I made these Spongebob Patrick and friends cakes for my son’s fourth birthday and my daughter’s second birthday. They are only nine days apart so we had a joint party.
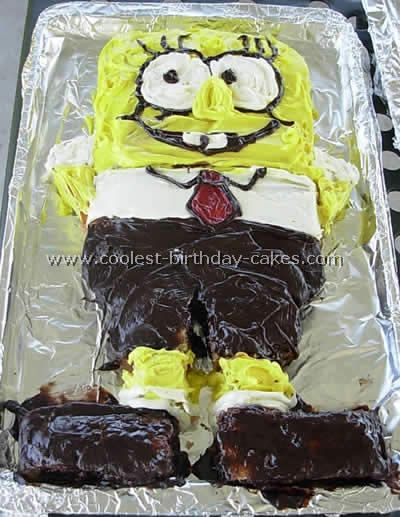
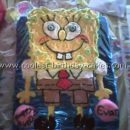
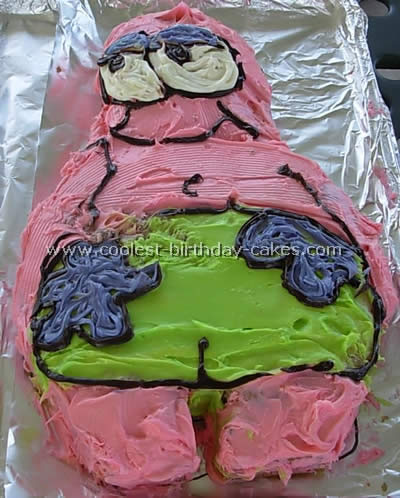
I made Sponge Bob by baking a 10×8 cake and a 9″ square cake, any flavor will do. I used Funfetti because it was for kids. The 10×8 is the main part of Sponge bob. The upper half I iced with vanilla icing colored with a lot of yellow food coloring. I used my butter knife to make swirls in the icing to make him look pockmarked.
On the lower half I used plain vanilla icing to make his shirt in the upper part of the half, the lower part of the half is chocolate icing to make his pants. I then cut the square cake in half, then that half into quarters. Two of the quarters were covered in chocolate icing and used for his feet. The other two I used as legs by putting a small area of chocolate then an area of yellow for his skin and a small area of white for his socks.
I then put chocolate icing in a gallon zip lock bag and pushed all to the corner and cut a very small hole in the bag (I was out of piping bags). I outlined his eyes and mouth. The nose is very thick yellow icing. I also outlined his clothes to make them look crisp. I mixed a little red icing and made his tie. I used white icing and my makeshift piping technique to fill in the eye and teeth.
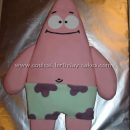
Patrick was made out of one 9″ square pan and the other half of the cake used for Sponge bob. From the small piece I carved out a pointy head. The big piece I carved the sides and bottom to make his shape, I just eyeballed it. I used pink food coloring and vanilla icing to cover the exposed skin. His swim trunks are made with green and purple icing. I outlined everything with chocolate icing and filled in the eyes.
More Spongebob Patrick and Friends Cakes
Spongebob Patrick and friends cake by Melissa C., Selbyville, DE
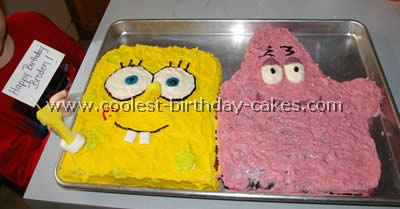
I asked my friend Linda to make a Sponge bob cake for my son’s 5th Birthday party. I gave her a SpongeBob picture and asked her to copy it. Not only did she make Sponge bob but she made his best friend Patrick Star as well. Sponge bob’s hand is a cookie with a marshmallow for the cuff and is held on by a toothpick. His nose is also a cookie. His eyes (the blue) are lollipops. I think she did a great job.
Spongebob Patrick and friends cake by Lori L., Swift Current, Saskatchewan, Canada
I ask my kids a couple months before their birthdays what kind of cake they want, so that I can come up with a game plan. The first process for me is to think up and/or research as many different ideas as I can.
From this I eventually come up with a picture in my mind of what I want the cake to look like and from that point the real work begins.
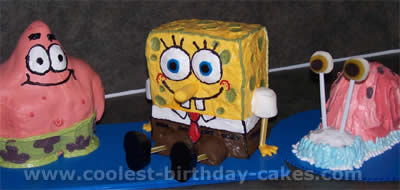
How do you make your vision become a reality? With Spongebob, Patrick, and Gary the Snail, as the theme that my 8 year old daughter picked, I didn’t just want to do the typical rectangular pan Spongebob that seems to be most common due to it’s simplicity. I thought it would be challenging to try a 3-D Spongebob Patrick, and Gary.
Since I don’t have very many different icing tips I have a tendency to improvise a lot. I use the Wilton gel colors, but there again I don’t have very many, just some common basic colors and I mix them until I get a desired color or shade, since I usually don’t have the color gel that I need. Experimenting is half the fun!
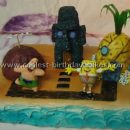
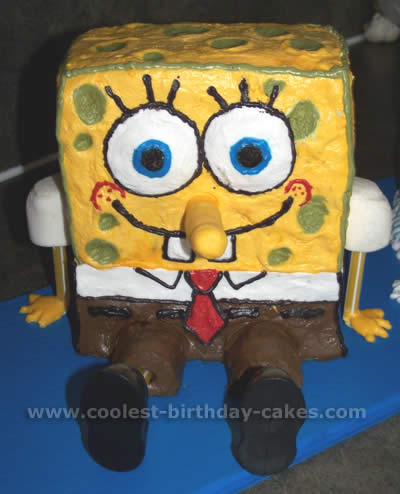
Spongebob was created using the Wilton 3-D house pan. Before removing the cake from the pan cut the risen part of the cake off level with the pan so that the back will be flat. Cut off the roof peak and overhang and place the cake on what should be the side of the house. Cut pieces from the cake remnants for the pant legs.
Ice the brown pants first, then the yellow sponge part. For his shirt Pipe on some white and then smoothed it out. To make the yellow look more ‘spongey’, I patted it with a damp paper towel. I drew in the facial features with a toothpick. Next Pipe on random green circles of varying sizes, then with the help of some cornstarch press them into smooth indentations.
Pipe the green corner outlines on the yellow. His red tie is simple using a toothpick for the small task. Pipe white for his 2 teeth and press smooth. Pipe white for his eyes in layers of consecutive circles getting smaller until they have a little bit of a dome-like shape to them. Using cornstarch, press them smooth. Pipe the black pupils and all the black outlines as well as his belt. Add the red cheek marks and the blue for his eyes.
The nose is simply 4 mini marshmallows on a cut down wooden skewer long enough to securely anchor into the cake. Warm some yellow icing (not all icings will do this!) till it can be poured easily but not too watery. I microwave it for 10 – 30 seconds depending on the quantity of icing. The small amount you need for his nose, 10 sec should be enough. Pour over the marshmallows ensuring there is good coverage everywhere. Let it set in the fridge for a bit then stick it into the cake.
His sleeves are simply large marshmallows trimmed for a better sleeve shape and stuck on with some icing. The arms are pieces of yellow drinking straw that were stuck into the marshmallow sleeve. The hands are mini yellow marshmallows squished and shaped into fingers. If I do this cake again I will just pipe icing for the hands. His legs are pieces of yellow drinking straw stuck into the pant leg and the shoes are actually from a toy.
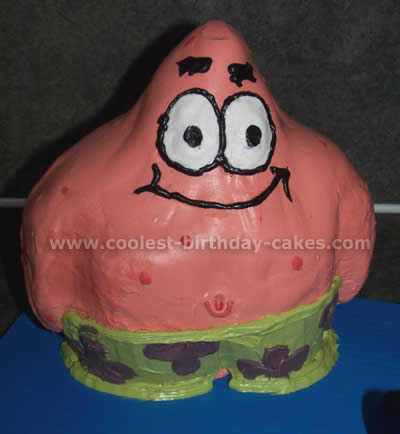
Spongebob Patrick was created using the Wilton 3-D pumpkin pan. Some sculpting was required to give him an elongated head and to define his arms. I cut out a little bit between his legs as well. Place Patrick on a sturdy, raised, cooling rack.
Warm lots of the pink/coral colored icing to pour over Patrick. You should warm about 1.5 times the icing you will need to cover him just to ensure all areas get covered the first time. Don’t worry about what drips down thru the cooling rack. Remember the icing must be easy to pour but not too watery. Pour quickly and evenly, as this icing does not take long to set.
You may need to help direct some of the icing along the arms and under the hands so have a spreader or something ready. If some spots did get missed you can ice them with the drippings under the rack. It’s easier just to spread icing on the missed spots than to try pouring it there. You can see in the picture where I had to do this along his arm. Tint some of this icing a little darker to give Patrick his dots and the double ‘u’ for his belly button.
Pipe or spread green icing for his shorts and then large purple flowers on his shorts. Pipe white for his eyes in layers of consecutive ovals getting smaller until they have a little bit of a dome-like shape to them. Using cornstarch, press them smooth. Pipe the black pupils and all the black outlines. When you move him off the cooling rack to a platter, pipe green just around the bottom.
At this point I was running short on time, otherwise I would have also iced some small cone-shaped cake pieces for his legs as if he was sitting down. If I do this cake again I might try a sugar cone inverted on top for his head. This would eliminate most of the cake sculpting. I didn’t think of that in time or I would have run out to buy some cones!
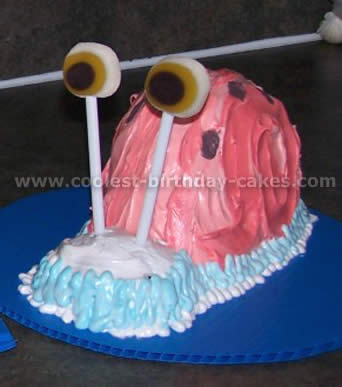
Gary – was an after thought! I discovered that the roof peak (from Spongebob) and some of the other trimmed cake pieces, could be glued together (with icing) to form a snail-shell shape. About 1/2 hour to party time I ‘rush’ iced him as best I could with icing that was left over. Stuck 2 gummy eyeballs on slim stiff straws and stuck them into Gary’s head. I used Betty Crocker ‘with pudding in’ cake mixes. They came out a little heavy in the middle with the 3-D pans, and you have to bake them for about 1 hr +or- but they still tasted great!
I also used Betty Crocker Creamy Whipped white icing. It is very soft and easy to spread and also firms up nice in the refrigerator. It melts nicely for pouring icing. It does not stay really firm in the icing bags (unless you are a quick icer!) for doing stars and other decorative tips. It will work; it just doesn’t come out as firm and crisp looking as the buttercream. Homemade buttercream icing will not melt! I tried it once and the result was yucky.
Spongebob Patrick and friends cake by Samantha B., Cleburne, TX
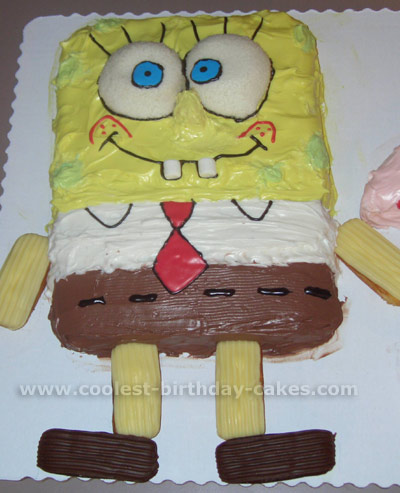
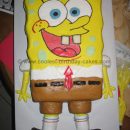
I prepared these Spongebob Patrick cakes using 2 boxed cake mixes. Spongebob Squarepants was chocolate and Patrick was a yellow mix (per my daughter’s instructions).
I used ideas from looking at all of the other pictures on this website. I started with trying it out first with construction paper. I measured it against the pans, and used the actual colors, to get a good idea. This really helped when it came to cutting out the pieces to form Patrick’s body.
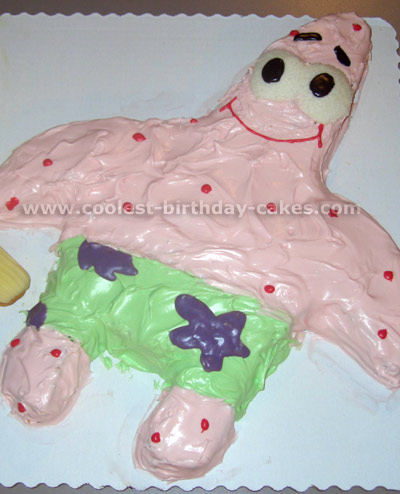
Patrick’s body is made from two round cakes (still just one mix). I just put the paper copy on top of the cake and cut around it. Spongebob Squarepants is a regular rectangular cake for the body. I used Zingers for the arms, legs, and shoes. I was too lazy to figure out something for fingers.
For the whites of the eyes I used Snowballs (cakes). For Spongebob Squarepants, I used two that I had cut in half (so they wouldn’t be quite as tall). For Spongebob Patrick, I cut the (1) snowball in half so it wouldn’t be tall, and I additionally cut a pattern out to look like both eyes together.
I used chocolate frosting for Spongebob’s pants. The rest is white frosting that I colored (pink, yellow, green). For the accents (eyes, spots, mouths, flowers, tie, etc.), I used writing icing (the little tubes that come in a box of four at the store). I used two small marshmallows for Spongebob’s teeth.
I had planned to do more decorating on the base, but again, was too lazy. So I just wrote Happy Birthday on the box with writing icing, which I’ll admit doesn’t look that great. I had also thought of making a Gary (snail) out of the Snowball cakes, but didn’t. I got the cardboard base, and a box from Walmart for free. Both cakes fit fine. I used my construction paper patterns to draw, with pencil, on the box first so I would know where to put the cakes so that it would fit.
I was pretty happy with the results of the Spongebob Patrick cake. The adults at the party seemed much more impressed than the kids. Also a lot of the kids just wanted the eyes and legs and arms (the Snowballs and Zingers)! Go figure!
Spongebob Patrick and friends cake by Jennifer, Baumholder, Germany
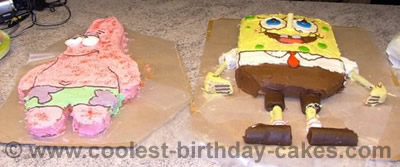
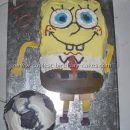
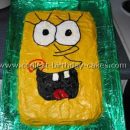
I made both these Spongebob Patrick cakes for my daughter, Kayla, on here 2nd birthday. Spongebob is a vanilla cake from a 9×13 pan. His icing is also vanilla with yellow food coloring and chocolate pants.
Most of the details are from airheads, but the feet were Hoho’s. I had some difficulty finding something that resembles arms and legs. (I live on an army base overseas) So I used beef jerky sticks (Slim Jims). People actually ate them!
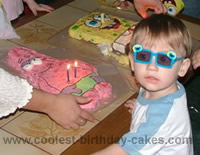
Spongebob Patrick was much easier. I used a template that a neighbor drew for me and just cut the outline. He didn’t fit over any of my cake pans so I had to use my roasting pan that came with the oven. He is an all strawberry cake with strawberry icing and glitter. His eyes are marshmallows.
The kids loved the Spongebob Patrick cake. I also made matching Gary and Squidward pinatas!
Spongebob Patrick and friends cake by Lara R., Winnipeg, MB Canada
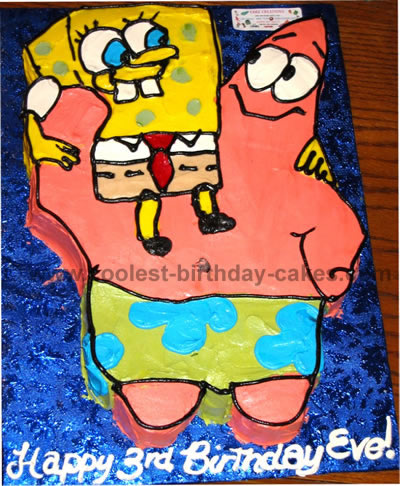
For this Spongebob Patrick cake I started with a rectangular cake. I printed the image off on the computer, and placed it on to the cake. I carved around the paper to shape the cake. Then, I iced the cake using butter cream icing.
Spongebob Patrick and friends cake by Jeremy D.
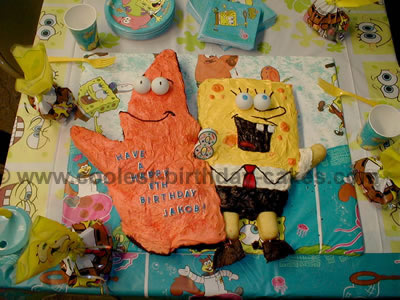
For this Spongebob Patrick cake I used 3 cakes.
9×13 for Spongebob – I slightly angled one end for his shirt and pants, Twinkies were used for his arms and legs and extra pieces of Patrick were used for his shoes. Fruit Roll up was perfect for his tie and tongue and the rest is all frosting. Well except for the ping pong balls I used for their eyes.
Spongebob Patrick was a 9×13 cake which I started with one corner as his head and cut out the shape I was looking for, I then used another cake for filler pieces to complete the body. I mixed red and yellow food coloring a little at a time until I achieved the perfect match in color. I then used some of Patrick’s frosting with a bit more yellow coloring to create the holes in Sponge Bob.
A little patience and a lot of time and this is what turned out – We fed 30 kids and 10 adults at a pool party with this Spongebob Patrick cake and everyone loved it! Just the appreciation from my son made the 3+ hours of baking and decorating well worth it!
I have a tradition with my two boys that every birthday I make them a themed cake of their choice, the biggest challenges are getting the coloring right and of course creating a cake that will feed the entire party.
