My granddaughter, like every other girl in the world, is in LOVE with Elsa and Anna of of Arendelle! Kaylee’s 6th birthday was coming up and I had just retired. She wanted a “Frozen” cake. I was about to order a 1/4 sheet cake from our local grocery store, same ‘ol, same ‘ol, right! Then it hit me! I would ask on Facebook if any of my friends knew of someone who could make me one. I had seen one with Elsa’s face and her hair wrapped around the cake. I got the name of a lady, and I went to her Facebook page to see her cakes. Well then it hit me again! I could make the cake she had a picture of, which was a “doll” cake. I can do this!
So, I researched, looked at pictures on the internet, and went in search of what I needed! Most of the cakes on the internet used an 8 inch pan with a dome top which was a bowl from Pampered Chef. Well, that looked HUGE to me. When I was in my local craft store that sells Wilton products, I decided on the 6 inch round pans. I already knew I had a 6 inch Pyrex bowl at home. I also bought the Wilton gel colors, that were the colors of the dresses Elsa and Anna wear. I bought a cheap set of piping tools and disposable decorator bags too.
Next, I went in search of Elsa and Anna. They weren’t hard to find as they are EVERYWHERE!!! I picked out the ones I wanted and off I went.
Now I had a week before Kaylee’s party, so I started watching Youtube videos and looking up cake recipes. I printed out two different ones.
I decided to make Elsa a vanilla cake and Anna a chocolate one. Both recipes used sour cream, but one used more eggs and flour and sugar. I thought this would be good. I did a dry run. It was awful. It fell apart as soon as I took it out of the pan. I’m not sure if this was because I doubled up on everything or what. So I redid it with the other recipe. I did not double it either. It was perfect. I dumped the other cake out.
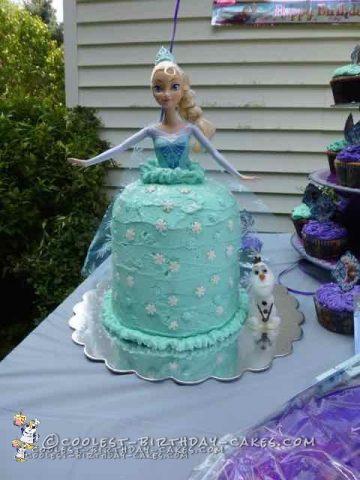
So, 3 days till the party and I am at JoAnn Fabrics when I notice in the Halloween costume fabric this sheer light blue with snowflakes fabric. This would be perfect for Elsa’s cape, which the doll did not have. (I love to shop, and I love to hunt for ideas and bargains!)
Anna and Elsa Cake Instructions
- That night I make the first cake, vanilla. I made one cake mix at a time, which would fill the two 6 inch pans, with some left over.
- I poured this into an 8×8 pan, and set it aside.
- I mixed up the next cake mix and poured it into the Pyrex bowl. By the way, the cake mix is mixed with 4 eggs, 1/2 cup water, 1/2 cup of oil and 1 cup of sour cream.
- After filling the Pyrex bowl up to about 3/4 full, I put the leftover batter into the 8×8 pan.
- One other note: Buy Pam cooking spray with flour, and spray the heck out of the pans and bowl. Use a paper towel to make sure every inch is covered.
- I baked the two 6 inch pans in a 350 degree oven for about 30 minutes or until a toothpick came out clean. I watched these like a hawk, as I didn’t want to dump any more cake.
- After they were done I reduced the heat to 325. I watched the Pyrex bowl like a hawk and I am not sure how long it took, but it came out perfect.
- When you take the cakes out of the oven leave them in the pans for about 10 minutes to cool on a wire rack.
- After that I put down either parchment paper or wax paper. I then tipped pans/bowl upside down and they came right out of the pans. I let them cool completely. If not frosting then, you could put them in a ziplock bag and refrigerate overnight.
- Next, I made buttercream frosting using 1 cup of butter at room temperature and 1 cup of Crisco.
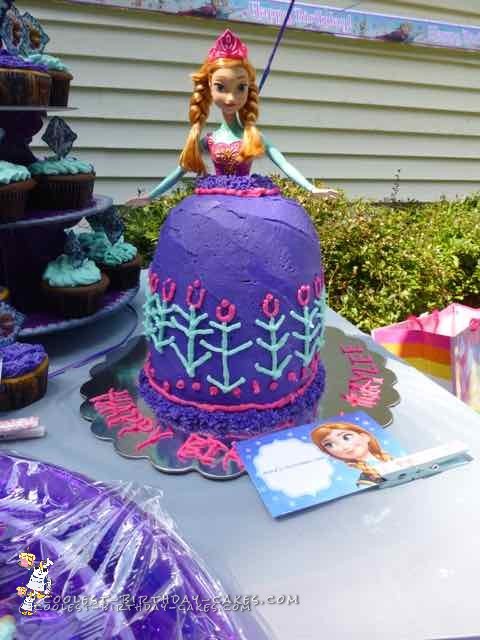
- I divided this up and colored some in Elsa’s dress color, some in Anna’s dress color and some for Anna’s dress decorations.
Assembling the Anna and Elsa Cakes
- First I cut a hole in the middle of each cake for the doll to stick in.
- For each cake put a big dab on the cake board and put down the first layer.
- Then frost that layer.
- Put on the next layer and frost, and then add the dome cake.
- Now frost all of the cake with the color.
- I wrapped each doll’s lower body in Saran wrap so they would stay clean.
- Stick dolls down the center. Put their arms up first so they don’t go into the cake.
- I also had found snowflake candies, so I put those all over Elsa’s dress.
- For Anna I piped the decorations on her dress. As you can see it was a little lopsided, but hey it was my first time.
- I attached the cape for Elsa using scrapbooking double sided tape.
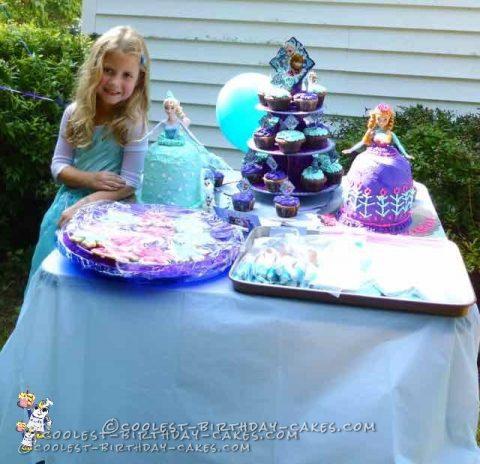
Kaylee LOVED her cakes! They were a HUGE success and I got a ton of compliments. They tasted great too. I really felt proud of myself for taking this on and it warmed my heart to see that smile on my granddaughters face!
Related cakes:
 12+ Coolest Frozen Birthday Cake Ideas for the Ultimate Frozen Theme Party
  Easy Frozen Anna and Elsa Doll Cakes
 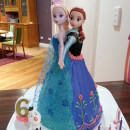 Coolest Frozen Anna and Elsa Cake
  Dual Dress Anna and Elsa Frozen Cake
  Coolest Disney Frozen Birthday Cakes
  6 Magical DIY Disney Princess Cakes
  Coolest Tinkerbell Dress Cake
  Beautiful Mermaid Birthday Cake Tutorial | Ariel and Friends Cake