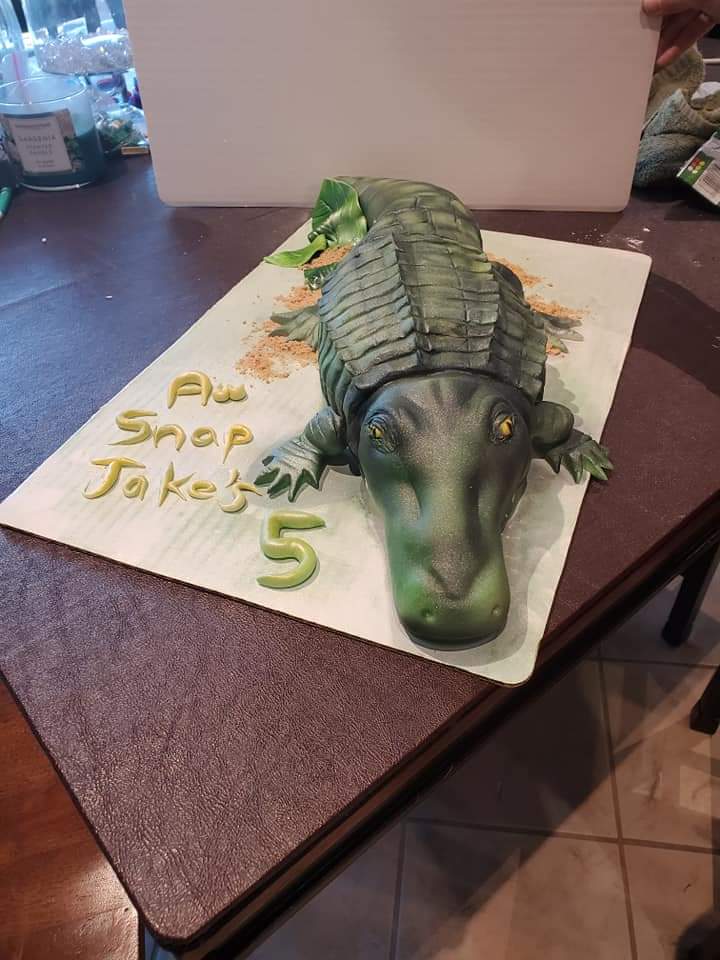
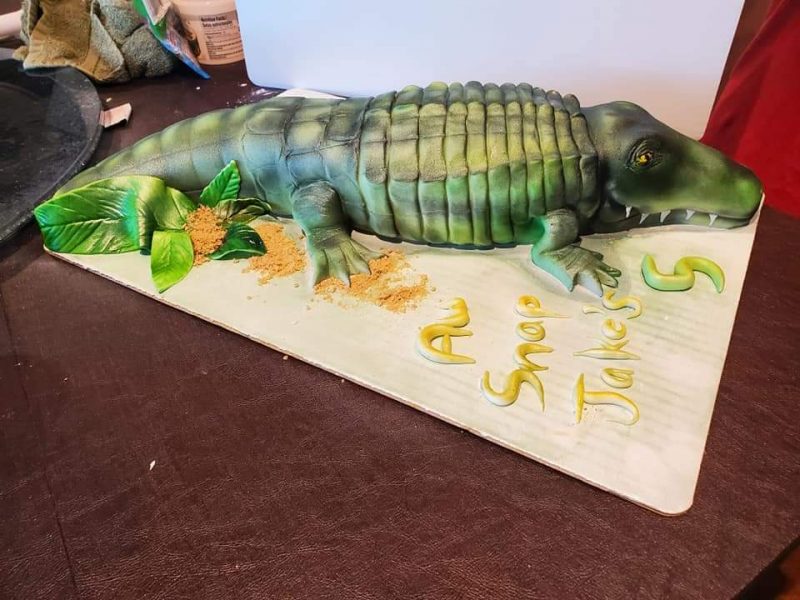
My 5 year old Jake wanted an alligator cake, so… he got one. This is the first carved and airbrushed cake I’ve done, so I was a little nervous. As always I have the best of intentions to keep my kitchen organized. I have one thing to say…..Ha ha ha. A cake this size takes over lol.
First you want to decide on the size. I baked 2 half sheet cakes to stack. It’s best to us we a more dense cake when carving, I used a vanilla wedding cake recipe. You also want to use a crusting buttercream as thats best under fondant.
First bake 2 half sheet cakes. Once cooled stack your cakes with icing in the middle, then freeze your cake as frozen cakes are easier to carve. I left mine in for an hour. Take cake out of freezer and using top view pictures of alligators use them as a guide to cut the head and body, then tail separately.
Put the pieces together and start carving the head using pieces to form the head and then dirty ice and put in the freezer. Take cake back out, ice again and back in freezer. Form fondant for eyebrow area, middle of the nose to the head and the end of the nose, then cover cake in fondant. Use your fondant tools to accent the head, remember mouth eye sockets etc.
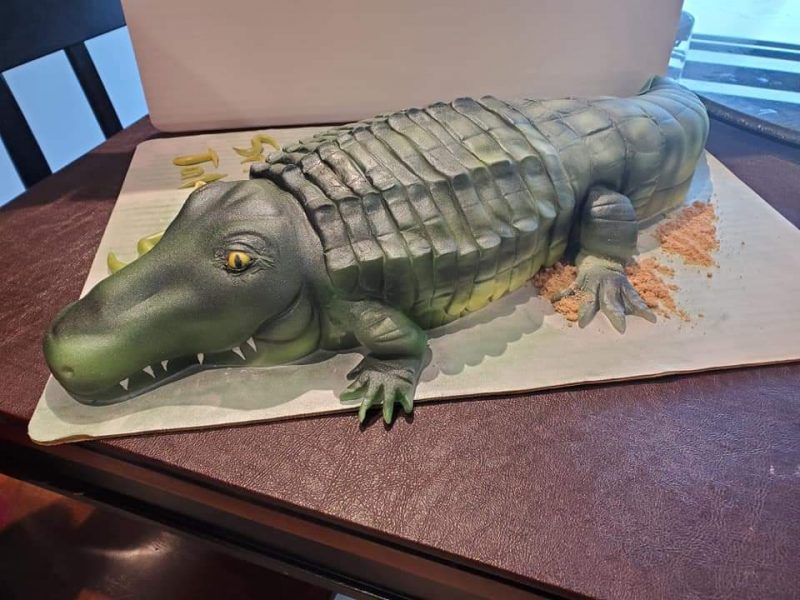
Add your legs and be sure to use your tools to add lines for realism. Now you have to cut individual strips of fondant, pinching to form the alligator armour on its back. Once done… airbrush time.
Start with yellow across the bottom, then accent the back and sides. Then use green and then shadow with black. Last add your eyes and whatever else to your board and voila!

Your comment has been sent successfully.