I love making cool themed birthday cakes for kids. I found a finding Nemo picture (coloring page) online of Dory and printed a copy. Using a regular 9×13 cake pan I cut out the fish shape and frosted the cake in with the correct colors. The kids loved the cake and I received numerous compliments.
More Dory and Finding Nemo Cakes for Kids
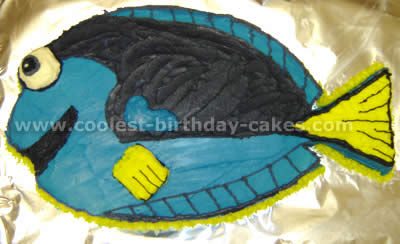
Dory birthday cakes for kid by Angela N., Singapore
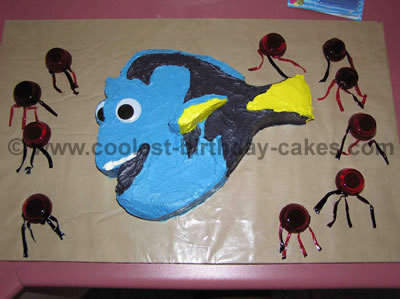
This birthday boy wanted a blue fish, instead of making any blue fish; I thought one from Finding Nemo would be more meaningful. And this Dory is easy to make too.
The main body was a 10-inch round cake. Then I made another 7-inch round cake for the tail and fins. Trim down the fins to be slightly lower than the body of the fish.
Outline the design and fill in with 2 shades of blue, and bright yellow buttercream. With the extra cake, I placed them randomly at the bottom (for more cake serving) to resemble rocks/coral. Then add relevant gummy candies.
Tip for when you use M&M’s for birthday cakes for kids: If using M&M candies, do not put them on the cake if the cake is to be placed in the refrigerator. The candies will discolor and won’t look bright. Before delivery or before the party (cake taken out from fridge), then place the M&Ms on.
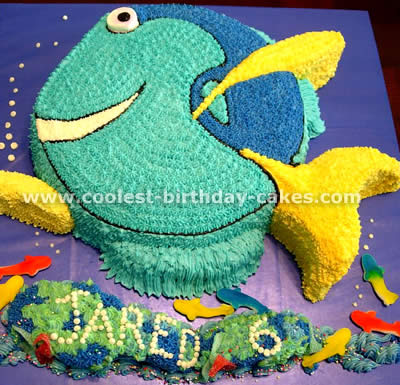
Dory birthday cakes for kid by Joanne VDB., Sydney, Australia
Quick and easy Dory birthday cakes for kids with jellyfish:
You will need 2 x A3 size printouts of a Dory colouring picture. I saved a colouring picture of Dory from the internet. I then opened it and chose the fit to page (A3) option when printing as I have an A3 printer. If you don’t have an A3 printer you could do the same except fit to A4 page. Then have it enlarged to A3 size at your local photo copying / printing place. Using this method you can make the cake any size you like just by adjusting the ingredient quantities.
You’ll also need a 68.5 x 42cm approx rectangular prepared cake board. I used a spare shelf I had laying around. I covered it with brown paper and then with clear contact (book covering).
To make Dory:
- 3 x 340g packets buttercake mix
- 26 x 36cm baking dish
To decorate Dory:
- 125g soft butter
- 1½ cups icing sugar mixture
- 2 tbsp milk (approx)
- Concentrated paste icing colouring: royal blue, lemon yellow, black
- Black decorating gel
- Minties
- 2 x craft wiggly eyes (approx 4cm diameter)
To make jellyfish:
- 1 x packet jelly mix
- Fruit roll-ups / fruity metres
- Mini muffin pan
Make jelly according to directions on packet. Pour into mini muffin pans and refrigerate until set.
Grease baking dish, line base with baking paper. Using all 3 packets, prepare buttercake mix according to directions on packet and pour into prepared dish. Bake at 180 o c for approx 1 hour. Let stand in dish for 5-10 minutes before turning onto wire rack to cool (see hints and tips).
Cut out the printout of Dory. From the second printout cut out Dory’s side fin. Secure pattern to cake using toothpicks and cut out Dory (see hints and tips). Also, remove some cake from Dory’s eye (the one on the left of the picture) so that when you place the wiggly eye on top of that section it sits flush with the rest of the cake. Cut out Dory’s side fin from leftover cake (I cut Dory’s fin slightly larger than in the printout because I found it easier to handle and ice). Place the cake on the prepared cake board and set aside the fin.
Decorating Dory birthday cakes for kids:
Beat butter with electric mixer until light in colour, gradually beat in half the icing sugar, then the milk, then the remaining icing sugar. Tint a few tablespoons of the frosting yellow, 2/3 of the remaining frosting blue and the remainder black (see hints and tips). Using the picture as a guide, apply frosting one section and colour at a time. I found it easiest to cut the two pictures into sections and use them as overlays. I then used the black decorating gel to outline the black areas on the cake. Then all you have to do is fill the sections in the appropriate colour. Apply the eye on the left and place some icing over the top so it looks like it is partially behind like in the picture.
Decorate the fin using the same method and position on cake. It may be easier and less messy to use a couple of forks to place it on the cake. Give Dory her other eye. Cut strips off the Minties to make her teeth and position on cake.
Using a hot cloth rub the underside of the mini muffin pan to release the jelly onto a separate board. Carefully place the jelly around Dory on the cake board. This is best left until just before serving especially on hot days to prevent the jelly from melting. Using kitchen scissors cut the Roll Ups into thin strips and place around jelly to make tentacles.
Hints and tips for these sort of birthday cakes for kids:
Due to the size of the cake it may crack after turning it out onto the wire rack if the top of the cake is domed. To prevent this have two racks ready. Turn the cake out onto one and then quickly turn it on to the other so the domed section remains on top rather than underneath.
Prepare cake ahead of time and keep frozen. Only partially thaw before cutting out shape. This saves time, prevents some crumbling and makes cutting out shape a lot easier.
To tint frosting black you will first need to tint it blue otherwise it turns out grey.
You can use just about any colouring picture to make all types of cakes. To keep it simple for novices like me just choose a picture with only a few colours and not too many lines.
Related cakes:
 12+ Coolest Peppa Pig Cake Ideas
  12+ Coolest Frozen Birthday Cake Ideas for the Ultimate Frozen Theme Party
  12+ Coolest Minnie Mouse Cake Ideas
  12+ Coolest Mickey Mouse Cake Ideas
 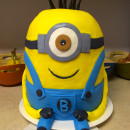 Coolest One Eyed Minion Cake
 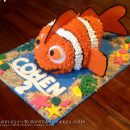 3D Finding Nemo Birthday Cake Makes A Splash
  15 Cool Minnie Mouse Birthday Cakes
 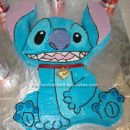 Coolest Stitch Birthday Cake