The idea for a cars themed party came about because I discovered that the car museum in LA does reasonably priced birthday parties and can accommodate a large crowd. I then found out that Cars2 was opening the week before! That led to the discovery of the Cars2 cakelet pan at Williams-Sonoma which I purchased despite the hefty price tag. I have also been watching Cake Boss on Netflix so I’ve been really pumped to make something special. Earlier in the month I made my 6 year old a purse cake which came out great so my confidence was high!
My twin boys were turning 3 which, in my tradition, also marks the time when they receive their first haircut. A guest list of 60 people meant a very large cake! I started this Homemade Cars 2 3rd Birthday Cake with 6 half sheet cakes (my oven is too small for full sheets). I used Duncan Hines because I needed it to stay fresh for quite a few days. I baked the cakes on Wednesday for a Sunday party. I did one yellow cake layer, one chocolate and one red velvet layer. After the cakes cooled, I put a shmear of frosting onto the cake tray I had bought and then I leveled each cake and layered them, onto the cake tray, using Duncan Hines chocolate frosting in between each layer. Before I “dirty iced” the cake, I wedged sheets of paper towel under each side of the cake so that the tray would stay clean once I started decorating. Parchment paper may have been a better choice for this since there was some sticking when I removed the paper towel later on but it did the job. Dirty ice means that I put a light layer of frosting all around the sides and top of the cake sealing in the crumbs. After clearing out my fridge I was able to fit the dirty iced cake into the fridge for the night.
On Thursday morning I tackled the decorating. I covered my kitchen table with parchment paper, sprinkled it with powdered sugar and got to work on my green fondant. The entire cake needed to be covered with the green fondant (purchased pre-colored) so I needed to roll out a full 5lb tub of the stuff. I measured the cake with a tape measure before starting so I knew how large the final dimensions needed to be. Don’t forget to measure the sides and add an inch or two to your number just in case. Unfortunately the fondant was not the greatest consistency. You can see cracks in my photo. If I had had time I would have taken it back to the store and exchanged it but I didn’t have time so I made it work. After kneading the fondant with some Crisco (which softened it slightly) and enlisting my sister in law’s help we got the green fondant rolled out. I continuously sprinkled powdered sugar on the rolling pin and fondant to reduce sticking.
To transfer the fondant onto the cake, I loosely rolled the fondant around a rolling pin. Fondant, when the right consistency, easily rolls right onto your cake and, with a little light prodding, moulds into itself to form a smooth cover for the cake, even in the corners. Fondant not only makes cakes look amazing and professional, it also keeps cakes fresh for longer.
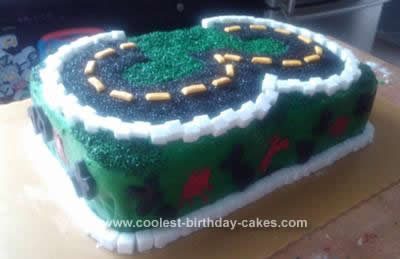
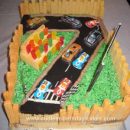
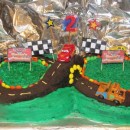
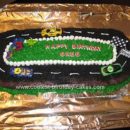
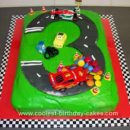
With the green fondant done I moved onto the black fondant race track. A few days before I made a template for my #3 race track by printing a giant 3using my word processor and then cutting it out. The black fondant (purchased pre-colored) was perfect consistency so rolling out a piece large enough for the race track took no time at all (if only the green had been so pliable!). After the black fondant was rolled out I carefully cut out my racetrack using a sharp knife and my template. It came out perfect! Once it was placed on the cake I moved on to decorating. First I placed sugar cubes around the 3 to delineate the race track. To help them stick to the cake I put a drop of icing on the bottom of each one. Then, I mixed some kelly green frosting and iced the top of the cake wherever green fondant was visible. I covered the frosting with green sprinkles. This was my “grass”. Next, I sprinkled black dusting sugar on the race track to make it look like asphalt. To make the dotted yellow line I mixed some yellow fondant (I had white fondant left over from the purse cake) and cut out 1” lines. I secured those to the cake with a dot of frosting. Store leftover fondant at room temperature in an air tight container wrapped in plastic wrap.
The sides of my cake are decorated with the letters of the Hebrew alphabet, cut out of black fondant with cookie cutters. I also used stencils of the yarmulkah, tzizit and scissors which are emblems of the 3 year old Jewish haircutting ceremony. Stencils are tricky and I definitely need more practice. I mixed some red frosting and, using my smallest spatula, I shmeared a light layer of frosting over the stencil which I was holding against the side of the cake. The key is to keep that stencil secure, not use too much frosting and to use the flat side of the spatula, not the edge. If you are reusing your stencil, wash it in between each repetition. At this point I removed the paper towels that I was using to keep the tray clean and I lined the bottom edge of the cake with sugar cubes to create a nice edge. I secured the cubes to the tray and cake with a drop of frosting.
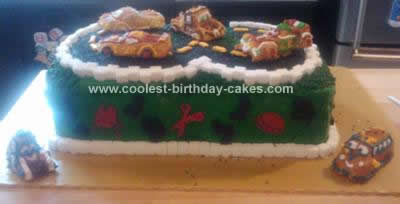
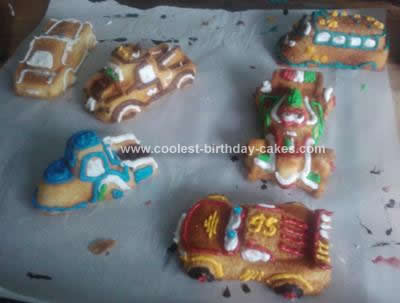
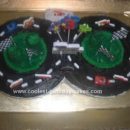
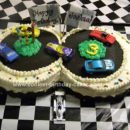
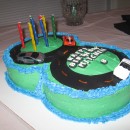
OK, the cakelets. These were a challenge. I used the recipe that came with the cakelet pan. The cakes need to be dense pound cakes to make them super sturdy. Since I have no experience with Royal Icing and I’m not great with frosting, I opted to decorate the cakelets with outlines only and not bother filling in the spaces. Next time…. I needed a ton of colors. I used a basic small circular tip for everything except the stars on Fillmore. For those I used a small star tip. I only used 6 of the 8 cakelets that the pan makes. I placed the cakelets onto the cake using plastic dowels that I trimmed to size. I secured Guido and Fillmore to the tray using frosting. Below are the colors that I used for each character.
McQueen: Red, White, Yellow, Royal Blue, Black
Mater: Brown, White, Green, Silver Disco Dust
Finn: White, Blue, Silver Disco Dust (I “painted” the white silver with the disco dust)
Francesco: Red, Green, White, Brown, Black
Guido: Royal Blue, White, Brown
Fillmore: Teal, Yellow, White, Brown.
My Homemade Cars2 3rd Birthday Cake was a huge success.

Your comment has been sent successfully.