I came up with the idea for a Dora themed birthday party for my daughter’s 2nd birthday because like many toddlers she is in love with Dora! I am not a fancy baker nor am I experienced in making unique birthday cakes, however I knew I wanted hers to be special and because of our budget – it needed to be homemade.
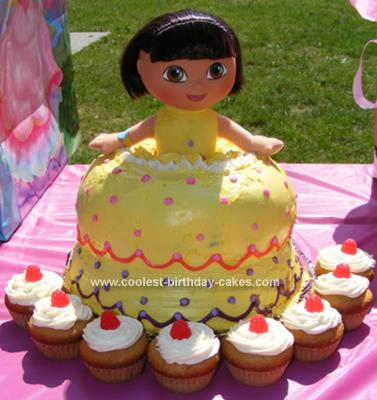
For this homemade Dora doll birthday cake I started off looking up pics online for inspiration and finally decided to do a doll cake (just like for a Barbie doll but with Dora). The next step was to figure out what Dora doll to use. I had wanted a hard plastic one but the one we found had only a plastic head and then soft body but this worked out well for putting in the cake later :)
Making the cakes- I made two cakes. One on the bottom was made in a glass (oven safe) Pyrex bowl and I put 3 cake mixes in it to fill it up! The next layer I made was in a bunt pan (with ridges) and that was 2 cake mixes.
Now the directions for both cakes were a little different than on the boxes- I lowered the temp 20 degrees for the bunt pan and added 20 min. bake time. For the large Pyrex bowl I lowered the temp by 50 degrees and added 80 min. bake time! I have to admit the bunt pan cake turned out much better and fluffier than the Pyrex cake did- so I just ended up serving the top cake.
Decorating the cakes- I layered them together just with store bought icing and thickened with additional icing sugar. Make sure icing is room temp (not too soft or cold) and that the cake(s) are cool. I shaved off top of the Pyrex cake to make a flat surface before adhering with icing. I also sheered off any imperfections in both cakes with a serrated knife before icing- so the icing would go on smooth.
After the layers were set and before doing the icing all over I cut a hole in the middle of the two cakes. I just estimated the size, cut out, tried the doll and then cut a bit more so it would fit.
(Side note: I did this in August so I put the cakes in the freezer after each application of icing to make sure the icing set and the cakes were easier to work with).
One thing that was frustrating was getting crumbs in the first overall layer of icing- don’t worry those will be covered up by a second and if needed third layer of icing. I used an icing decorator kit to make the details in the icing with different icing tips.
Coloring the icing- was easy. I just bought food coloring and tinted it yellow- very slowly until I got the desired color!
Adding Details- I bought gel icing tubes to decorate details on the dress and to stick on some sugar dots.
Putting the Doll in- After I iced it we VERY carefully inserted the doll- the legs wrapped in plastic food wrap to protect them and the cakes- and held the dolls arms away from the icing with toothpicks until the party. After this I put the cake in the freezer for a couple of hours before the party as it was outside and hot!
This homemade Dora doll birthday cake held up pretty well although the icing did ‘sweat’ a bit in the heat (it didn’t melt :)
Time- overall two days! One day is pretty much baking and doing the dirty layer of icing (first layer). Day two is the second and third layer (optional) and the details. Keep in mind stuff is dragged out because of cooling time and having icing set in between layers.
Oh and I also did some cupcakes also from a cake mix and just added a quick bit of icing with the same icing decorator I used for the cake plus gummy berries on top.
I received so many compliments though! Totally worth it!
Related cakes:
 12+ Coolest Frozen Birthday Cake Ideas for the Ultimate Frozen Theme Party
 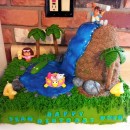 Coolest Diego and Dora Birthday Cake for 4 Year Old Twins
 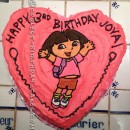 Heart-Shaped Dora Birthday Cake
  12+ Coolest Peppa Pig Cake Ideas
 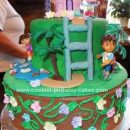 Coolest 360 Degree Dora Adventure Birthday Cake
  12+ Coolest Minnie Mouse Cake Ideas
 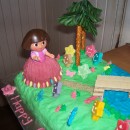 Coolest Dora Scene Cake for a 3-Year Old Girl
 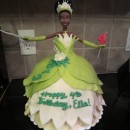 Coolest Ice Cream Tiana Doll 4th Birthday Cake
Your comment has been sent successfully.