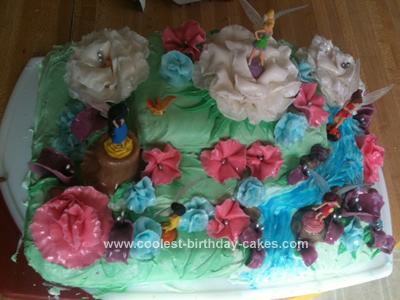
This Homemade Fairy Birthday Cake Design was so much fun! I used regular store bought cake mixes and baked them in 3 different sized pans (the big cake on bottom: 11×14, the middle: about 5×8 (it’s short too), and the top: 8×8). Be sure to make your flowers for this cake at least the day before so that they have time to dry!
SHAPE:
First I leveled the cake tops for layering. I put the medium cake directly in the middle of the big one. For the top, I cut off about a 2″ section from the 8×8 and added the larger section to the top, making the backside flush with that of middle layer. I then used pieces of the 2″ section I had previously cut off to form the curves of the river. Note: I put a small amount of frosting between each layer as well as around the curves to ensure the cake crumbs wouldn’t venture into the finished product.
FROSTING:
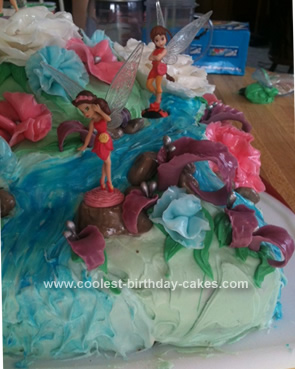
I used approximately 5-8 drops of green food coloring to color my vanilla frosting. I didn’t mix it completely as I wanted the grassy areas to have a bit of a marbled look (so it wasn’t too plainly pastel-ish). with the green frosting I coated the cake everywhere except where I wanted the river to flow. I then used blue frosting (lightly colored) to put on the first layer of the river. To finish off the river I put lines of blue writing icing on it in the direction I wanted the river to flow. I also added a bit of Disney Princess Glitter Writing Gel to give it a shimmer effect. Using a butter knife I gently swirled the colors together to give the water it’s movement. For the leaves I put a leaf frosting tip into a small hole I made in the corner of a Ziploc bag, filled it with green frosting, and made leaves where I wanted my flowers to go. (I’m sure many of you own a piping/icing bag or what-not, but this works too for those of you that don’t or can’t find yours.)
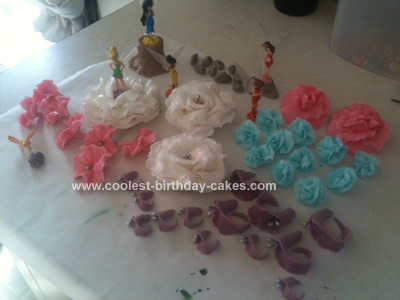
FLOWERS:
This was my first time working with fondants, so before I got started I watched a few videos on you tube for instruction. The one I found most helpful was one on how to make a carnation without fondants tools (since I don’t own any of those either). I just want to say to all of you that have yet to attempt to use fondant, I was excited, but also intimidated. It wasn’t as hard as I was expecting a all. Once I found my own “groove” it went quite smoothly and quickly. When you’re finished making the fondant pieces the fairies will stand on, paint a small amount of water where the fairy is to be and press her down gently. You want them to stick and be allowed to dry with the fondant.
One other thing: as you’re reading this, remember that isn’t technically the “right” way to make flowers. It’s quite unconventional. I had to find a few random things in my kitchen to use in place of the proper tools.
PINK SWEET PEAS (2):
You will need three circles (using cookie cutters, one larger and two smaller), and a small ball of fondant. First, roll the ball lightly in your hand to make it slightly oblong, and lightly pinch the ends. Next, I used the round side of a measuring spoon to ruffle the edges of one of the small circles I “pulled” the fondant by rubbing the spoon from about halfway to the center, out past the edge, pressing down lighter on the inside and using more force as I neared the edge. This should be done in one fast motion. There are tools made for this, just make sure that what you use is smooth and round. This is where watching the carnation video will come in very handy, cause you can see the motion he uses. Do this around the entire edge of the circle. You can go around it more than once if you feel it doesn’t have enough texture yet. Now, using a paint brush, I dabbed a small amount of water down the center of the circle. I put the oblong fondant ball in the middle and folded the circle up around it. Just be sure to press the edges up, but don’t completely close it in. You want it to look like a pea in a slightly opened pod. For the next layer, take the other small circle and cut a small triangle out from one edge. Now go around this and ruffle the edges like you did the first. To attach it to the flower, paint a small amount of water about halfway up the circle on the opposite side from where you cut out the triangle. Now place it around the pod that you’ve created (cut out on top), wrapping it around the bottom as though you’re making a cone, allowing the top edge to fall back away from the inner petal. Press the bottom edges down lightly to secure it. Now ruffle the edges of the large circle, and place it on your flower in the same way; folding the bottom like you’re making a cone and allowing the top edge to fall away from your middle petal. Place your finished flower in a piece of tinfoil that you mold to allow the flower petals to fall in the desired direction. You now have a sweet pea.
To make the small pink flowers, I used the small circle cookie cutter. Take one small circle and ruffle the edges. When this was done, I folded it slightly in half and placed the center (two silver balls atop a piece of yarn from a Christmas decoration) in the middle. I folded up the sides gently around my center accordion style so that when I pinched the bottom after all the sides were up, it gave the appearance of “petals” around the flower. Its now ready to be placed in it’s foil to dry. After setting it down you can push the outside down slightly to open it up and give it the bloom you desire.
PURPLE FLOWERS (5 big, about 10 small):
Cut elongated triangles out of your fondant. The bigger the triangle, the bigger your flower will be. Ruffle the two long sides of your triangle. Fold the short bottom around itself like a cone, and allow the point of your ruffled triangle to fall backwards. Add your desired center piece and place the flower on it’s side. Gently curl the point back and allow to dry.
BLUE FLOWERS (about 10):
I used the technique shown in the you tube video on easy carnations.
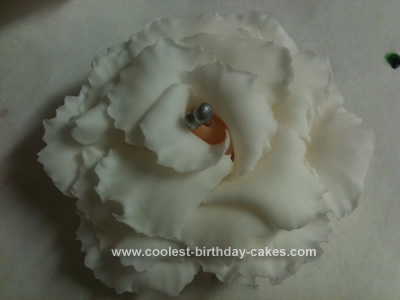
WHITE PEONY’S (3):
For this you’ll need a 6-petal flower cookie cutter. You’ll need to form your foil into a small dish approximately 1/2″-3/4″ smaller in diameter before you begin. When this is ready, cut 5 flowers from your fondant. Cover 4 of them to keep them from drying out too much while you’re working with your first flower. Be sure not to set them on top of each other, as they will stick together. Now, ruffle all the edges around each of the 6 petals on your first flower and place it in the foil mold you’ve prepared. Now get out your second flower and ruffle its edges. Paint a small amount of water in the center of the first flower and lay the second flower on top with its petals overlapping the middle between petals of the first, so the petals aren’t all in the same spot. Press down lightly in the center to secure. Here, I folded up the petals of the second flower as though these had not yet bloomed so they would stiffen slightly and add more volume to the peony. Repeat these steps for the rest of your precut flowers (you’ll of course need to lay down the petals before adding each layer). When all of your layers are added, make a small cone out of your center color, adding your desired stamens at the cones top. Paint a dab of water in the center of your peony and place your middle inside. Now paint water around the bottom half of your cone so that you can begin working with your petals. The top petals will need to be pressed lightly against the cone to finish the middle. Now bend and fold all of your petals to give your peony it’s desired finished look. (It helps to use a butter knife or something similar to press the petals up a little from underneath near the center to add volume.) You now have a peony. Tinkerbell: I added the cone center as before, but left out the stamens. This gave her a place to stand.
ROCKS:
I marbled gray and orange fondant and simply rolled balls, then pinched them in different ways to give the rocks form. I made one large rock for a fairy to stand on.
STUMP:
Roll your fondant into a cylinder shape and sent down on one side. Pull the edges out around the bottom to give the look of roots. Now use a paper clip or piece of wire to add lines around the stump to give it the look of wood. This also has a fairy on top.
GLIMMER:
I painted all of the fondant pieces using Disney Princess Glitter Writing Gel. To do this, mix a bit of water into your gel to make a thin wash, and you’re ready to paint your flowers. I only painted the tops of the petals. Be sure not to use too much and allow time for drying. It will make your flowers sticky.
FINISHING YOUR CAKE:
Now that you have a frosted cake and all your decorations are prepared, start with you largest flowers and the tree stump. All you have to do now is add the rest any way you like!
Note: this cake cannot be covered because it will soften your fondant.
Related cakes:
 12+ Coolest Castle Cake Ideas – Awesome Homemade Castle Cake Designs!
  12+ Coolest Disney Princess Cake Ideas – Awesome DIY Cake Decorating!
  12+ Pretty Homemade Princess Cakes
  Coolest 21st Tatty Teddy Bear Cake
  Pink Ombre Ruffle Cake for Princess’ First Birthday
  12+ Inspiring Homemade Princess Birthday Cake Ideas
 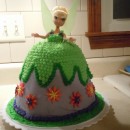 Coolest Tinkerbell Dress Cake
  10+ Coolest Princess Cake Ideas
Your comment has been sent successfully.