
My daughter wanted a Disney Fairies cake for her Tinkerbell-themed 6th birthday party, and since I always make her birthday cakes, I did as much research as I could to pull this one Homemade Fairy Tinkerbell Birthday Cake.
I purchased the Disney Fairies cake toppers/stamp kit and looked up the decorating instructions online, making a few notes and modifications of my own. Since my little girl’s guest list included close to 50 people, I made 2 chocolate and 2 vanilla/strawberry swirled 13×9 sheet cakes to layer. The base used 1 entire chocolate and 1 entire vanilla/strawberry cakes. For the middle tier, I used 1/2 of the other chocolate cake and 1/2 of the other vanilla/strawberry cake. Then I cut the other halves of the 2 cakes in half again, but on the diagonal. (TIP: Freeze the cakes after you bake them if you have time. It enables you to make them ahead of time and also makes the cake easier to cut, using a bread knife.) I also made a strawberry cupcake for the tree stump. (TIP: place cake boards cut to size between the tiers to make cutting and serving the cake easier.)
Two nights before the party, I cut and thawed the cakes, then placed them in the fridge. The next day…day before the party, I made the icing and began decorating. The decorating/piping took 6-8 hours and roughly 9-10 cups of butter cream icing, which I made from the standard Wilton butter cream recipe.
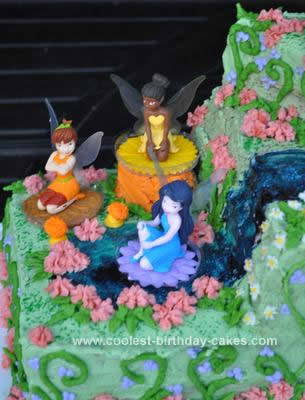
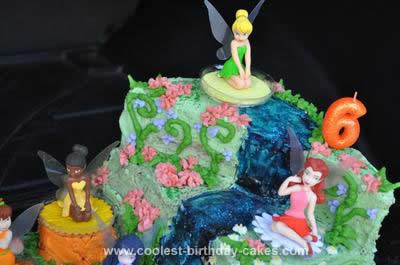
First, I iced the entire cake with green, using a small cake spatula to create the grooves along all the edges and sprinkling some green sugar crystals along the top for texture and a little sparkle. Then I mixed a little blue icing coloring in with some icing gel and created the waterfall and stream. I added some blue sugar crystals for more sparkle and swirled in a little more blue coloring to create depth through multiple blue hues.
Next came the cupcake. I iced the cupcake first, then placed it on the cake, top side down. I placed the fairies, then finally painstakingly piped in the various flowers, leaves, vines, and berries along all sides and surfaces of the cake, using extra vines and flowers to cover up any cracks or blemishes. As I mentioned, it took several hours, and I was glad I started decorating the day before the party, rather than the night before! The instructions mentioned writing the “Happy Birthday” message along the side of the cake, but I thought it showed up better on the white cake board, rather than on the green base with all the vines.
I kept this cake refrigerated until it was time to transport it to the party location. Man, was this cake HEAVY! All those layers of cake and icing really weighed it down, but not so much that I needed any help carrying it. Everyone at the party was enthralled, especially my little girl, who said, “Oh, thank you, Mommy! It’s beautiful!” over and over again, making it well worth all the time and labor involved. I noticed some of the parents taking pictures of the cake, and later that afternoon, I was surprised to see those picture pop up on their Facebook pages, with captions such as “Check out this cake…[this is] hard core!”
I was very happy that the decorating instructions also came with cutting instructions, as a 6-layer cake with so many angles could be tricky! After removing the fairies, you first remove and serve the tree stump cupcake. Then starting with the top tier, you cut triangle pieces from each end, making the top tier square again. Then cut the rest of the tier as you would a square cake. Cut the middle tier as you would a rectangular cake, then lastly, the bottom tier as a sheet cake. Using this method, I had all guests served in minutes.
Related cakes:
 Coolest Tinkerbell and Fairies Cake for a First Birthday
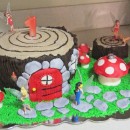
  Coolest Tinkerbell with Fairy Friends Cake
 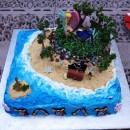 Enchanted Fairy Island Birthday Cake
 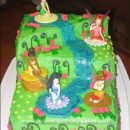 Coolest Tinkerbell and Friends Birthday Cake
 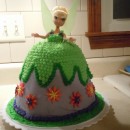 Coolest Tinkerbell Dress Cake
 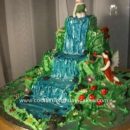 Coolest Waterfall Tinkerbell Fairy Garden Cake
 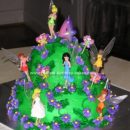 Coolest Tinkerbell Cake
 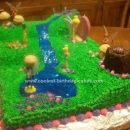 Coolest Tinkerbell Birthday Cake Idea
Your comment has been sent successfully.