It was my daughter’s birthday again and this year she had requested a chocolate rainbow cake. I looked around on the web and found a few rainbow cakes that I liked the look of and thought wouldn’t be too hard, but was a bit bored by the idea of it being just a chocolate cake and then I saw polka dot cakes and I thought that would be fun. Of course, not being one to do things by halves, I decided to make the polka dots rainbow as well!
Process:
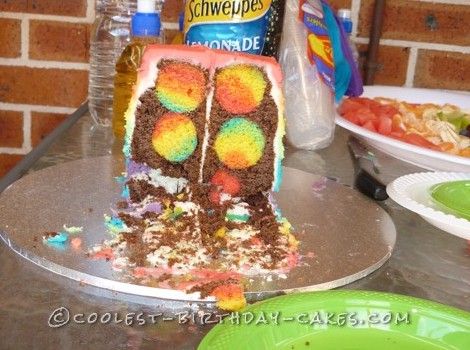
Make “polka dots”. Thankfully I had been given a cake ball tin from my mum for last Christmas so that part was easy. You just have to make up a simple cake mix with an extra egg and a packet of vanilla pudding mix added. (This makes the balls slightly heavier and moister than normal cake, meaning that they won’t float to the top of your main cake mix or dry out during their second cooking). I separated the mixture into 6 different bowls and colored them the colors of the rainbow (red, orange, yellow, green, blue, purple). It helps if you don’t do the same amount for all – you will need more red than purple for example. Put a dollop of red in the base of the cake ball tin, followed by the other colors in order (just put them on top of each other). You will probably have to do a couple trials to ensure you are getting the amounts right. Make sure you cook a trial to make sure you have put enough in that it will rise properly and give you a nice ball shape.
Make sure the dots are fully cooled (you can even do them the day before and then store in the fridge). Mix up your main cake mixture. I made a double batch of my favorite chocolate cake recipe as I was using a large round tin. Put a thin layer of mix on the bottom of your prepared tin and then put a layer of your cake balls on top. Put them as close together as you can (touching) to ensure everyone will get a slice with some dots. Pour the rest of the mixture over the top, ensuring that the top of all the balls are covered. Tap the tin on the bench to get rid of bubbles and to make sure the mixture goes down between all the balls. Cook as per your normal recipe, but consider a slightly cooler temperature for longer so that the middle cooks without the edges burning.
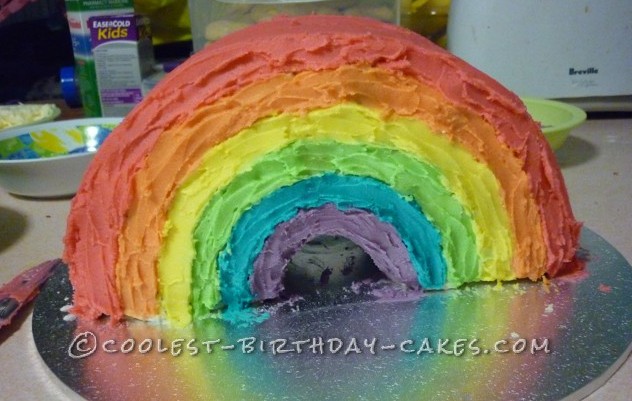
Once cooled, cut in half exactly (I traced around the tin on paper and folded it in half to get a template for working out where halfway was) and then use a ramekin/ large glass/small bowl to cut out a semi circle from both halves for the bottom of the rainbow. Sandwich both halves together however you like (I just used some of the butter cream frosting I was using for the outside, but you could easily fill with something more interesting.
“Crumb coat” the cake with a quick layer of frosting or icing and allow to set/harden to trap the crumbs inside and avoid getting them in the rest of the frosting. Dye the rest of your frosting into the rainbow colors (again, you’ll need more of the outside colors than the inside ones). Start icing from the purple first and progress to the outside. I originally planned to scratch lines into the crumb coat to help guide my lines but found I didn’t need to.
Done! I was going to use marshmallows or something for clouds but decided I liked it better without. Sorry for the mess in the background!
Related cakes:
 12+ Coolest Castle Cake Ideas – Awesome Homemade Castle Cake Designs!
  Fabulous, Built-to-Travel, Rainbow Castle Cake
  Coolest Rainbow Birthday Cake
 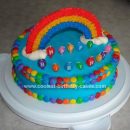 Coolest Somewhere over the Rainbow Cake
 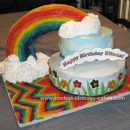 Coolest Rainbow Birthday Cake
  12+ Inspiring Homemade Princess Birthday Cake Ideas
 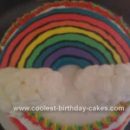 Coolest Rainbow Birthday Cake
  12+ Coolest Disney Princess Cake Ideas – Awesome DIY Cake Decorating!