My son wanted an Angry Bird cake for his birthday last year. I thought, “piece of cake! I’ll go to the store and ORDER one!” Boy, was I surprised to find out that our supermarket had absolutely nothing in their cake design book for Angry Birds! But they were SOOOO popular, how can that be??? So then I decided to go to the nearest party store… all they had for Angry Birds were napkins and paper plates. Onto Plan B: I had to make the cake. I have never designed any elaborate cakes before, so I kept telling my son, don’t be too upset if this doesn’t come out perfect, lol!
And silly me, I decided to wait until the day before his birthday party. Looking back, I should have definitely started at least a week in advance, so if you decide to make a cake similar to this one, do yourself a favor, and plan accordingly, giving yourself enough time to experiment and re-do if you must. Originally, I thought rolled fondant would be the way to go for the entire cake. But then I saw how much the pre-made stuff cost. Then I thought I could make my own! I had never made it before, so I was a little nervous about making it for the first time the day before the cake was needed. So I decided my best bet was to use home made butter cream icing to cover the entire thing, and just used rolled fondant for the pieces/parts.
I searched online for the “easiest” rolled fondant I could find, and read all the positive comments before deciding on making an easy marshmallow fondant (not a candy fondant, a rolled fondant recipe). It was perfect! That being said, I will give you a run down on what I did to make this Angry Birds cake, under the gun, and fingers crossed that it turned out OKAY for the party the next day.
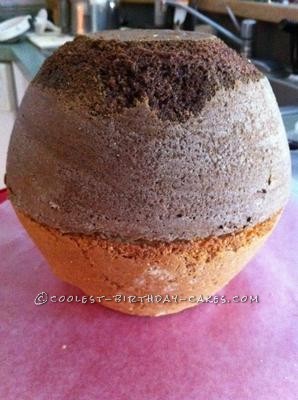
My son wanted yellow and chocolate layers, so I bought two box mixes, one yellow, one chocolate. Yes, box mixes, I had enough on my mind trying to figure out how I was going to decorate it, so I figured I’d make this a little easier on myself. Normally, I make everything from scratch. I used my Pampered Chef batter bowl as the “pan” and baked one yellow, and one chocolate cake, and let them cool completely. Next, I did any cutting to remove the top of the cake so that it was nice and even and both cakes were the same size circle.
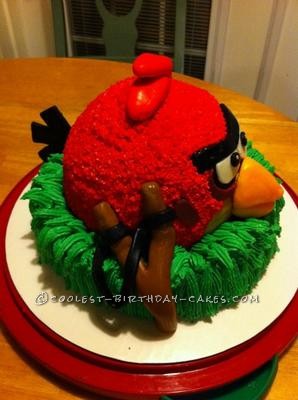
I used home made butter cream icing to “glue” the two layers together, one on top of the other, and then stuck a few skewers through from top to bottom of the cake to make sure the layers didn’t slide apart. After the two layers were glued together, I sculpted the edges of the top layer to look more rounded on top. I also decided to make a “platform” of cake by baking 2 round cakes for which to perch Red Bird sitting in the grass.
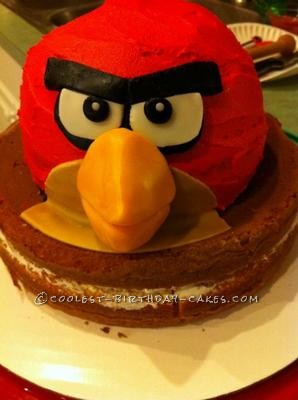
Once my two layers were shaped to my liking, I smoothed red butter cream icing over the entire head. Next, I started coloring, rolling, and cutting the marshmallow rolled fondant to make the eyes, chin, cheek circles, tail, feathers for top of head, slingshot, and beak. I used artwork of the Red Bird and had it in front of me the entire time to make sure I had everything to scale. TIP: use some plain white paper to draw, and cut out the parts first, and place on cake to see if you have the size right. Mine was a little too big at first, so I scaled it down.
Then, use those cutouts as your templates on top of the rolled fondant. I found that an exacto blade or very sharp knife on top of a hard surface such as a granite cutting board works great for cutting out the shapes. I used a little butter cream icing to glue the pieces onto the head. For the beak, that is all just pure molded fondant. To hold it onto the cake, I used long skewers.
After I had all of my facial features glued on, I filled a pastry bag with red butter cream icing and used a #16 star tip (Wilton) to fill in all of the red head. Once the head was done, I used green butter cream icing and a #21 tip to make the grass. To make the long grass, I just placed the tip in from the cake, and piped while pulling upward. In doing this, it just made the grass naturally bend and look the way did. I then attached the remaining parts: tail feather, top of head feathers, and slingshot. I had to use skewers and/or toothpicks to get the tail and head feathers to stay attached.
I think it took me a total of about 8 hours to make this cake! At least! But then, I was making it up as I went along with no tutorial or anything to go by. And I also had to stop to make rolled fondant for the first time. I was so pleased and relieved that I successfully pulled it off, lol! The look on my son’s face when he woke up in the morning and saw it…. my sore back and feet from standing, the lack of sleep, the mess I had to clean up afterwards… it was all worth it! He LOVED IT! It was a huge hit at the party with all of my son’s friends and the parents too. His party was at a bowling alley, and total strangers and all the employees came over to take photos of it!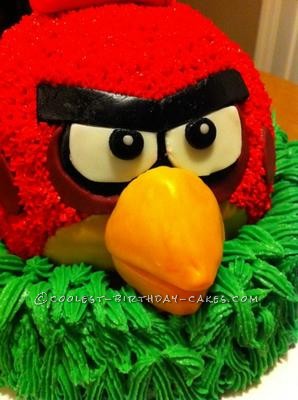
Related cakes:
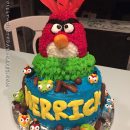 Awesome Angry Birds Cake
 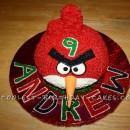 Step-by-Step Red Angry Bird Cake
  Coolest Angry Birds Star Wars Cake
  Coolest 2-D Angry Birds Cake and Cupcakes
  15+ Cool DIY Monkey Cake Designs for the Birthday Cake Enthusiast
 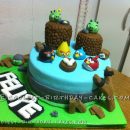 Coolest Angry Birds Cake
 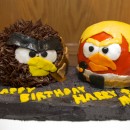 Angry Birds Star Wars Cake with Luke and Chewbacca
 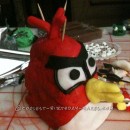 Cool Angry Birds Cake for My Great Grandson on his 6th Birthday