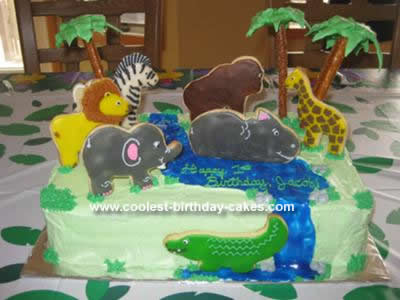
The inspiration for this Safari Scene Birthday Cake was a combination of two Wilton Safari Scene cakes – one from the most recent Wilton Yearbook (2011) and the one featured on the Wilton website with the how-to video.
I got the Wilton ‘Animal Pals’ cookie cutter set to make sure the sugar cookie animals were uniform in size and baked and decorated them a few days in advance to ensure the frosting would set. I first frosted the base color of each animal using the ‘Sugar Cookie Icing’ recipe from allrecipes.com with twice the amount of corn syrup. It dries hard and shiny and looks very professional! I used the instructions from the Wilton Yearbook as a guide to pipe the features on each animal with buttercream frosting, and attached lollipop sticks to the back of each one with royal icing.
I first tried to bake a few cookies with the sticks already pushed into the cookies, but it displaced the dough too much and they puffed up to almost unrecognizable shapes. I didn’t initially trust the strength of royal icing to hold the weight of the cookies but found I had nothing to worry about once it dried!
I made the palm trees using royal icing and pretzel sticks according to the instructions on the Wilton website. DO THIS A FEW DAYS IN ADVANCE to have adequate drying time, as the amount of icing needed to attach the leaves to the pretzels requires quite a long time to dry! Watch the how-to video as it shows how easy it really is. I didn’t feel like spending money on the mini-ball cake pans to use as a base for piping the leaves, so I used small grapefruits covered with tinfoil instead.
After piping about 8 overlapping leaves for each tree I let them dry overnight, then peeled the foil off the next morning. With the leaves upside-down, I piped a TON of frosting as a base for the pretzels and then propped them up securely while they dried for 24 hours since the reviews for the Wilton instructions said that they had a hard time with this part. They were fine – I didn’t lose a single tree.
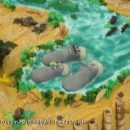
For the actual cake, I stacked two 9×13 cakes and used white icing first to frost the river/pool area across the middle and down the front of the cake and on the cake board for the pool at the bottom. I then generously covered the rest with green frosting, making the edges of the green a few mm higher than the white river/pool area. I piped the gray rocks at the curves of the water area and randomly throughout, then piped some grass along the sides of the cake, in and around the rocks, and over the corners on the top. Since I wanted to use the grass to give definition to the trees, rocks and animals, as well as to hide the holes created by pushing in the trees and the lollipop sticks at angles, I didn’t pipe grass all over the cake. I used two tubes of royal blue gel icing for the water over the white base. I did the white base because I didn’t want the blue color to be distorted by the cake underneath (this one was chocolate). It was easy to swirl it to look like water.
I waited until I had delivered the cake to the party to add the sugar cookie animals and the trees, and brought a tube of the green icing to pipe the grass around the feet and the base of the trees to hide the holes created by pushing them in.
I spent a lot of time on this cake but the animals were so cute and the kids at the party loved getting to eat the cookies in addition to the cake. If you plan ahead and do each part in small steps, it doesn’t end up feeling like too much work. Wilton gets a lot of the credit for this cake!
Related cakes:
 Coolest Safari Birthday Cake Ever
 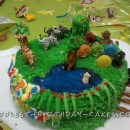 Coolest Zoo Party Animals Birthday Cake
  12+ Coolest Castle Cake Ideas – Awesome Homemade Castle Cake Designs!
  12+ Coolest Disney Princess Cake Ideas – Awesome DIY Cake Decorating!
 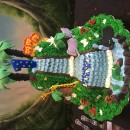 Amazing Homemade Jungle Cake with a Waterfall
 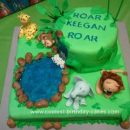 Coolest Baby Animal Cake
 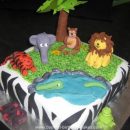 Coolest Jungle Animals Birthday Cake
 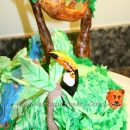 Coolest Rainforest Animals Cake
Your comment has been sent successfully.