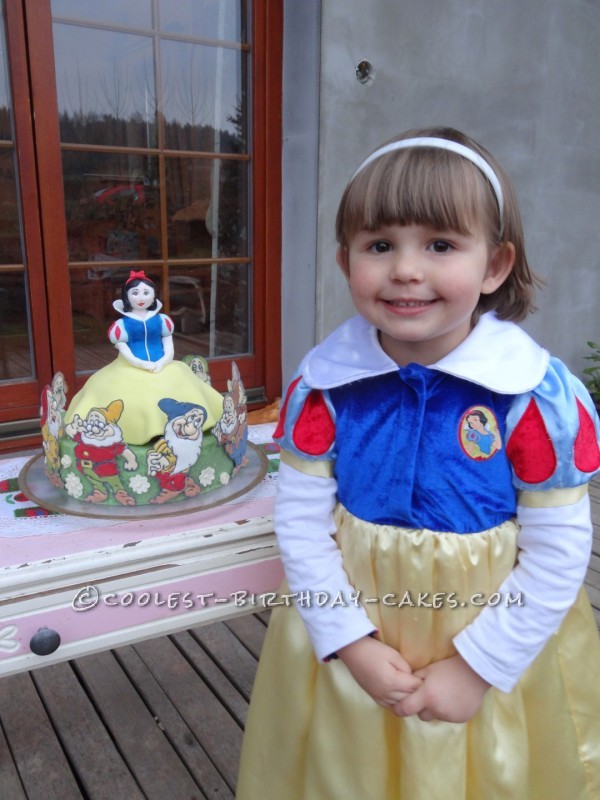
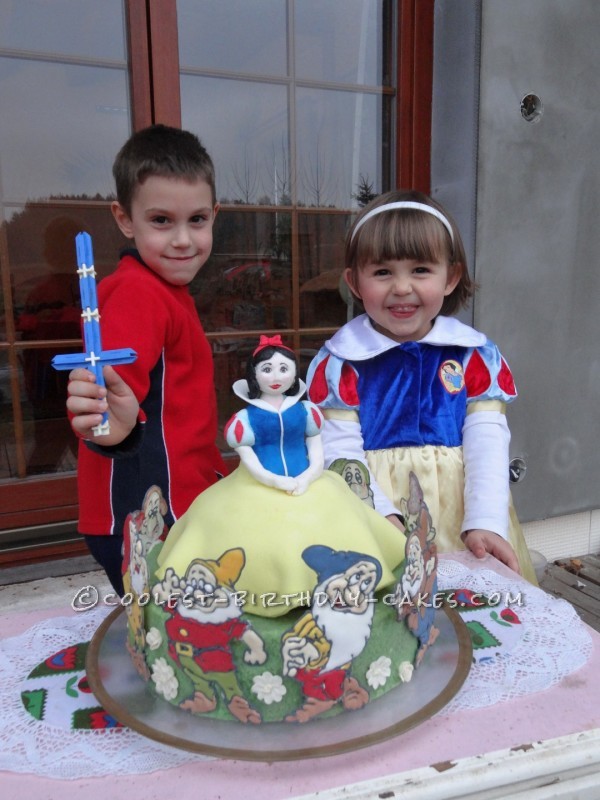
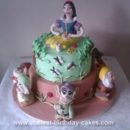
Every mother knows their children’s heroes and favorite things, so a Snow White cake was an easy choice for my daughter’s 3rd birthday this year. Throw in a Snow White dress for the birthday girl, and it was everything she could wish for! She still talks about it, several months later and remembers exactly who ate which dwarf!
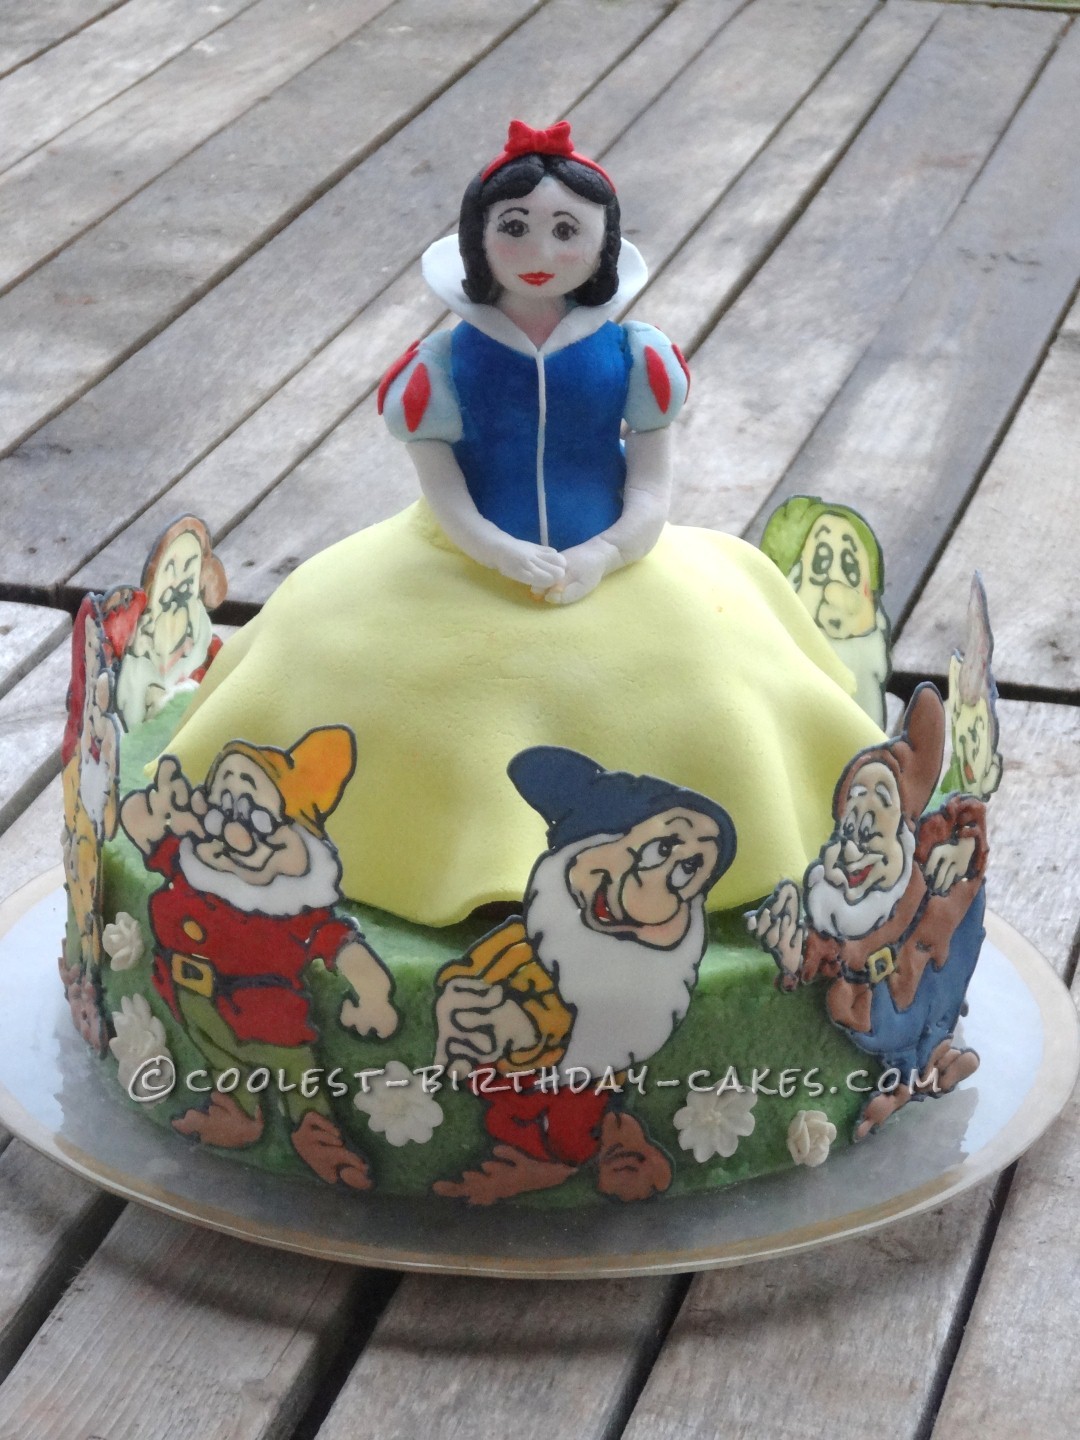
Originally, I was going to make a typical doll cake, using a real doll. But my hubby preferred to leave Barbie-type dolls for another year, so I decided that I was up for the challenge of creating my own Snow White figure! Additionally, I purposely gave her a more matronly figure than most princesses, to avoid the stereotypes.
A week in advance, I formed Snow White on a wooden skewer to give extra strength to her body (but next time I would use a heavy gauge wire with a hook at the top to stop her from sliding up the skewer). She is made from gum paste, and colored with petal dust/liquid colors. Since the paste was drying quickly, I had to be very quick to form all of the pieces. This was definitely a touch-and-go stage! I colored her straight away, because I couldn’t wait for her to firm up.
I baked a chocolate cake in a lined large Pyrex glass bowl, and used it for the skirt. Then I baked a normal circular cake for the base, bigger than the skirt, of course. I split both cakes and filled them with chocolate ganache, which is so easy to make and incredibly yummy! (bring cream to the boil and pour it onto a good quality cooking chocolate, stir and let cool).
The cake came together quite quickly, as I iced the base with butter cream tinted green, placed on the skirt cake and iced it with butter cream as well, stuck on a yellow circle of gum paste for her skirt with a hole in the center, and finally pierced Snow White’s torso into the skirt. I finished it off with a white ribbon around her waist, to give more interest to the back of the cake and hide the joins. Then I carefully glued on my pre-prepared dwarfs (see the step-by-step guide), and the royal icing piped flowers.
Since I currently live in the Czech Republic, I had limited materials compared to my home country of Australia, but I was very happy with the result. And my daughter, and her handsome prince brother, were on cloud nine!

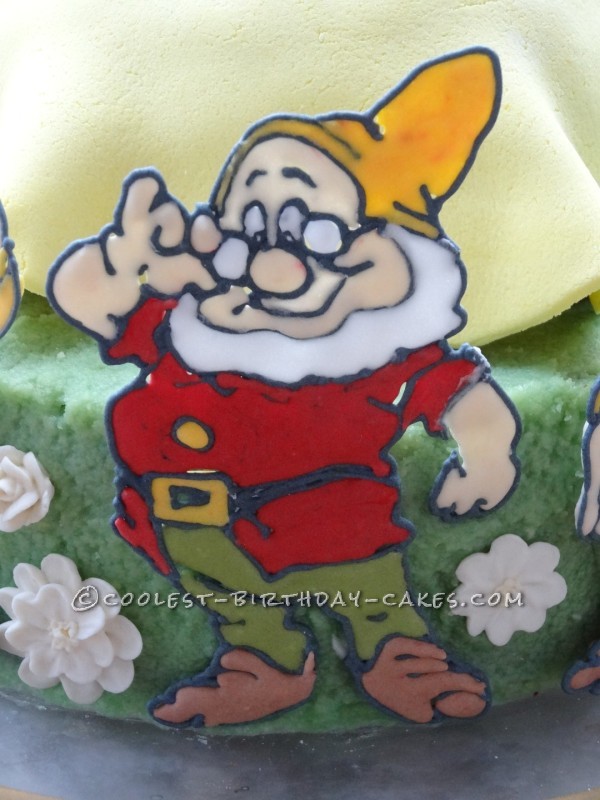
7 Dwarfs – Floodwork with Royal Icing
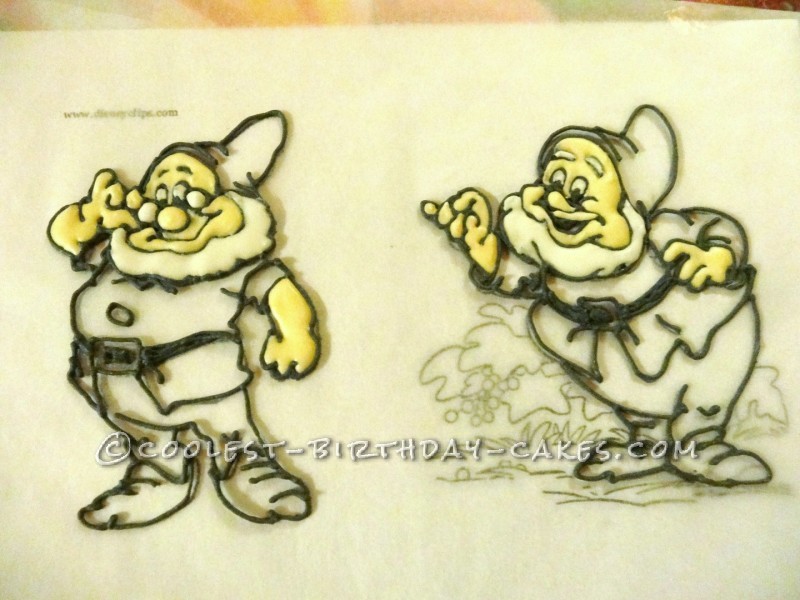
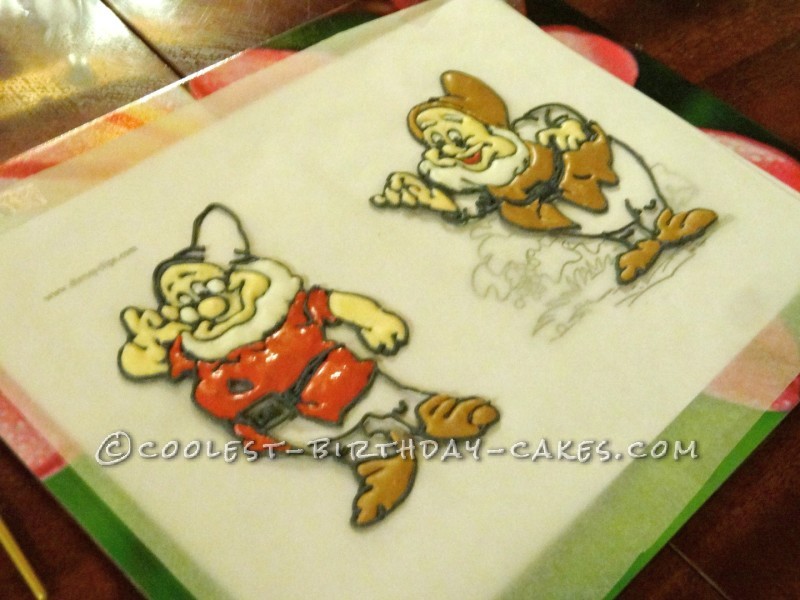
Since piping skills seem to be a dying art, I would like to share some secrets of good floodwork. I decided to make my own floodwork figures, opting to save on price of buying the dwarfs and to add some originality and personal touch to the cake.
First of all, I printed my dwarf pictures to the correct size. Then I placed them on individual place mats and stuck baking paper over them (your creations need to be mobile so that the dining table can be used for other important purposes, too!).
I mixed up my royal icing to stiff peaks, tinted it (almost) black, and used my finest piping tube. Of course, since I wasn’t using pure icing sugar (without cornflour), it blocked up and I needed to downgrade to a slightly larger nozzle.
Very carefully, I piped the outline of the pictures, making sure that all lines joined up and being careful not to miss any details. IMPORTANT: Next time, I would pipe a double outline (2 rows high) so that the figures would be thicker and more durable.
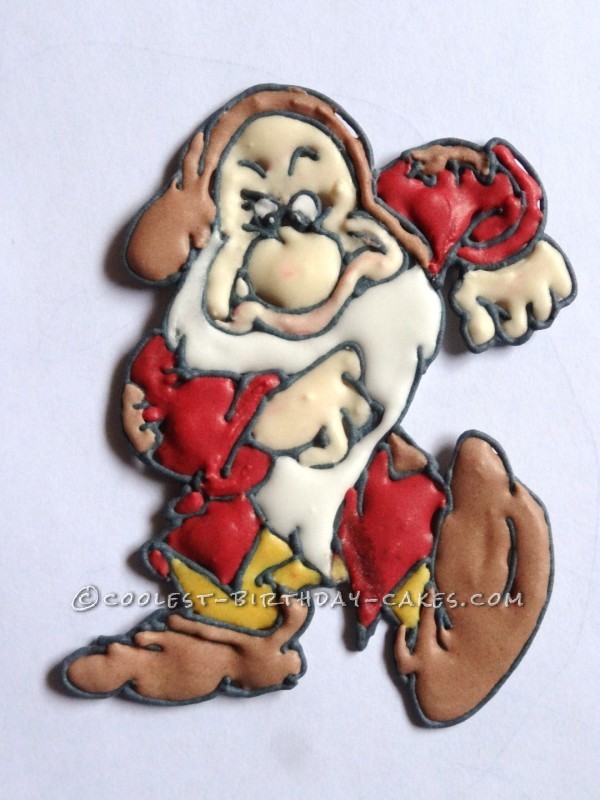
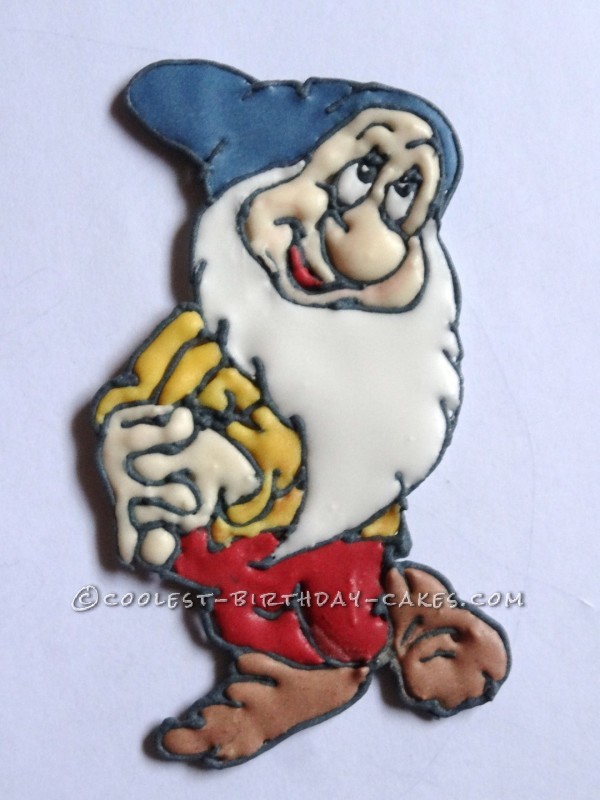
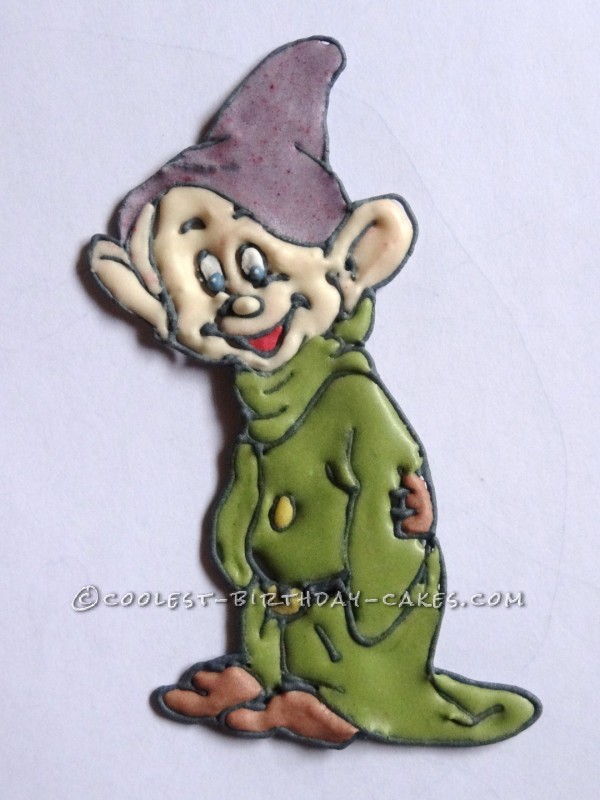
Filling the floodwork
To create the right consistency of royal icing for floodwork, I added a few drops of water to the icing (you’ll know it’s right when you draw a knife through the icing and the line disappears by the count of ten).
I colored the icing, and used a slightly larger piping tube (it still needs to fit the small gaps, so it can’t be too big). Then I filled in each area, reinserting the tube after a minute and pushing in more icing to pump up the volume in the desired areas.
You can go as 3D as you want with this method – this is the most fun part. It’s magic!
Assembly of figures
Let the figures completely dry 110% (overnight is best), and CAREFULLY lift them from the baking paper….or rather, peel the paper away from the figures. Attach them to the cake with a small squirt of royal icing, and there you have it…great floodwork figures!
The flowers were also piped with royal icing, and if you can keep a secret, I’ll tell you the crazy part about this cake….I made the flowers more than 15 years ago when I started cake decorating, and conveniently found them in a box just when I needed to add a “final touch” to the cake!! Luckily, icing flowers keep indefinitely and the party guests didn’t pick the difference!
Related cakes:
 Coolest Snow White and the Seven Dwarfs
  Snow White’s Enchanted Forest Cake
  Coolest Snow White and the Seven Dwarfs Castle Cake
 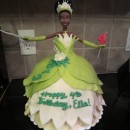 Coolest Ice Cream Tiana Doll 4th Birthday Cake
  15+ Cool DIY Monkey Cake Designs for the Birthday Cake Enthusiast
  Coolest Snow White Birthday Cake
  12+ Coolest Minnie Mouse Cake Ideas
  12+ Coolest Frozen Birthday Cake Ideas for the Ultimate Frozen Theme Party