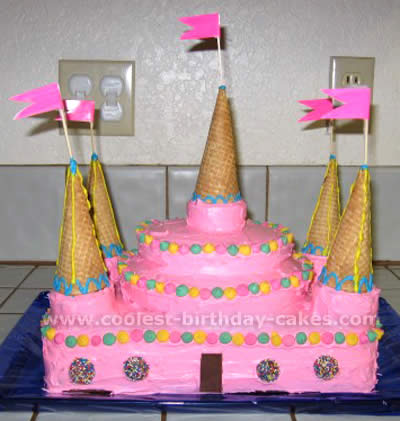
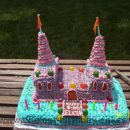
I compiled this cake castle from several different cake plans I found on the internet.
I took two rectangular cakes, then a medium round cake, and a small round cake, and stacked them like that. Then I added cupcakes to the four corners and the center. This is when it got fun. I iced the whole thing pink, and put a line of mint chocolate chips with bright colors on the borders.
I made a few designs on sugar cones with writing icing and put those on each cupcake. Then I made flags out of toothpicks, plain white paper, a pink highlighter, and clear packing tape. I put foil over a cookie sheet, and then a layer of bright blue cellophane wrapping paper.
Not pictured are the three mini Disney Princess figurines and curly candles that I will add at party time. I made this tonight for my seven-year-old daughters birthday. She was thrilled with it. See? You don’t have to be a perfect cake artist to make a little one feel special. :0)
More Cake Castle Ideas
Cake by Patricia B., Clinton, MS

For this Disneyland cake castle, make 1 large cake for base, and 1 small cake for upper level. Then frost entire cake white.
You will need Disney edible toppings, regular ice cream cones, sugar ice cream cones (for the castle stems) one choc. Graham cookie (for the draw bridge), color sprinkles, toothpicks (for flags), black frosting to create brick wall and to add lines on the cookie to make it look wooden, also to outline stems, green frosting for a grass effect.
I cut out the regular cones for the stems frosted them. Then, frost sugar cones and add color sprinkles. I put a rainbow on the cake for extra color, added the Disney toppings, bought a happy birthday candy set (or you can write it with frosting), I used the cookie for the bridge, and black frosting to create a brick wall. Good Luck!


Cake by Miranda M., Thornton, CO

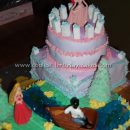
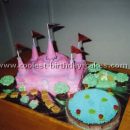
My girlfriend asked me to help her make her sons 4th birthday cake. His party was going to have a medieval theme so she wanted a cake castle. She baked two square, two round, and four cupcakes. We laid the square cakes on a large cutting board that had been covered with blue plastic wrap to resemble water.
We started with making icing that looked like the color of stone. We then stacked the two square cakes together. We stuck straws in the corners for support. Then we frosted the squares. Then we placed the circle cakes together on a round cardboard cutout frosted them and placed them on the squares (we did this so she could remove the round cakes when serving).
Four cupcakes were placed in the corners and an upside-down sugar cone was placed on them. We add a stone color border around the top of the round cakes, along the bottom of the square cakes and around each cupcake (which is also how we attached the cones).
White chocolate was used for the door and windows; milk chocolate was used for the drawbridge. We used red peal apart Twizzlers for the rope, gumdrops surrounded the water to create a mote, candy corn was placed around the top of the round cakes to give the castle a finished look, and we placed a flag on each cone but, they kept falling off so they were finally removed.
All of the little knights and princesses at the party loved the cake castle.
Cake by Patricia G., Surrey, BC

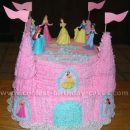
For my daughters 5th birthday party we had a princess theme; lots of purple and pink napkins and plates.
The cake was a two-tier cake castle wrapped in fondant. The princesses were pictures I printed off the computer and laminated (or else the icing would soak into the paper), then cupped out to the size of the window and framed them in icing to look like they were looking out the window.
As a party favor I bought Hershey chocolate bars (or any gold wrapped chocolate bar) and made my own bar wrappers with a princess on it and a “thank you for coming” printed on it. The party was a lot of fun.
Cake by Joy S., Locust Grove, GA

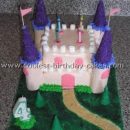
I used the directions from the familyfun.com website for this cake castle. I could not find cake glitter so I just used colored sugar.
I made square cakes and stacked them 3 high for the base. Top piece was made from a square cake quartered and stacked 3 layers high. I used regular store bought vanilla icing. I used sugar cones for the pillars. I iced them and sprinkled with colored sugar.
I trimmed with pink dyed icing and purple and white gum drops. The flags were flags printed off the computer and taped to toothpicks. I would recommend using pound cake recipe for this unless you have small square cake pans you could use. When trying to ice the cut sides of regular cake mix, it crumbled very badly!
Cake by Laurel D., Calgary, Alberta, Canada

The cake castle itself is two 12-inch hexagons for the base and two 10-inch for the second tier. The front is a 1 layer hexagon cut to fit face. Towers are paper towel rolls covered in fondant.
Sugar ice cream cones for turrets covered in Royal icing using basket weave tip to make shingle appearance. Towers glued to the board with royal icing. Airbrushed with pink and Purple. Piped with icing to make grass and vines.
Cake by Wendy H., Lulworth, England

After a mishap with the real cake, we made a hurried version for our daughter’s princess party.
We took the top off a Barbie castle and used some of the other decorations for cake toppers, and put them on a two-tiered round cake frosted pink.
The kids seemed to like it.
After they ate, we took them to a real castle for pictures since they were dressed in proper attire.

Cake by Susie S., Cali, Colombia

This cake castle was actually made out of Rice Krispie treats. The treats were cut and stacked together with icing in between. The towers were made by painting on royal-egg white-icing.
After the construction was complete, the cake castle was decorated with green vines and varied pink flowers. It was a lot of fun to put together and turned out really cute.
Cake by Debbie H., Hampshire, UK

For this cake castle, I baked two 9″ square sponges for the bottom cake (filled with buttercream). I baked another 9″ and cut it into 4 pieces (stack 2 or 3 of these pieces on top of each other for the top part of the cake depending on how deep you want the top piece).
I covered the cake with apricot jam for the icing to stick to. I didn’t want the fuss of having to colour white ready-to-roll icing fondant pink so I had the bakers do it for me, (this was as cheap as buying the white icing fondant and the pink colouring – £6 got 3lb in weight of lovely pink icing and saved me getting messy!!)
I rolled out the pink icing fondant and fitted over the cake castle. As I’ve never done this before I didn’t do it in one piece, but did the sides in 4 bits and then fitted the top square of icing. I knew I was going to decorate the corners to hide the icing seams. Buttercream piping hid the seams along the top edge of the square.

Once the cake castle had the pink fondant on, I piped on the pink edging to both the cakes with a tube of pink icing. Added the decorative icing flowers with a bit of buttercream to hide those seams.
I brought several bars of white chocolate and used this for the drawbridge and the windows again using buttercream to stick on, and piped round pink icing. I used 2 bits of string liquorices for the ropes of the drawbridge.
For the turrets I bought ice cream cones and brushed them with melted apricot jam, rolled them in pink sprinkle sugar and hundreds of thousands mixed together. Put buttercream icing onto bottoms of cones and set them on the cake. I then stuck on the mini marshmallows with buttercream icing.
For the flags I printed out 5 little Disney princess images and cut out flag shapes, added a little buttercream icing to the end of a cocktail stick and attached the flag. This cake castle was so much fun to make, looked very impressive but was actually very easy to do.
Cake by Lorelai B., Salida, CA

I made this princess cake castle for my daughter’s 3rd Birthday. She is allergic to dairy products, so I have to make her a dairy-free cake every year. This year she had a princess theme party. I got the idea from searching sites like this one, to make a cake castle.
I had altered the cake recipe from birthday express, to create this dairy-free cake for my little princess. I baked and frosted the cake and my husband decorated it with gummy candies and ready-made sugar lettering.
Cake by Shannon L., Williamsville, NY

This is a 10-inch round cake. I used both regular ice cream cones and sugar cones for the top. The little candy balls on the cake are not gumballs – they are called Dutch chocolate mints. They come in really pretty shades of pastels and are really hard to find. I buy mine in the bulk department at my local grocery store.
Cake by Shannon L., Williamsville, NY

For this cake castle, I used a Wilton bundt cake pane. The windows are made out of pink foil – I also wrapped the same foil around paper cones and made the flags for the tops. I used sugar cubes along the top edge of the cake.


Your comment has been sent successfully.