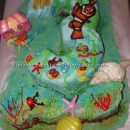
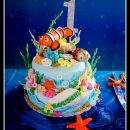
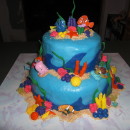
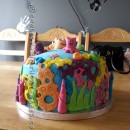
Take a look at these cool homemade Finding Nemo cake ideas shared with us by cake decorators from around the world. Along with the birthday cakes here, you’ll also find loads DIY birthday cake-making ideas and how-to tips to inspire your next birthday cake project. Enjoy!
And don’t forget… if you end up with a cool cake, have great tips to share or pictures of awesome birthday cakes you’ve made in the past, share them here and be a part of our coolest birthday cake community.
Latest Finding Nemo Scene Cake Ideas
- Coolest Finding Nemo Cake IdeasThis Finding Nemo cake is really a whole ‘under the sea’ theme….though it contains Nemo and The Little Mermaid. I … Read more
- Coolest Underwater Nemo Cake!It was one Monday morning when I got a call from my friend ,asking for a “favor”. She wanted to … Read more
- Coolest Nemo Birthday Cake for a 3 Year Old BoyI used to be a cake decorating show addict (Food Network Challenge, Ace of Cakes, Cake Boss, etc.). My husband … Read more
- Cool Last Minute Nemo Birthday CakeThis last minute Nemo Birthday cake was my first ever attempt at a big cake. I never stray from what I … Read more
- Coolest Nemo Scene Birthday CakeI made this Nemo Scene Birthday Cake mostly of Fondant. Since the fondant is a little bland, I put a … Read more
- Coolest Finding Nemo Cake Photos and How-To Tips 6I made this Finding Nemo cake for a joint father-son birthday. Nicholas turned 2 and just loved watching Nemo and … Read more
- Coolest Finding Nemo CakeI was naive enough to let my kid browse through this site when he was about to turn three. We … Read more
- Coolest Nemo Under the Sea Birthday CakeI made this Nemo Under the Sea Birthday Cake with a 12 inch double layer white cake with buttercream icing … Read more
- Coolest Finding Nemo Cake Photos and How-To Tips 7I used a combination of a couple of finding nemo cakes I already saw on this site. Thanks for the … Read more
- Coolest Nemo CakeI made this cake for my son’s 1st birthday. Ahead of time, I made frozen buttercream transfers of Nemo, Pearl … Read more
- Coolest Nemo and Friends Birthday CakeMy idea for this Nemo and Friends Birthday Cake came from a little boy that was turning 3 and really … Read more
- Coolest Finding Nemo Cake Photos and How-To Tips 8This was a fun Finding Nemo cake to make. I cut out Nemo and Dory and laid them on the … Read more
Featured Finding Nemo Cakes
Cake by Diane P., San Angelo, TX
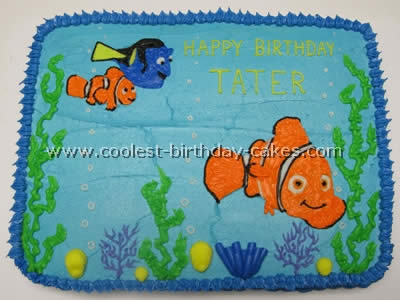
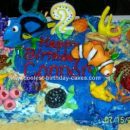
Thanks to hints learned from my mom (who decorated cakes professionally) and encouragement from my grown children it has become tradition for me to make birthday cakes for my grandchildren (like my mom did for my own children). One of my grandsons’, Tater (aka Trevor), just turned two and his favorite movie is Nemo. He had to watch it every day last summer! So of course I made him a Nemo cake. We decided to forego the character shape pan and make a sheet cake with an aquarium look.
I used an 11×15 Wilton pan which takes two box cake mixes. I use the French Vanilla cake mix because it gives the cake a flavor of it’s own as opposed to a regular white cake or yellow cake mix. After baking the cake and trimming the top to make it flat I gave it a “crumb icing” (a trick I learned from Mom) and let it dry. Then I mixed up a double batch of buttercream icing. After taking out about a cup of icing to be colored orange, I colored the rest of the buttercream using a combination of Teal and Royal Blue Wilton gel tints to get the color of ocean water. I then iced the entire Nemo cake with the blue icing. For the rest of the colors (Leaf Green, Yellow, Purple, Royal Blue, White and Black) I used Wilton Decorating Icing that comes in a tube. I have found them to be wonderful when you just need a little bit of a certain color and the decorating tips fit right on the tubes.
I used the leaf tip #67 using Leaf Green icing for the seaweed. For the Yellow shells I used tip #199 pointing straight down then pulling toward me. Where I lifted the tip there was a little point sticking up and with my finger I gently pushed it down tucking it under almost giving a curved effect to the bottom of the shell. For the anemone I combined Purple and Royal Blue icing and used tip #12. Starting at the top and coming down to the base be sure to wipe the tip of the tip clean each time giving each ‘stem’ a straight top. I freehanded the fern-like seaweed with the #3 writing tip using the Purple icing. I also used the #3 tip with White icing for the bubbles.
For the fish I simply went online and downloaded pictures of Nemo, Dory and Marlin, enlarged them, printed them and cut them out. (They are extremely pixilated but you can get the basic shape you need.) Laying them carefully on the cake I used a toothpick to trace around them and freehanded the inside lines. I used the orange buttercream icing to fill in the orange spaces on Nemo and Marlin followed by the Black lines and finished with the White. I used the #3 tip for most of this. In the larger areas I used a small tipped rounded knife to spread the icing and used a toothpick to get into the really small areas. To get the ‘fin’ effect I used the #3 tip to draw lines then dipped my finger in cornstarch and patted the area to flatten the lines and merge them together. (Cornstarch keeps the icing from sticking to your finger and dissolves into the icing.)
On Dory I filled in the Yellow areas first (using the same ‘fin’ effect on her tail) followed by using White to make her eyes. Then came the Royal Blue followed by the Black. For the border I had just enough of the ocean blue buttercream left to which I added a little more Royal Blue gel tint. I used the shell tip #199 to make a shell border around the bottom and used a small star tip for the border around the top. Everyone loved this Nemo cake and I think my mom would be proud!
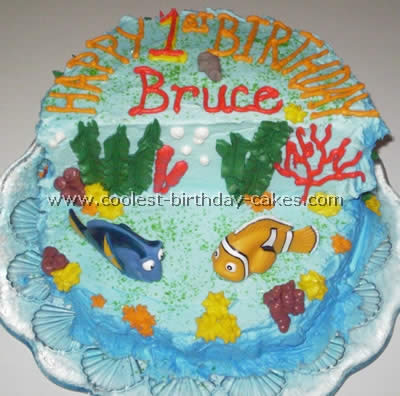
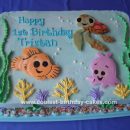
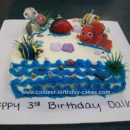
We decided on a Nemo cake for our little boy’s first birthday due to his love of aquatic life. This was my first cake ever and it had to be perfect, only the best for my little guy. I did a lot of research online. This site was a huge inspiration. I then took the best of all ideas and ran with it. I thought the “stage cake” would be the easiest to attempt and I had found these really cool squirt toys of Nemo and Dori to use as props. I watched the movie to get my color pallet correct and just used artistic license to create an undersea world. I have to admit that it wouldn’t have been possible without the help of my mom. She’s the greatest, letting me do all the fun cake decorating while she was on clean-up duty.
We also used an orange flavored cake mix. It had the best of both worlds, color and flavor. One tip that I discovered was the more colors you use the better it starts to look within reason. It’s a pain to keep cleaning out your cake decorating tips to just add a couple of details but it’s worth while.
As I said this is only my first cake, there are many more birthday’s to come and you will be seeing a lot more of my creations.
Cake by Nancy B., Lafayette, IN
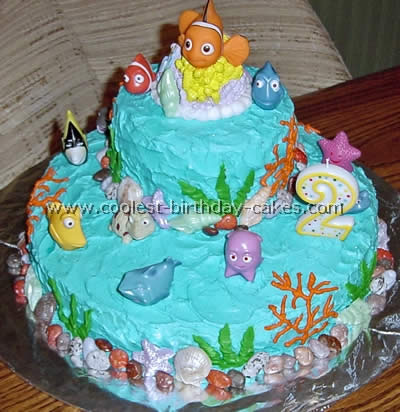
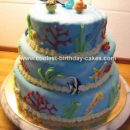
I made this Nemo cake for my twins’ second birthday based on the ideas I found on this website. The bottom and top were both two layers (one chocolate one white): bottom from a 12-inch round pan, top from a 6-inch round pan. Both had whipped cream filling.
I made two recipes worth of buttercream icing (I had two mini Nemo cakes to ice as well) and tinted it the colors I needed. I used mainly blue for this cake and iced it to look like water. Then I used green for the seaweed and orange for the coral. I used chocolate candy rocks that I bought online along with chocolate shells made with candy molds and brushed with luster dust.
The mini Nemo figurines I got as a set on eBay and they worked perfectly. Then I used the top off of Nemo novelty soap for the topper. I made and froze the cakes ahead of time for easier decorating and to save some time.
It was fun to make the chocolates and to decorate the Nemo cake itself. It was a huge hit and tasted delicious!
Cake by Emma S., United Kingdom
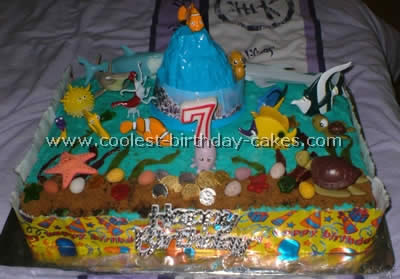
I originally found a cake like this Nemo cake on the internet and fell in love with it so decided to give it a go and found that it was surprisingly easy to make! I felt the need to share it with other parents/grandparents etc!
Firstly I bought a tub of Finding Nemo toys from the Disney shop for about 7 GBP. I covered a huge chopping board with foil to save buying a cake board. I actually made two large rectangle sponge cakes and split in half to fill and then placed both together on board with some jam and butter cream to join it! The frosting was made from a normal recipe which I found on the web and I added a blue cake dye paste bought from a cake shop to give it the sea color.
I added brown sugar for the sand, mini candy eggs for pebbles, sweetie laces and fruit winders for all the seaweed! Chocolate foil money for treasure and jelly fruit sweets in the shape of shells! Then placed all the characters on the Nemo cake and the finishing touch was to add a cake ribbon to hide the messy sides!
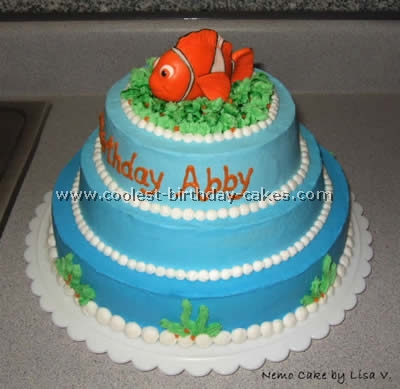
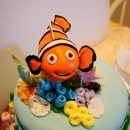
For this Nemo cake I used 3 tiers which were frosted using blue buttercream which I tinted darker on the bottom layer and gradually got lighter toward the top. I made the frosting for all three layers and then frosted the bottom cake. I added in some white to lighten the color and frosted the middle tier. I added in more white and frosted the top tier. The cakes were then stacked and green ‘seaweed’ was added to the top and around the sides as accents.
Small orange dots were added and the lettering was also done in orange. The topper was handmade using marshmallow fondant. I sculpted it by looking at a Nemo toy that my son has. The black accents were done using a Wilton’s edible marker.
To make marshmallow fondant place mini marshmallows in a large bowl and microwave until melted. Mix in powdered sugar using your hands. Kneed it and mix in more sugar until it is the consistency of play dough and no longer a super sticky mess. It can then be tinted with Wilton paste colors again mixing the color in with your hands. You can wear gloves if you don’t want to be dyed but I did find that the colors washed right off of my hands with soap & water. Once it is mixed you will want to keep it in a plastic baggie. Just take out what you need to use so that it doesn’t get all dried out. Have fun!
Cake by Holly G., Mount Orab, OH
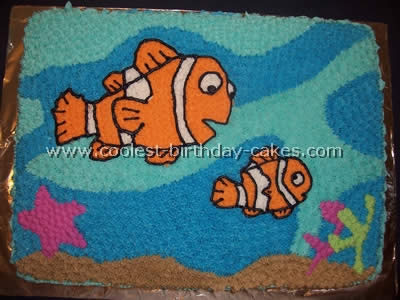
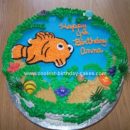
I copied pictures of Nemo and Marlin and enlarged them on a tag board. I cut them out so I could use them as templates because I cannot draw very well. I used a cake board to lay out the design of the cake.
I iced the top and sides of the cake with the light blue icing. I then used my cut outs and traced their outlines on the top of the Nemo cake. I used the idea of the different colors of water from what Mary-Lou C. did on her ocean cake that I found on this website. I piped in the whole top of the cake with one of the Wilton star tips.
Cake by Kirsty S., Gladstone, Queensland
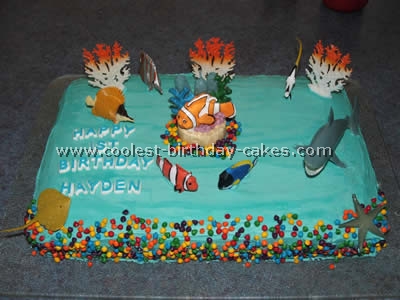
I used a butter cake as the base for this Nemo cake and made it in a large roast tin (20cm x30cm x4.5cm). I made a butter cream frosting and added blue coloring to give the appearance of the ocean. I was limited to actual Finding Nemo figurines but went into my local toy shop and found some that were very close to the actual characters.
I purchased the icing letters and put them on the cake just before we were about to present it to the guests. This was my first attempt at a birthday cake and I was pretty impressed at the attempt? What do you think?
Cake by Hope W-M., Middletown, CT
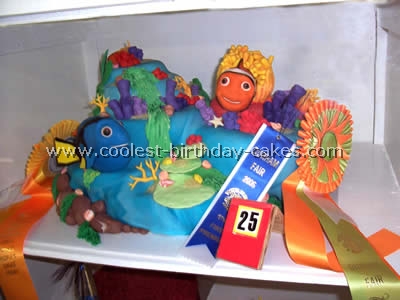
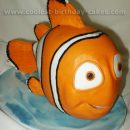
This Nemo cake was created using round cakes stacked unevenly on top of one another then using wooden sticks to secure them in place.
The cake is decorated completely in Fondant and gumpaste. The individual decorations were then attached using toothpicks.
