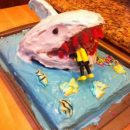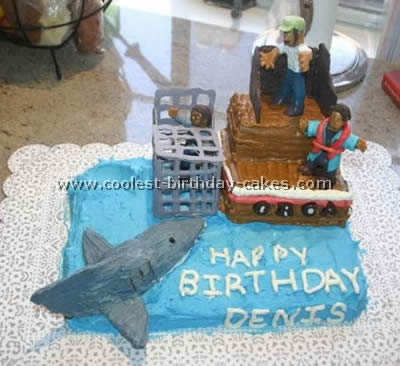
My husband’s favorite movie is Jaws so I made this shark picture cake for his 39th birthday. The characters and the shark are molded from caramels, six for each character and 40 for the shark. Microwave them for 10-20 seconds to make it warm but not too hot and easy to work with. I worked in stages so that the basic shape was done first then I let it cool a bit more and worked on the details, the shape of the noses, fingers etc. The clothes and shark are then covered in candy melts, tinted the appropriate colors.
I did break down and buy a candy warmer since I needed the melts to stay warm while I painted the characters. Their hair is done in melted chocolate and then piped on with a #3 tip. Hooper’s beard is melted chocolate and I took a paint brush dipped in chocolate and dabbed it on. For the shark I just used a shark picture and copied but for the rest I spent a great deal of time on the jaws website to ensure they were dressed the right colors. Brody’s shirt life preserver and Quinn’s hat are starburst melted and then I rolled them out and cut to fit. Brody’s shirt even has cuffs (seriously down in the weeds with the details on this one). The wheel house is melted chocolate piped onto wax paper and then glued together with more chocolate. The shark cage is candy melts tinted grey and then piped out onto wax paper. Likewise, then stuck together with more candy.
The letters of the boat, ORCA, are melted chocolate poured into an alphabet candy mold. I had a mast but the boat was not big enough for it and it was just the five of us so I already had more than enough cake. The base of the cake is a 9 X13 rectangular cake pan. The boat is a square cake pan cut into two layers to resemble the base of the boat. I used chopsticks to secure the boat onto the water.
The cake portion took two batches of icing, one for the water which I just applied with a spatula to make it look like choppy water (that is why the Happy Birthday is so uneven the waves). The boat is covered with brown icing and tip #45 to make it look like wooden planks. As you can see from the shark picture the cake was a huge hit with my family and was tons of fun to make. You can make the caramel and candy parts days in advance, just don’t put them in the fridge and then assemble right before serving. I am not a huge fan of fondant but I am sure you could easily make these figurines with fondant if you wanted to.
More Shark Cakes
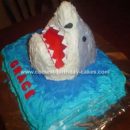
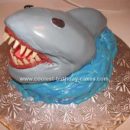
My son wanted a great white shark cake for his fifth birthday so I found a shark picture and copied it on to a cake. I used a Wilton football mold for the shark cake and a 9 x 13 for the water cake. After I baked the football I put it in the freezer overnight. I sliced the end off at an angle and then put the cut piece under the football for the bottom of the mouth.
I sliced down the two sides so the shark wouldn’t look too wide. I used the two side pieces as the side fins and dorsal fin. The dorsal fin needed a couple of toothpicks to hold it in place. The shark frosting color is delphinium blue with some black mixed in and the water is royal blue. The eyes are dark brown M&M’s and the nostrils are two chocolate sprinkles. The teeth are mini marshmallows cut diagonally and wedged into the mouth frosting.
My son has not seen this yet so it will be a fun surprise for the party on Saturday.
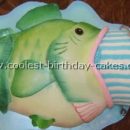
Shark picture cake by Domini M., Palmerston, North New Zealand
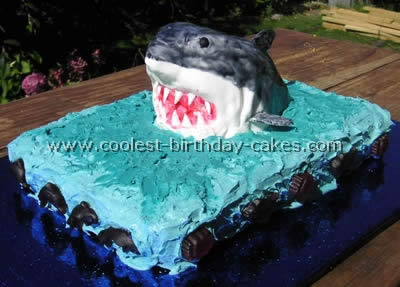
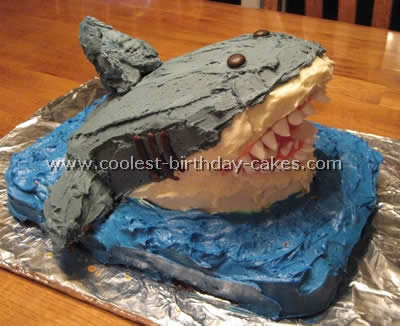
As you can see I copied this cake from another shark picture on this site. (Thanks Alison T.) The big slab cake on the bottom was a double recipe of my favorite banana cake. The shark piece was a basic butter cake recipe baked in a loaf tin. Once cooked I froze the cake. Then I did the tricky sculpting bit when it was still half frozen. This helps to stop it crumbling.
The bottom jaw was made of one of the off cuts. I stuck a wooden skewer down through the middle of it all to stabilize it. Like Alison I made the teeth and dorsal fin out of ready-to-roll white icing from the supermarket. I also added some side fins. I made these bits a few days in advance to give them time to dry hard. I also made a few extra bits to allow for breakages.
The base of the cake was iced with blue buttercream. I found some fish sweets to stick on around the edge. I covered the shark in ready-to-roll white icing letting it fall into gathers where the gills are then painted on the dark grey colour. I painted inside the mouth pink. At this point I was getting worried because it didn’t look much like a shark at all but then I added the teeth and fins and suddenly it was all okay. My six year old son David loved it and so did his party guests.
Cake by Jasmine C., Berkeley CA
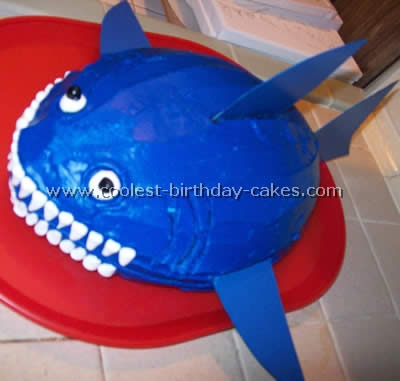
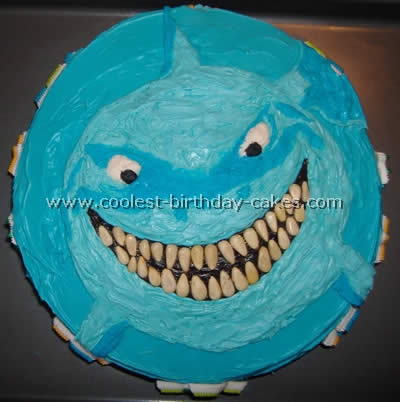
I used the football pan similar to what the other woman on this site used. I would have been lost without her shark picture. I made two cakes from the football tin and stuck them together. I frosted with tons of frosting (tinted blue) and used paper plates glued together to make the tails and fins (as she did). I used mini marshmallows to make teeth (trimmed them down) and used two smashed marshmallows and a jelly bean cut in half for the eyes. And just cut gills out! Everyone loved it!
Shark picture cake by Alison T., Cardiff, UK
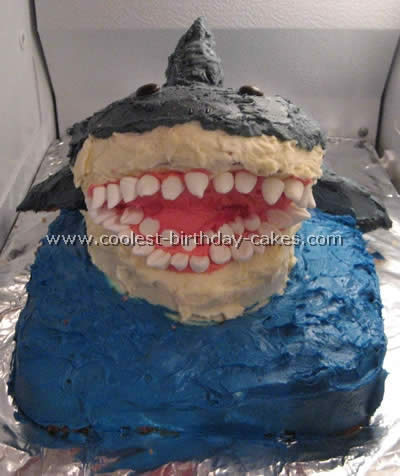
My son is really keen on sea life – particularly sharks and he wanted a shark cake for his birthday. I couldn’t find one in any of my recipe books so I thought I’d make my own from a shark picture! I made two large rectangular Madeira cakes, sandwiched them together with buttercream and jam and then smoothed a thin covering of buttercream over the surface of the cake and covered it with rolled out fondant icing. The good thing is the fondant will be covered later on so it doesn’t have to be too neat – it just holds the cake together nicely and keeps it fresher if you are working on it over a couple of days.
Next I baked two more Madeira cakes, this time in a smallish loaf tin. I trimmed the edges and put them together one on top of the other with the top one overhanging the bottom one by about three inches. I didn’t put the buttercream between them yet – it’s easier carving the cakes when they aren’t all squeegee! Then came the tricky bit – carving the Madeira loaves into a shark shape to resemble the shark picture! I also found one of my son’s shark models and had it with me while I did it to make sure I got the shape right. It also helped that my husband was there to advice on where the cuts should be made. It was quite tricky to get the mouth right -making it go in far enough without making the top jaw too heavy! My best tip is to do it a little at a time because you can always take more off but it’s hard to put it back on!
Once I was happy with the basic shape I took one of the off cuts and made a small semi-circular shape to make the bottom of the shark’s mouth. Then I sandwiched the shark cakes together and covered them with a thin layer of buttercream. I covered the shark cake with a thick layer of white fondant icing. Roll the icing out first (obviously!) and smooth it lots with your hands so it is really shiny which makes for a better finish once it’s on the cake. Start at the back of the cake and work towards the mouth because you will have to trim around the mouth. Make sure there is enough icing at the sides of the shark to let you cut a couple of side fins. It’s easier to trim the icing as you go because it’s heavy and it also helps you to see what you’re doing. It doesn’t matter if it’s a bit rough at the bottom because it will be covered by the ‘sea’! It really helps to have another pair of hands around to support the top jaw of the shark so it doesn’t crumble while you’re icing it. You might need to roll a little piece of icing to cover the inside of the mouth if it is a bit scrappy by the time you’ve got the icing on.
Next I rolled two thin sausage shapes of pink fondant to make the shark’s gums and stuck them on with sugar glue. While I was waiting for it to dry I painted the inside of the shark’s mouth with red food coloring. The gels are better than the liquids as they give a more intense colour. If you need to dilute the colour use a clear alcohol like gin or vodka because this evaporates very quickly leaving the surface of the cake nice and dry. If you use water the cake will stay very tacky. Don’t panic about making your party guests drunk though – you only use a small amount of the alcohol and it will have evaporated long before the cake is eaten. It doesn’t affect the taste of the icing either. Meanwhile I had a pack of the white fondant icing used for sugar flower making. This dries very hard – much harder than regular fondant. (You could probably use ordinary fondant but you would probably have to leave it to dry out overnight.)
I rolled a small piece out thinly and cut it into pointy triangular teeth a little longer than I wanted. I also molded a pointy dorsal fin from the same icing and set both aside to dry. Once they were dry I cut a slit up the middle of the shark’s gums cutting up into the cake. Then I put some sugar glue on each tooth and stuck it up into the gums. Likewise I stuck the dorsal fin onto the shark’s back. You may need to prop it up with something until it dries.
Then you need your shark picture again to work out the position of the nostrils, eyes and gills. Mark them onto your cake. Now you need to place your shark onto the top of your rectangular cake – which will be the sea – and also means you have plenty of cake if you’re having a big party! You can attach the shark with a spread of buttercream. Then you need to mix up some grey food coloring – I used a tint powder mixed with vodka. Then just paint it onto your cake – remembering that great white sharks have a white patch from just in front of their side fins up over the top of their mouths! You will probably need to do two or three coats to get a nice even finish but it dries really quickly so you won’t need to wait long between applications. Once it is finished and dry ice on the eyes – I just used a tube of black writing icing. The best thing about this cake is that even if the icing dries out and goes a bit crackly it just looks even more like shark skin!
Once your shark is on top of the cake, mix up some royal icing. It also helps to beat in a teaspoon of glycerin because this makes the icing a bit less brittle so it won’t crumble so much when you cut the cake. Take out a couple of teaspoons of white royal icing and set aside then beat in some blue food coloring to the rest. Dollop it all over the cake and cake board pushing it right up to the shark. Use a pallet knife or the back of a spoon to pull the surface of the icing up into peaks. Then dip your knife into the white icing and just dab it over the peaks on the top of the cake to create the crests of the waves. (Also take a tiny dot of the white icing and put it on each of the shark’s eyes to make them look shiny.) I also managed to get hold of some glittery blue edible sprinkles which were a lovely watery finishing touch. I managed to get some candles shaped like tropical fish which finished the cake off perfectly.
It sounds like a lot of hard work but it only took about four hours once I’d actually baked the cakes and my son absolutely loved it – which made it all worthwhile!
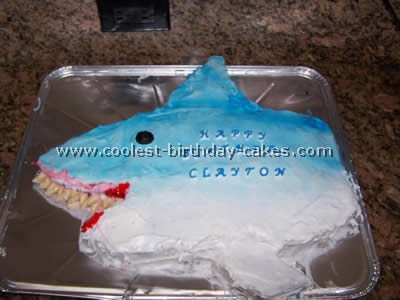
Shark picture cake by Trish W., Virginia Beach VA
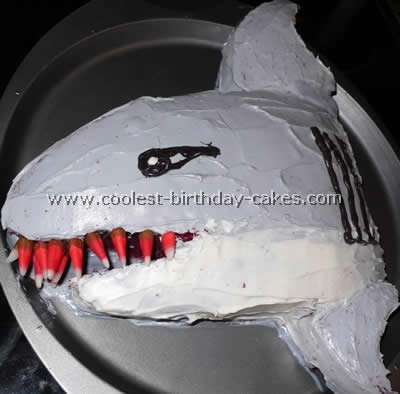
I used Stephanie E’s shark picture on how to prepare the cake! This is a red velvet cake out of a box. I used a sheet pan and a round pan. I cut the shark shape out of the sheet cake and the fins out of the round pan. I drew the shark design on a piece of paper and placed it over the cake so that I could get an idea of where to cut. I used the red velvet cake to look like blood when it was cut up. I used candy apple flavored candy corns for the teeth. I had to carefully put them on toothpicks to get them to stay.
I mixed black decorating icing into a white icing tub in order to make the gray icing. I melted some icing in the microwave to cover the hard to reach spaces in between the fins and mouth. I used three spatulas to move the cake so that the mouth did not break off and it worked well. This cake was not for a three year old but rather a 30 year old but we have recently started scuba diving and it seemed like a perfect idea. He loved it!
Shark picture cake by Julie D., London, Ontario, Canada
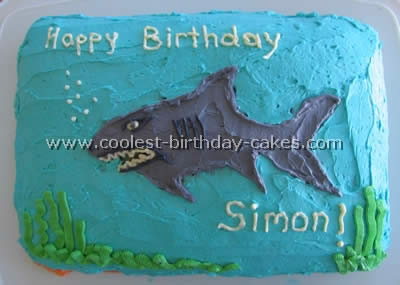
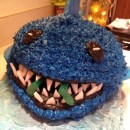
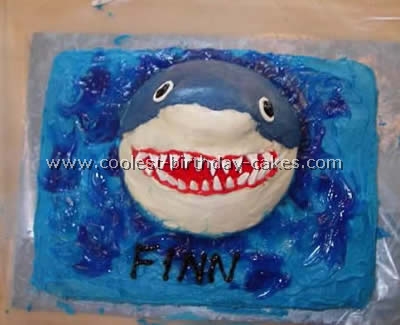
My son Simon is obsessed with Bruce the shark from Finding Nemo so I thought I’d try to do a shark cake for his 3rd birthday. I saw another shark cake on this site and overall my cake is quite similar however I used a different shark picture.
It was a rough drawing of a shark outline which I traced on the cake with a toothpick. I first iced the blue background then piped the outline of the shark and added some details and teeth (which weren’t on the picture I used – that shark had a closed mouth). Thanks for a great idea!
Shark picture cake by Theresa T., Bunker Hill, WV
This shark is copied from shark pictures. It was for my son’s 5th birthday. This cake was drawn completely free hand. The teeth were made out of nuts. I can’t remember what kind but I looked at all the packages and picked out the kind that most resembled teeth. I picked through the nuts for about a half an hour to pick the perfect ones. The cake was a big hit!
Cake by Stephanie E., Battle Ground, WA
A baker I am not. My son wanted a shark cake and I could not find a shark picture to make this cake.
This is a cake out of a box. I used a sheet pan and a round pan. I cut the shark shape out of the sheet cake and the fins out of the round pan. The frosting is from a can. I used a color mist spray for the blue.
The teeth are made out of vanilla tootsie rolls cut to look like teeth. My son wanted blood so I used red gel frosting. The kids loved the cake!
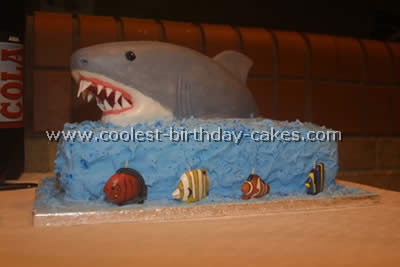
Shark picture cake by Meghan P., Silver Spring, MD
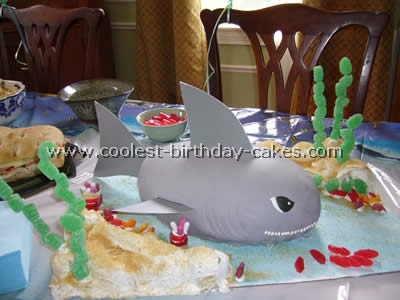
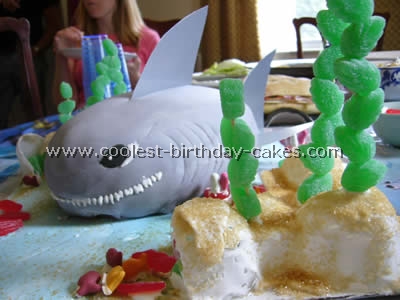
To make the cake I used the Wilton football-shaped pan and sandwiched two cakes together to give the shark a 3-D effect. I used 1 vanilla cake and 1 strawberry cake and it was really interesting when we cut into it!
As you can see in the shark picture, the shark was covered in fondant that I tinted gray using black gel coloring. Originally the fins were supposed to be gray royal icing but they didn’t harden in time for the party. Instead I used paper plates that I cut and glued together and inserted into the cake.
The plant life were spearmint leaves on bamboo skewers and the “sand” was turbenado sugar atop blue tinted royal icing. The features were pressed in with fondant tools and the eyes were colored with black Wilton decorating pens and white royal icing. The fish were the bagged Swedish fish and the other creatures were made from assorted candies.
My daughter loves sharks and I saw that the Wilton site recommended the football pan for a goldfish; I thought big and stacked them on top of one another. It isn’t authentic but I wanted it to be more cartoon-like since my daughter was only turning 2. I hope that you all enjoy it! (My daughter really did!)
Cake by Kirsten A., Seattle, WA
It’s best to look at a shark picture while creating your cake. I used the wonder mold pan and cut out the mouth. I used 1/2 sheet for the bottom, iced blue with blue gel for the waves. The teeth were gum squares cut in half! I hope my shark picture of my cake helps you!
Shark picture cake by Susan T., Myrtle Beach, SC
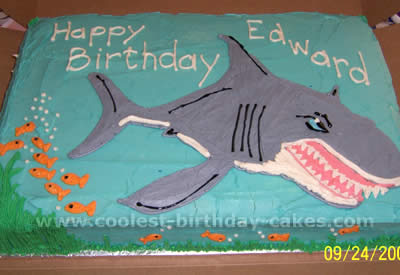
My 6-year old son had his party at an aquarium this year, so he wanted his cake to have a shark on it. I drew a shark on a piece of wax paper and then traced the outline of the shark picture onto the cake.
I then followed the outline and filled in the shark. Instead of a standard border, I choose to use the leaf tip to make seaweed and piped little gold fish to give the cake a bit more color. He loved it!