A week before her birthday; I ask my four year old what kind of cake she wanted. I expected her to say, a pink one (because pink is her favorite color), and that would be simple enough, however, she turned to me, without any hesitation in her voice and said, “a pink sparkly unicorn cake”. Needless to say, I was surprised at such a response. I thought to myself, “How in the world do I make a pink sparkly unicorn cake?”
With my only access to the internet being while I’m at work, I took the opportunity to Google Unicorn Cakes. And I must say, ” OH MY GOODNESS! I WAS SO HAPPY I FOUND ALL THESE IDEAS. I am so THANKFUL to each and everyone of you for your special talents and ideas because I am very inexperienced at cake making. I found myself, oohing and ahhing over every picture. I gathered ideas from several different pictures, changed a few and added my own.
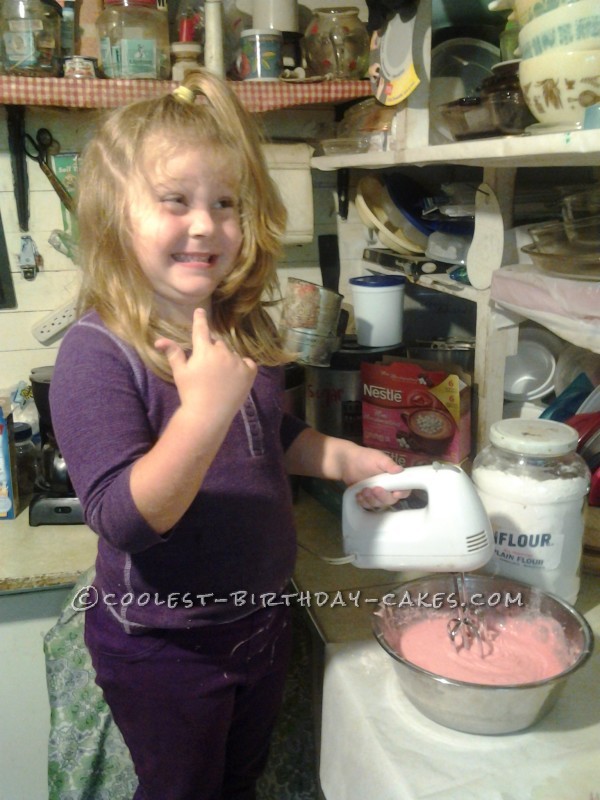
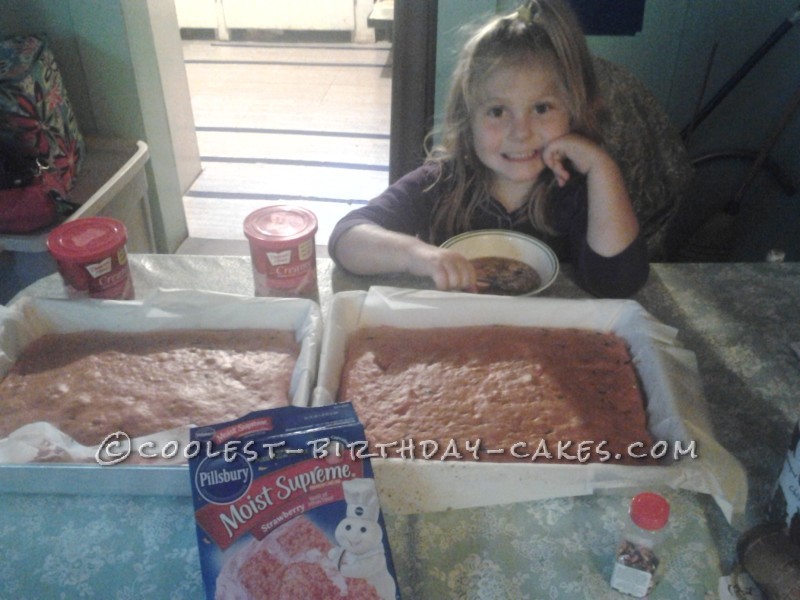
I started the cake making early in the day, around 1 pm. I made two 13×9 strawberry cakes. This process took almost two hours, because I had my daughter at work with me and she wanted to help make her own birthday cake. You’ll be able to see them in the step-by-step process. (I’m an in-home caregiver, so I am able to bring my daughter to work with me any time I need too. I love my job.)
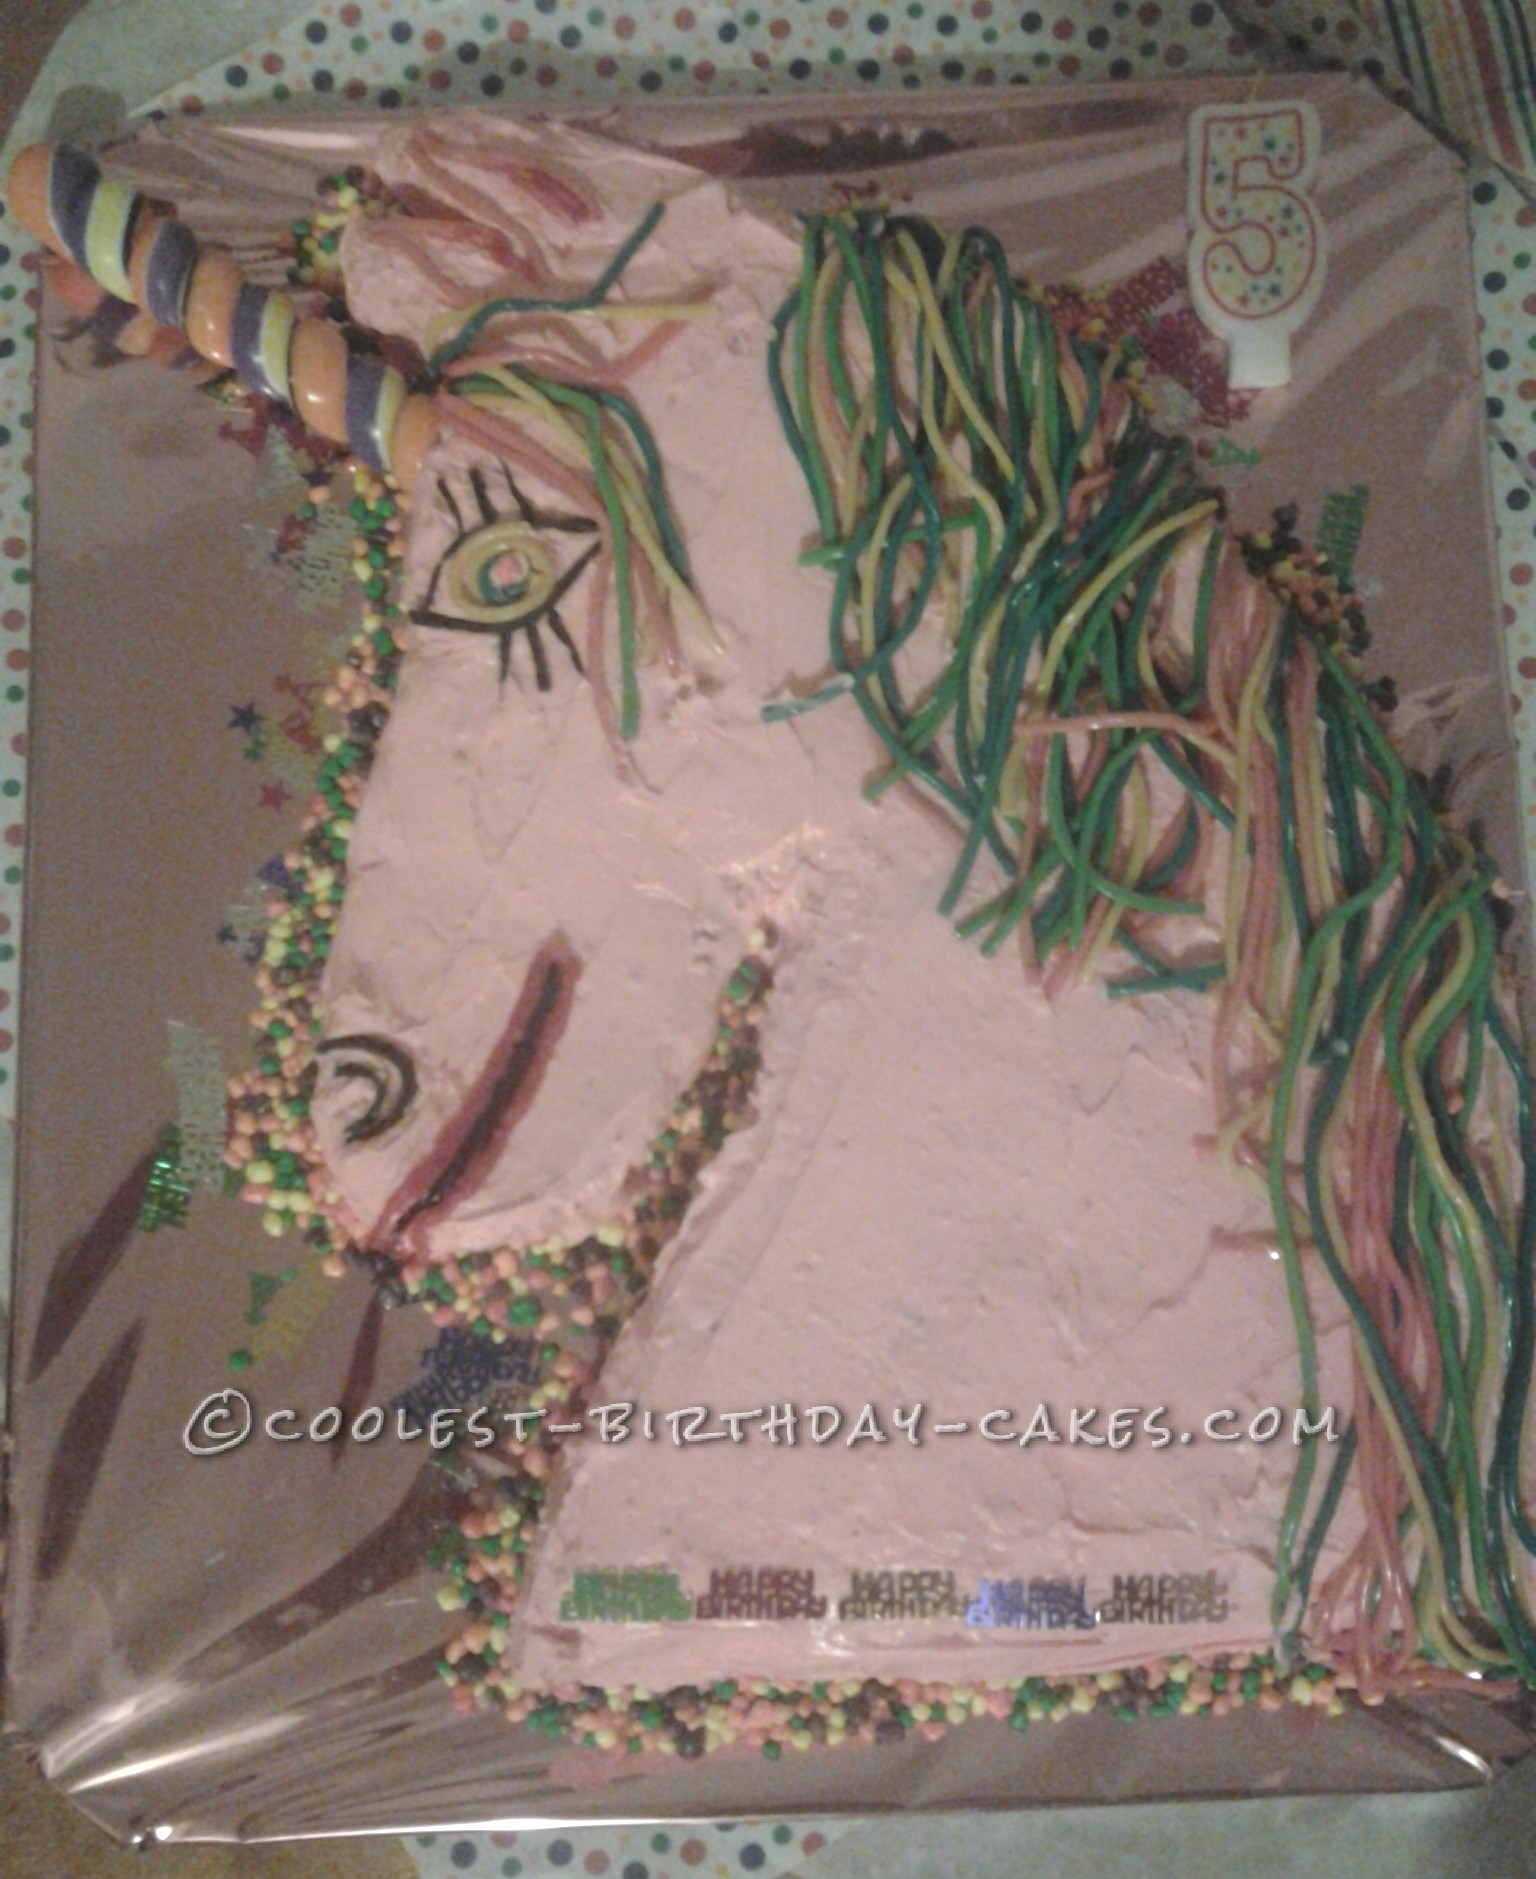
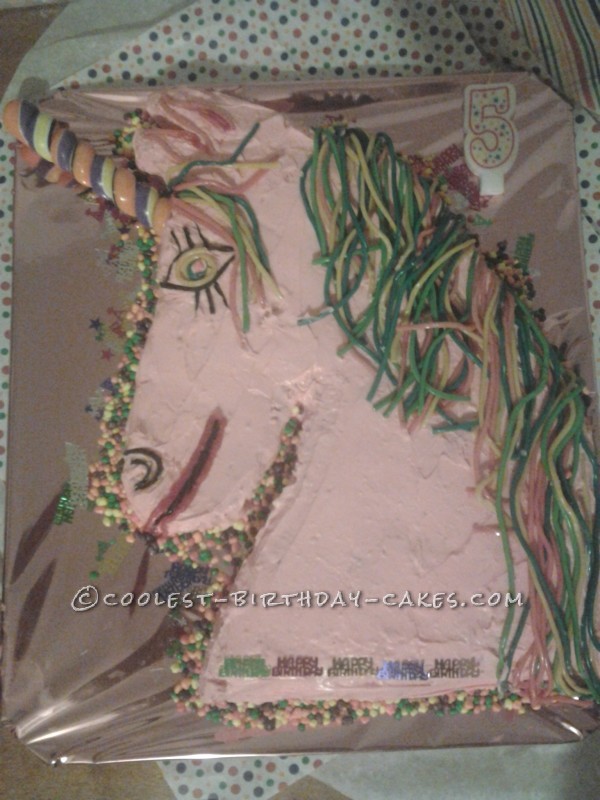
When I got home (after 5pm) my husband and I started working on the rest of the details. He has a talent for drawing, so I asked him to sketch out a unicorn. He did that on parchment paper. It works great for those of you who may want to try it later. We worked almost two more hours getting everything together to make her pink sparkly unicorn cake. Although the cake itself does not sparkle, I put it on shiny foil wrapping paper to make the background sparkle.
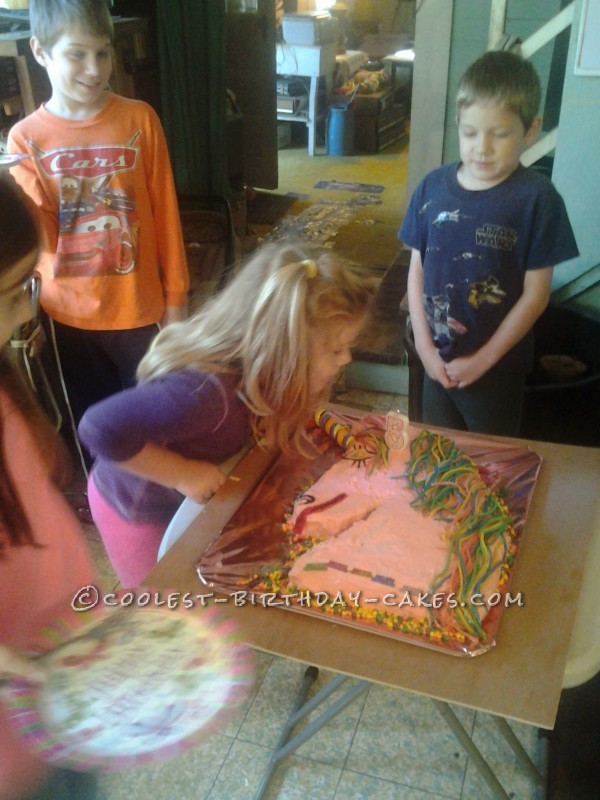
My daughter couldn’t stop hugging me when it was finally finished. She wiped her hand over and over it like she was petting her pink sparkly unicorn.
The First Ingredient Is LOVE: Mix Cake Batter Per Directions With Someone You Love
I love spending time with my daughter, and she loves helping me in the kitchen. We just followed the directions for making a strawberry cake because she loves pink. I lined my baking pans with parchment paper to make clean up easier and it is also easier to lift the cakes out of the pans for cooling.
Sneak a taste to test it out
Let Cakes Cool Completely Before You Start Decorating
We love the smell of fresh cake baking. I left the cakes in the pan until I got home a few hours later.
Cooling the cake
Decorating Supplies
We had to run out during my work hours to buy a few more decorating supplies while the cakes were cooling. This can only happen when the lady I sit with agrees to go with me. Some days she does not feel well enough to leave the house. She is 97 years young.
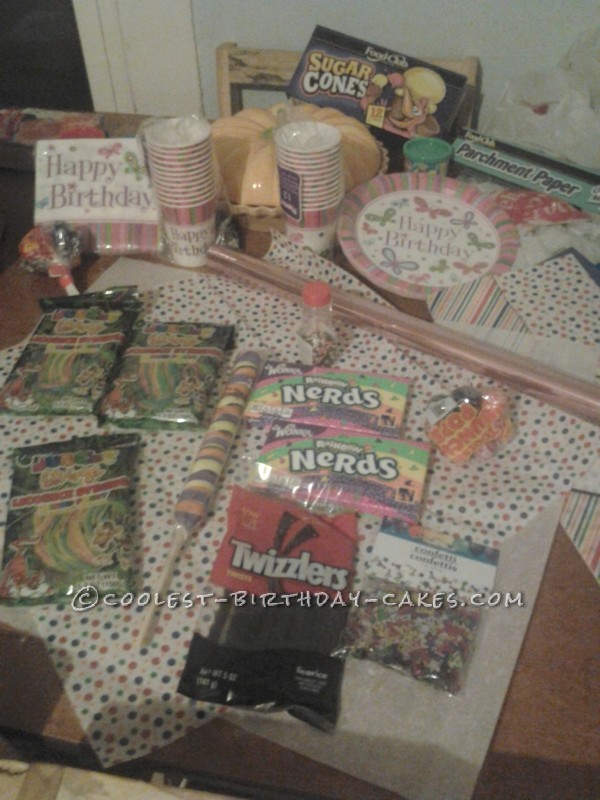
Decorating items
Cut Off the Thin Top Layer of Cake
I call it the “cake skin”, only because I am not knowledgeable enough to know what it is suppose to be called. I mentioned earlier that I am not a cake expert. I should have had a picture of my husband drawing out the outline of the unicorn. That should have been step 5. And for step 6 and I should have been cutting out the outline for the pattern. Step 7 should have been placing the pattern on the cake and then cutting the cake around the pattern. I did not have pictures for those steps. So sorry. This is my first time making a unicorn cake. But I do believe the next pictures show the pattern on the cake after it has been cut.
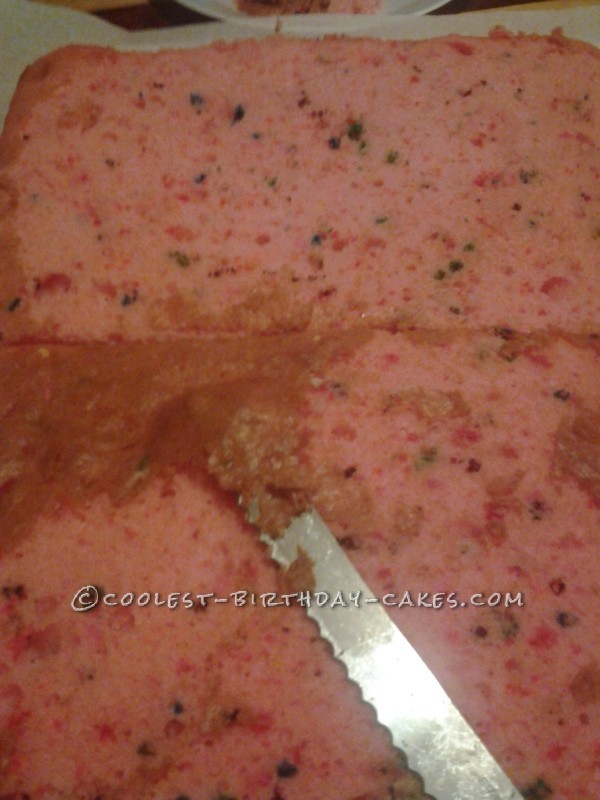
Cut the tops to remove the loose cake “skin” this make is easier for the icing.
Put Your Cakes Side By Side and Place Your Pattern on Top
Use toothpicks to hold your pattern in place on top of the cake and cut it out. This is not the most “cake saving” way to do it. It will waste cake if you don’t end up eating what you cut off (like I did). Of course, you can cut them in bite-sized pieces to save and eat later. Sometimes there are those few guests that don’t want cake because they are counting calories. Just give them those pieces you cut off, that don’t have any icing.
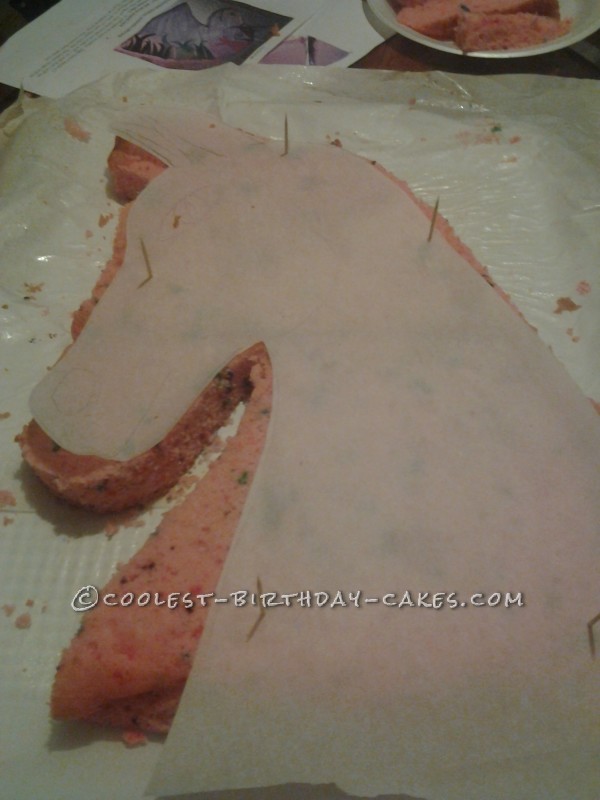
Use tooth picks to hold our pattern in place while you cut your cake.
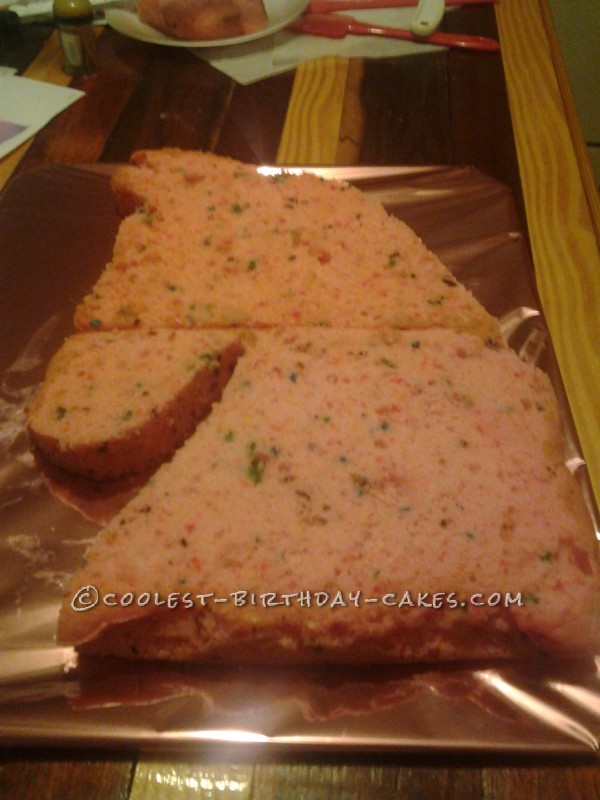
cake shape
Icing and Decorating
This is the longest part of the process, but also the most fun for me. Like I said before, this was my first unicorn cake and I sure loved every minute. I covered the whole cake in strawberry icing, and then started with my candy decorations. I used fruit string licorice for the mane and eye (my daughter later added a pink nerd to the very center of the eye), black licorice for the mouth and eye and lashes, red icing in a tube for the lips (around the black licorice), Nerds around the shape to help bring out more color, and a long spiral lollipop for the horn.
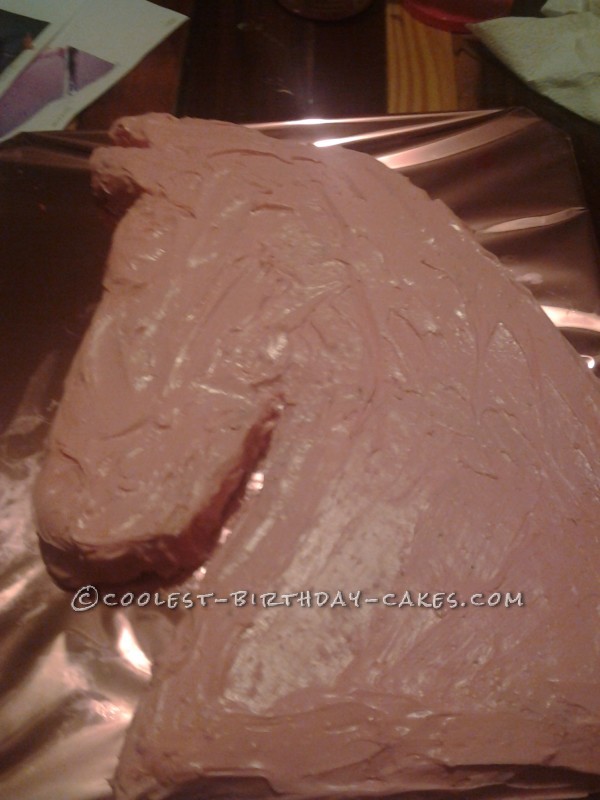
Pink strawberry icing
Use your magical imagination
I really hope you have fun making your first unicorn cake too, but most of all make sure your child has fun with you. Those are precious moments you will never get back.
Final Step: Have your party and hope that your child will remember those moments forever because you know you will. You won’t know her wish but you’ll know it was magical.
Make a good wish
Related cakes:
 12+ Coolest Castle Cake Ideas – Awesome Homemade Castle Cake Designs!
  Magical Unicorn Cake
  Coolest Unicorn Birthday Cake
  12+ Pretty Homemade Princess Cakes
  12+ Inspiring Homemade Princess Birthday Cake Ideas
 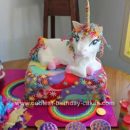 Coolest Rainbow Unicorn Cake
  12+ Coolest Disney Princess Cake Ideas – Awesome DIY Cake Decorating!
  Coolest Unicorn Birthday Cake
Your comment has been sent successfully.