Take a look at these cool homemade Treasure Chest cake ideas shared with us by cake decorators from around the world. Along with the birthday cakes here, you’ll also find loads DIY birthday cake-making ideas and how-to tips to inspire your next birthday cake project. Enjoy!
And don’t forget… if you end up with a cool cake, have great tips to share or pictures of awesome birthday cakes you’ve made in the past, share them here and be a part of our coolest birthday cake community.
Latest Treasure Chest Cake Ideas
- Coolest Treasure Chest Cakes and Pirate Birthday Cake IdeasI prepared this Pirate birthday cake for my daughter’s sixth birthday. I had also planned a treasure hunt for the … Read more
- Coolest Treasure Chest Cake Decorating IdeasMy friend was in a bind for a pirate-themed birthday cake since her son is just crazy about Pirates of … Read more
- Coolest Treasure Chest CakeI made this treasure chest cake for my nephew’s 1st birthday the other week. He had a pirate themed birthday … Read more
- Coolest Treasure Chest CakeWhen my oldest daughter (now 5) turned three, we decided to have a girly pirate themed birthday party. What goes … Read more
- Mermaids and Pirates: Under the Sea Treasure Chest CakeFor my daughter’s 6th birthday party, she wanted to have a mermaids party. The only problem was that she wanted … Read more
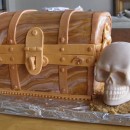
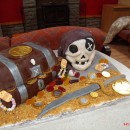
- Coolest Treasure Chest with Skull CakeI wanted to do a big skull cake, but didn’t want to pay $35 for the cake mold, so instead … Read more
- Coolest Treasure Chest and Pirate Skull CakeI made the treasure chest from chocolate biscuit cake in 2 pans then covered them with chocolate flavored fondant then imprinted them … Read more
- Cool Pirate’s Chest CakeI made this for my son’s birthday party. It was simply two 9×13 single-layer cakes. Right after baking, I covered … Read more
- Coolest Treasure Chest CakeThis treasure chest cake was for my son’s 3rd birthday party which was a pirate theme. I had decided to … Read more
- Coolest Treasure Chest CakeFor our Treasure Chest cake we started out with a cake baked in a small bread/loaf pan and cut it … Read more
- Coolest Pirate Treasure Chest CakeMy daughter liked the Pirates of the Caribbean and wanted a Pirate theme for her 5th birthday. I created this … Read more
- Coolest Treasure Chest Birthday Cake IdeaI made this Treasure Chest Birthday Cake Idea for nephew’s 7th Birthday Pirate Themed Party. I was actually looking for … Read more
Featured Cakes
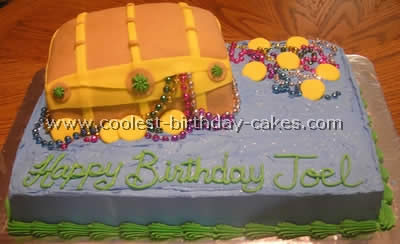
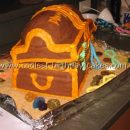
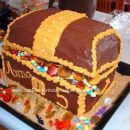
I used a 9×13 cake pan for the bottom and a 9×13 for the treasure chest cake. The one for the treasure chest was cut in half and stacked then carved in the shape of the treasure chest. The bottom part is covered in buttercream and the chest is covered in satin ice. I used satin ice for the coins and real beads. Real easy to make!
Cake by Christina R., Crystal Spring, PA
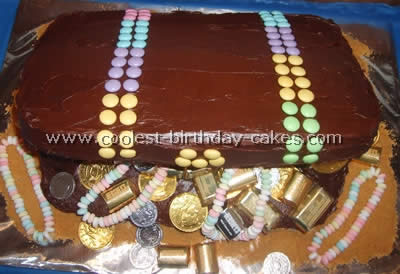
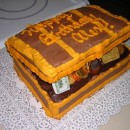
My daughter wanted a Pirate party for her seventh birthday. Usually I buy a cake pan for her theme and decorate it but this year we decided to do something different. The decorations had an open treasure chest on them so we thought that would be a neat idea. After researching the web for a treasure chest cake we had a pretty good idea of how to do it so we decided to try it. First I made one yellow 9×13 cake and one chocolate 9×13 cake. The chocolate cracked so I made a second chocolate 9×13. I let the cake cool loosely covered overnight.
In the morning I put the chocolate on the cake board covered with foil and then I used two triangle shaped wedges (from the cracked chocolate cake), one at each end and secured with bamboo skewers that I cut down. Then I frosted all of that with milk chocolate icing. Next I cut a piece of cake board a little smaller than the yellow cake and covered it with foil, put a little frosting on the board and placed the yellow cake on it. I put six toothpicks in the very back of the bottom cake to keep top from sliding and placed yellow cake on top, then frosted the top of the cake and the foil covered board underneath so it wouldn’t be seen. Then my sister with her smaller hands added candy to the inside (should have put candy on bottom before I added the top, would have been much easier), crushed some cinnamon graham crackers to use for sand around cake and used M&M’s to make straps and lock. Lastly I placed more candy around cake.
I was very happy that the treasure chest cake turned out so well. I admit I was a little nervous. Much easier than I thought it would be and the kids really thought it was neat.
Cake by Billie F., Glen Burnie, MD
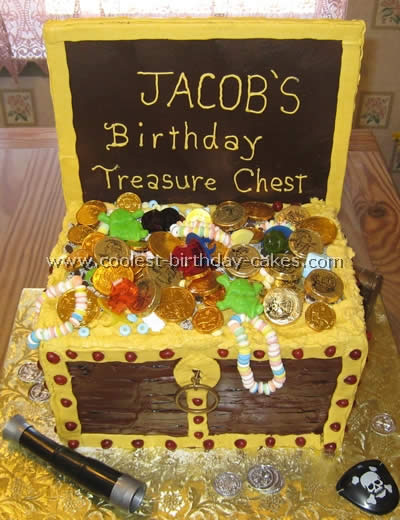
Thank you so much this idea for a treasure chest cake. It actually came from your website. It was so easy to make.
BACK OF CHEST: Two nights before I took a board, 12 x 16 and cut it a little to fit across the back of the cake, covered it in aluminum foil. I measured how high my layers were times how wide my cake was. (Four layers times 2″ layers equal 8″ plus 8″ for the width of the cake). You may have to cut off a little bit depending on how high your layers come out. I took store bought choc icing, mixed it with 10 x sugars and some black and brown color paste then I covered the board a little past half way with the icing. Let it dry until I was ready to but it on the back of the chest. Before I put it onto the back of the chest I covered the back with black construction paper and scrapbook glue. I used plastic dowel rods to adhere it to the back of the cake after I put the layers of the cake together and icing them. Icing works great to help glue it to the pack.
TREASURE CHEST: I actually made two 12 x 16″ half sheet cakes, and then I cut them in half which gave me four layers. I used a pound cake recipe. It holds up much better. I put the first layer on a covered 12 x 16″ doubled board (for support). Icing it with store brought choc icing, just a thin layer, then I put the second layer on and added another thin layer of icing. After that I stuck four dowel rods, one close to each corner for support. Covered that layer with powder sugar sifted, and then I put an aluminum foil covered board (a little smaller than the cake) on next. Then I added the next two layers doing the same. If you are traveling some distance you might want to stick a large pointed dowel rod in the center so the cake won’t slide. After that I finished covering the cake with choc icing, took my spatula and ran lines across the sides and front to resemble wood.
I took my tooth pick, dipped it in the black color paste and ran it through the cake. Then I made gold colored icing from scratch and used tip # 2B to make a gold strip up each side and across the bottom and in the front center of the cake. I also took the gold strip over the back part of the board. I stuck Boston Baked Beans around the edges. I took the tip #2B and used it to make the key hole. What I did was make an oval shape on one side and then the other you’re left with what looks like a key hole. I just took a tooth pick and shaped the key hole up a little. Next I put icing all over the top, added the back and finished icing the top and added candy and there you have it.
Treasure Chest cake by Jackie L., Essex, UK
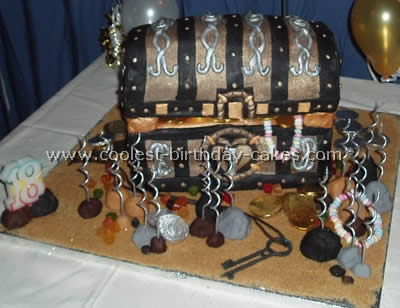
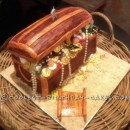
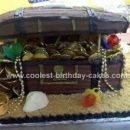
I made this treasure chest cake based on a Davy Jones Locker in Pirates of the Caribbean II. It was for my daughter Catherine’s 18th birthday. It was covered in roll out icing and then hand painted with edible paint.
The hardest part was getting the lid to stay in position. This was done with a support of icing underneath and dowelling inside. So as not to spoil the chest I put the candles on real pebbles.
Cake by Kristie L., Ballarat, Victoria, Aus.
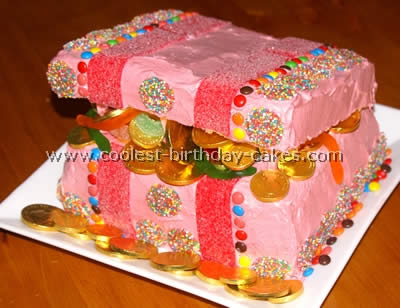
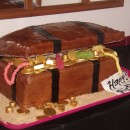
I love pirates and it was my niece’s birthday and so decided to make her a pirate treasure chest cake but I thought I’d make it more girly looking so made it a pink chest instead: Princess Pirate’s treasure chest cake!
Starting with three rectangle cakes the same size, spread jam and cream on one layer then sitting a second cake on top, ice them with icing of your choice – I used fluffy frosting. Gently place the third cake on top of the iced base cakes and prop it up with musk sticks. Then ice the top cake.
I decorated it with different kinds of lollies and put gold chocolate coins in the chest – you can put lollie jewels in too but I couldn’t find any! I used fluffy frosting which I found the recipe for on the net.
Here’s the recipe for it:
Ingredients: 1 1/4 cups caster sugar, 1/2 cup water, 3 egg whites., Method:, 1. Combine sugar and water in small saucepan and stir over medium heat until sugar until sugar is dissolved; do not boil., 2. Increase heat and boil rapidly uncovered for 3 to 5 minutes., 3. To test if ready drop 1/4 teaspoon syrup in cold water. It should form a soft sticky ball of toffee – i.e. hold its shape. If you have a sweet thermometer it should reach 115C (240F). If the syrup changes colour it’s cooked too long and you need to start again., 4. Beat egg whites until stiff., 5. Whilst still beating on medium speed pour in syrup in a thin stream. If added too quickly the frosting will not thicken. Continue to beat until frosting stands in stiff peaks., 5. Add coloring as desired. I think it’s a bit like making toffee? It took me a couple of go’s to get this part right but when I did it was well worth it – so yummy!
It was a huge success with my niece! She loved it and it tasted really good too!
Cake by Anne S., Abbotsford, British Columbia
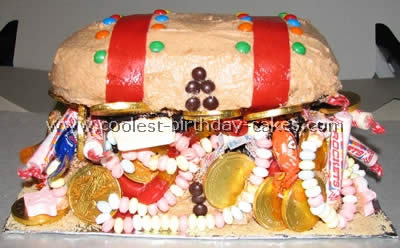
I made a slab cake and cut it in half for this treasure chest cake. I used two square pieces of cake to prop up the lid and filled the space with pirate treasure treats. I chose colorful wrapped candies to give the cake some pizzazz. Fruit-by-the-foot was used for the strips on the lid. Graham crumbs sprinkled around the cake for sand. Mini M&M’s for accent and that was it.
This was really easy to make and another huge hit with the birthday boy and the party guests.
Cake by Tracy C., Victoria BC Canada
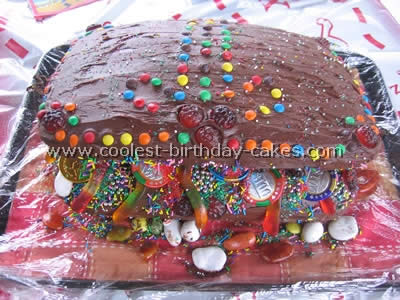
For this treasure chest cake, I took a recipe for a white cake and doubled it. I used two lasagna glass pans lined with parchment paper to bake. After the cake was cooled we cut a wedge in the bottom layer so the top of the chest sat open. Iced the bottom layer then put the top on iced and decorated inside outside and all around. Worms, chocolate money, mini M&M’s and so on. This was a huge hit at the 6 year-old Pirate birthday on the Beach!




Your comment has been sent successfully.