
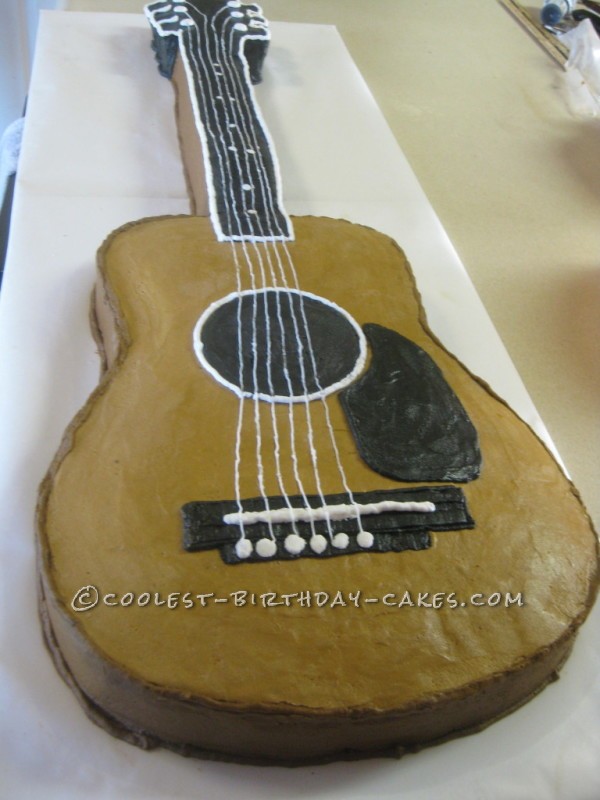
Yes, it’s a cake. No, I can’t believe I actually pulled this off. I was sweatin’ bullets the whole time, but it actually turned out to really look like a guitar! Here’s how I did it…
Coming up with a template
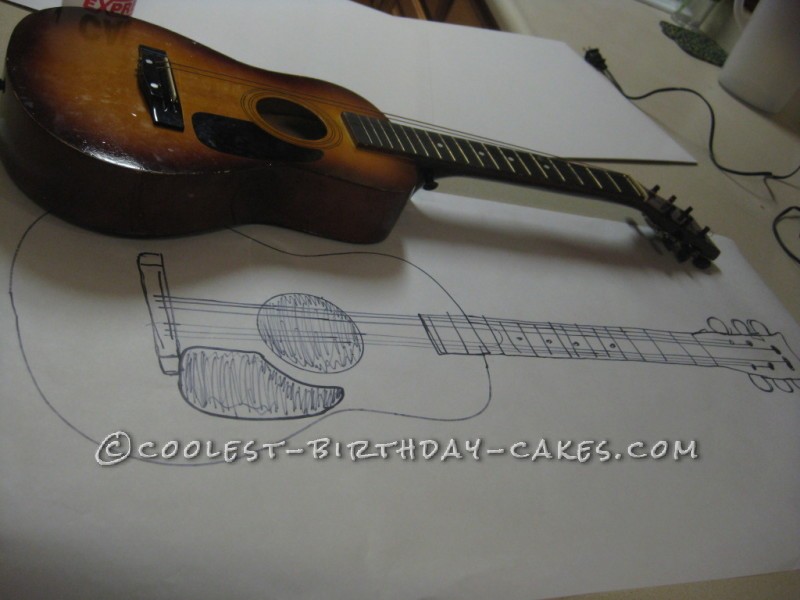
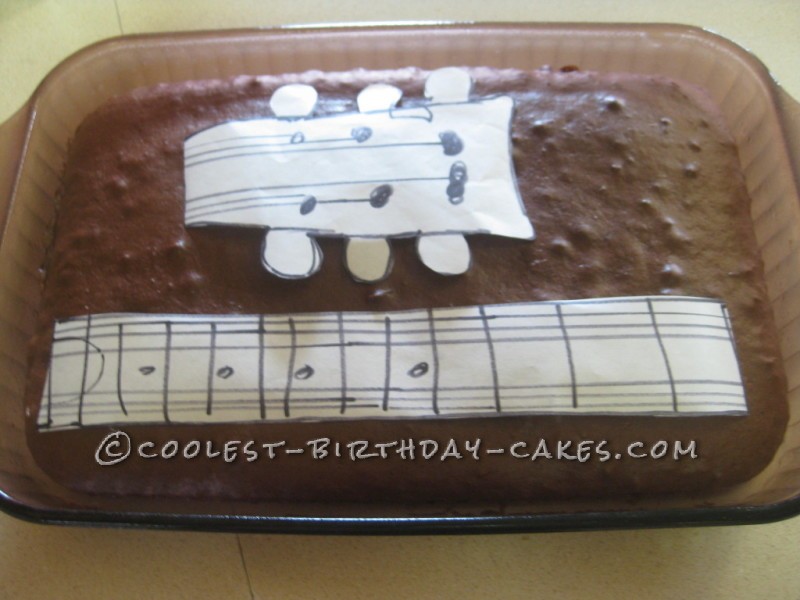
I looked up templates online, but they seemed to be too small for what I wanted. So I decided to make my own. I traced my son’s small toy guitar onto freezer paper.
Cake sizes and Carving the Cake
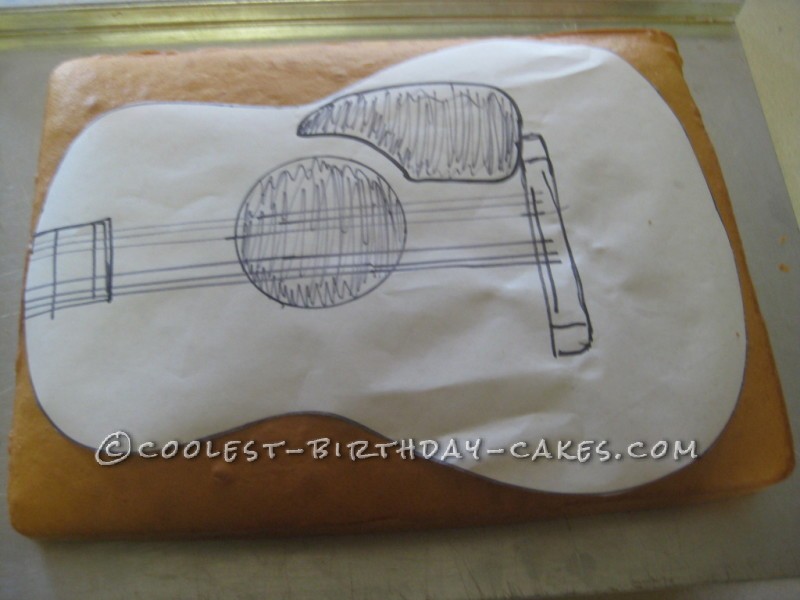
I used an 11×15 cake ( I baked a white cake from a box mix) and placed the paper body of the guitar on it.
For the neck of the guitar, I baked a 9×13 cake (I used chocolate for this cake just because! ha). I had to cut the Paper “head and neck” into two sections to fit onto the cake.
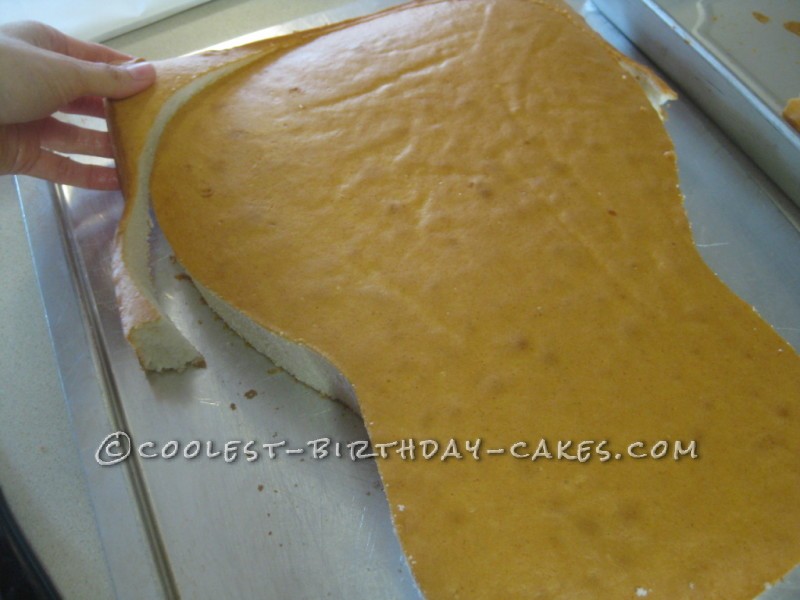
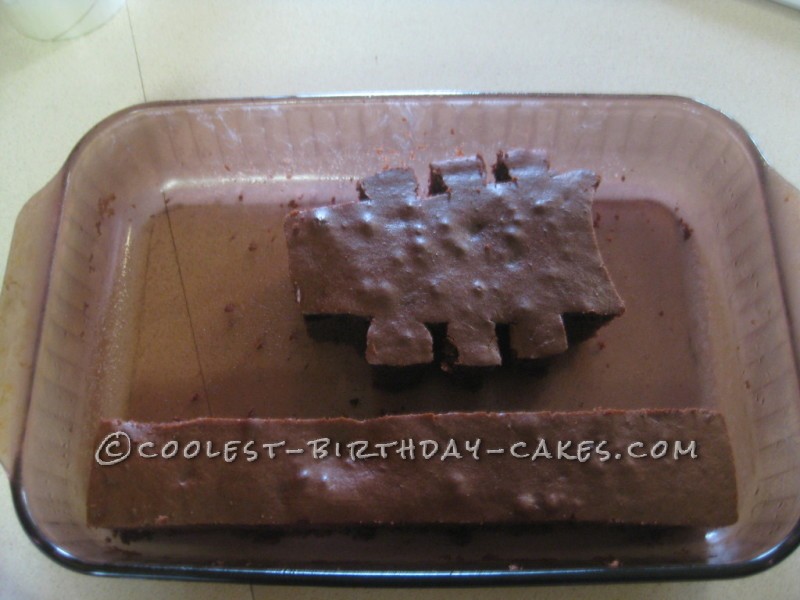
Note: I froze the cakes for 2 or 3 hours to firm it up before I cut them. It was surprisingly easy to cut out. And the frozen cold scraps were DELICIOUS! ;)
The hardest part was cutting in between the tuning keys (or whatever they are called…I’m not a musician!).
What Do I Put It On????
Now for something to put it on ! That was a problem.That seems to always be my dilemna when I transport cakes…especially odd sizes. But I ended up taking two large cake boards and taping them together. But I didn’t want the tape or the crack to show so I covered it in freezer paper. You could also use the special cake foil…but umm…I didn’t have any, ha!
Assembly Time
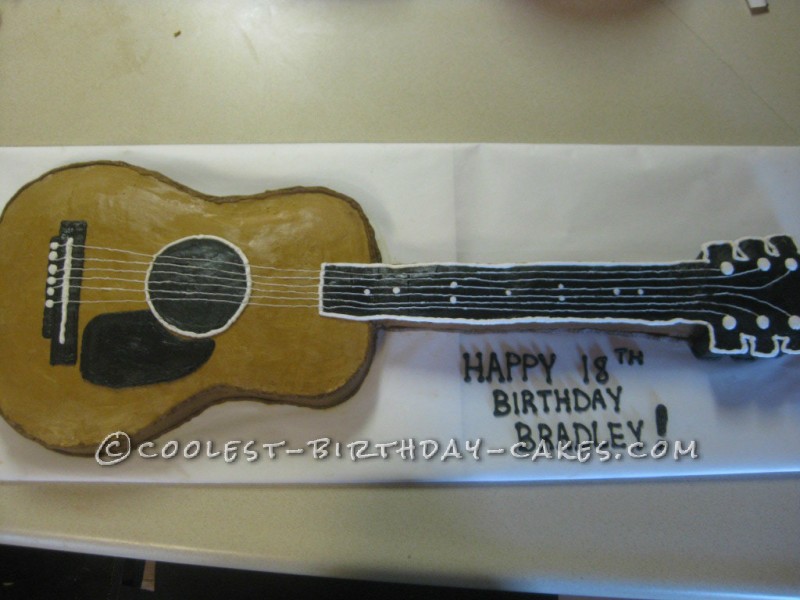
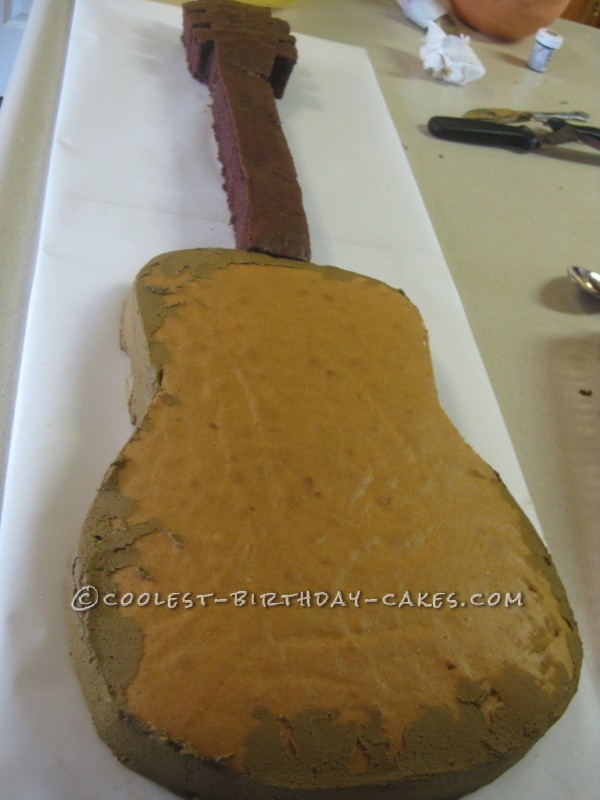
I assembled the neck and head onto the body of the guitar on my now extra long cake board. I covered it in brown buttercream icing. I tinted it a little darker on the sides. I dipped my offset spatula in water to get the icing really smooth on top.
Decorating Details
After I had the body iced, I used a cup to outline the circle (hole) and then filled it in with icing and smoothed it with water. I cut out the little paper scratch guard and pressed it into the cake’s body icing just to make an outline and then removed it and filled in the outline the same way with icing.
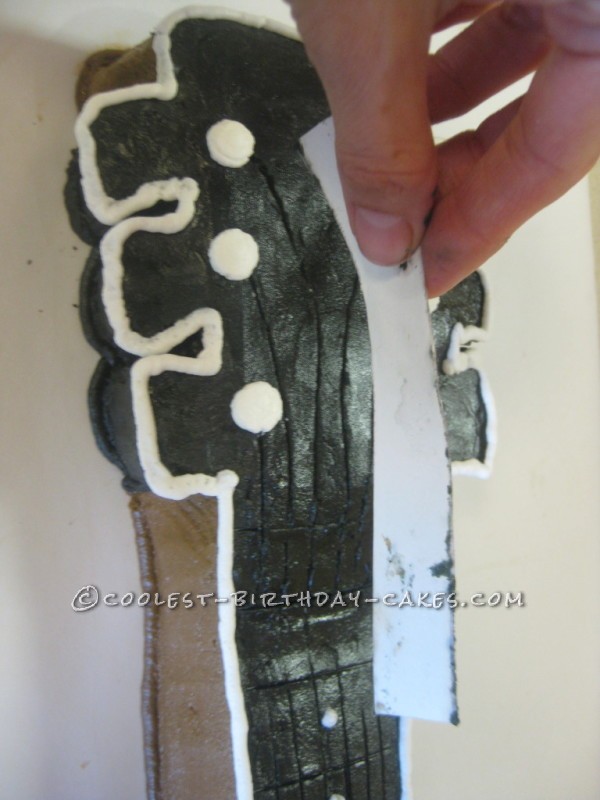
For the neck I iced it black and trimmed it in white. I made marks for frets with a piece of cardstock. I also used the cardstock strip of paper to press out where the strings would go. I did not trust myself to free hand draw them with icing. It worked great. I used the smallest tip I had and just slowly drew 6 strings with white icing.
Before I drew the strings I made the black strip and “connectors” for them on the bottom of the guitar body. I was a bit off centered on this, but it just wasn’t going to be redone! Overall It turned out beautiful and my friend was ecstatic! And I was very proud of it!

Related cakes:
 Awesome Gibson Electric Guitar Cake
  Surprise 21st Birthday Guitar Cake
  Coolest Homemade Guitar Birthday Cake
  Coolest You Rock Guitar Cake for a 6-Year-Old
  Coolest Life-Size Bass Guitar Cake
  Coolest Fender Electric Guitar Cake
 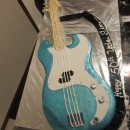 Cool Fender Precision Bass Guitar Cake
  5 Dinosaur Cake Ideas of Jurassic Proportions