Take a look at these cool homemade Tinkerbell cakes shared with us by cake decorators from around the world. Along with the birthday cakes here, you’ll also find loads DIY birthday cake-making ideas and how-to tips to inspire your next birthday cake project. Enjoy!
And don’t forget… if you end up with a cool cake, have great tips to share or pictures of awesome birthday cakes you’ve made in the past, share them here and be a part of our coolest birthday cake community.
Latest Tinkerbell Cakes
- Coolest Tinkerbell Cake Ideas and Decorating Tips
 I made this Tinkerbell cake for my boyfriend’s niece’s 4th birthday party. She really likes Tinkerbell and princesses so I … Read more
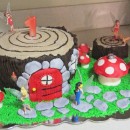
 - Awesome Tree Stump Tinkerbell Birthday Cake Idea
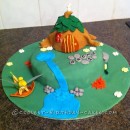
 Deciding on a Tinkerbell Birthday Cake Idea There has only been two times total for both kids that I didn’t make … Read more
 - Magical Tinkerbell Doll Cake
 I made this Tinkerbell doll cake for little Maddy. I am her great aunt and we were at her cousin Ada’s party (the … Read more
 - Fun Fairy Cake For A First Birthday!
 I made this tinker bell doll fairy cake for my niece’s first birthday. It was a bundt cake with a … Read more
 - Cool Tinkerbell Cake with House and Rainbow
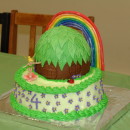 My daughter wanted a Tinkerbell cake for her birthday, with specific instructions that it also had to have her house … Read more
 - Coolest Tinkerbell Cake
 My best decoration ever, a Tinkerbell stand up cake and 24 cupcakes for my beautiful niece’s birthday. Breaking my head … Read more
 - Coolest Tinkerbell Birthday Cake
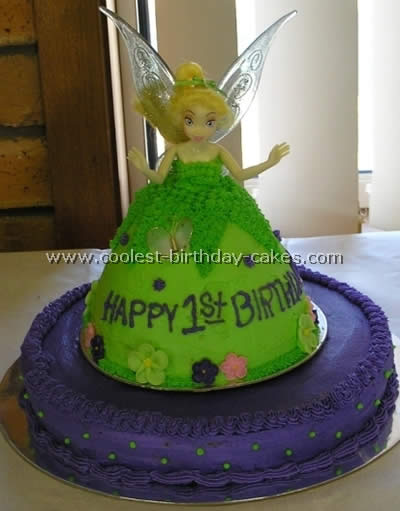
 I made this Tinkerbell birthday cake last year for my daughter’s 1st birthday. Two layers of 10″ cake covered in butter … Read more
 - Coolest Homemade Tinkerbell Cake
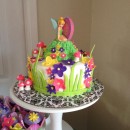
 This Tinkerbell cake is a 4 inch and 6 inch cake iced in butter cream with fondant decorations….leaves, and flower petals (brushed with … Read more
 - Tinkerbell and Friends Forest Cake
 This Tinkerbell and Friends forest cake idea was originally for my daughter. Unfortunately she decided she wanted to have a Pokémon … Read more
 - Cooelst Tinkerbell Cake and Cupcakes
 I made this Tinkerbell cake and cupcakes for my niece’s 3rd birthday party. She wanted Tinkerbell, so I look on a … Read more
 - Coolest Tinkerbell Dress Cake
 I made a Tinkerbell dress cake for my daughter Ella’s 4th birthday. She loved it! It was a lot of … Read more
 - Coolest Tinkerbell and Fairies Cake for a First Birthday
 After having 3 boys, I was so surprised to find out I was pregnant with my 4th child. Even more … Read more
Featured Cakes
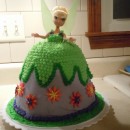
Cake by Patricia G., Surrey, BC
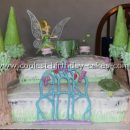
This Tinkerbell cake was made using the pampered chef bowl (any Pyrex deep bowl will do). I bought a Tinkerbell doll (which is shorter than a Barbie) and wrapped her legs in saran wrap and carved a hole in the cake and put it in. The Tinkerbell cakes were topped with play rings for the all the little girls to keep
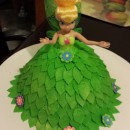
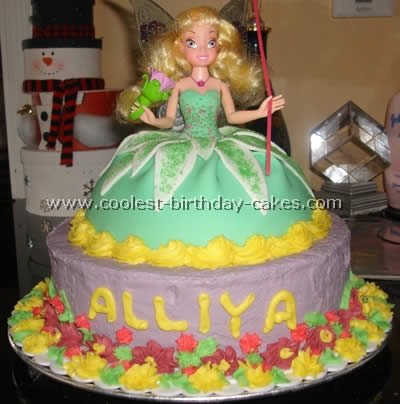
Cake by Beth R., Melbourne, Australia
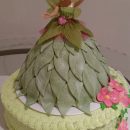
I got the idea from Stephanie L. but with my cake I chose to make her dress two shades of green. The bottom cake was a 12 inch round and since my friend’s little girl was having a green and purple Tinkerbell party then I thought that cake should be purple.
For Tink I used the Wilton Wonder Mold and iced the entire skirt smooth with leaf green with a touch of yellow to make a lime green. I took a toothpick and made V markings around the top of the skirt to give it that Tinkerbell look and used a start tip to fill it in. The star tip was used on upper body as well. I made the green color at the top of the dress brighter and darker to match the bow in her hair.
I just used the same icing for the bottom of the skirt but added more leaf green to make it a little darker. I loved the two greens together. I piped some purple here and there and just star tipped the border at the bottom of her dress. I bought sugar flowers at the local cake shop to match along with a butterfly.
This was my first attempt at Tinkerbell cakes and it was a fun to do.
Cake by Renee B., Sicily, Italy
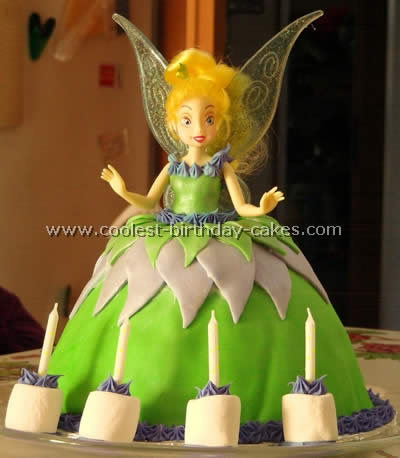
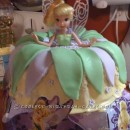
I made this Tinkerbell Doll cake for my daughter’s fourth birthday. I was a little nervous because I’ve never made a doll cake before but I was very surprised at how easy it was! This wonderful website has many ideas for Tinkerbell cakes and I copied some ideas from the other cakes. I used the Wilton Wonder mold cake pan for the cake and a Tinkerbell doll that I bought just for this reason. I used two instant cake mixes and had enough batter left over to make 12 cupcakes after filling the pan.
I baked the cake according to the directions (it took a little over an hour) and let it cool completely. Then I covered the outside of the entire cake with buttercream frosting and used Wilton’s pre-made fondant icing for the skirt. I was very surprised at how easy it is to use fondant icing. Wilton carries a bright white variety that you can color yourself (I used green and lavender) and then roll or cut into whatever shape you need. I rolled out green for the main part of her skirt and then shaped it to drape over the cake.
After I had the cake covered I removed Tinkerbelle’s clothes and put them away and wrapped her lower body from the chest down with plastic wrap. I cut a hole in the top and inserted the doll until the cake was even with her waist. Because the doll was shorter than most Barbie dolls she fit beautifully. I used a little more of the fondant icing to shape the bodice of her dress. Leaf shaped cut-outs in lavender made the petals of the skirt and then I dusted them with Wilton’s Pearl Dust to make the shimmer. After I was finished with the fondant I piped in the rest of the details with colored buttercream frosting. I didn’t want to spoil the cake by inserting candles so I inserted them into large marshmallows and decorated them with more of the buttercream and stuck them to the plate with even more buttercream.
All in all I was very happy with the way the cake turned out and my daughter loved it! Not including the cake baking and cooling it took me a little over three hours to complete the cake decorating from start to finish.
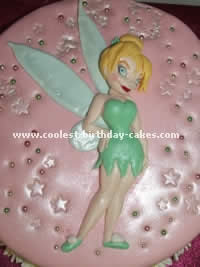
Cake by Hannah E., Perth, Western Australia
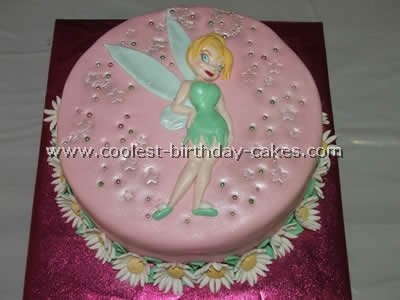
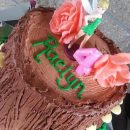
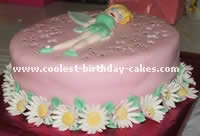
The cake was a two-layer chocolate ‘crazy cake’ baked from scratch with chocolate buttercream. All of the icing and decorations you can see are made from sugar paste (fondant). I covered the cake in pink sugar paste. The daisies were made with a daisy cutter and the centers were textured by pressing small balls of yellow sugar paste against a sieve. I allowed them to dry before attaching them to the cake with sugar glue.
The leaves were made using a rose leaf cutter. I decorated the top of the cake using star plunger cutters green silver and pink cachous and edible silver luster powder for Tink’s fairy dust. To make Tink I printed a coloring picture from the internet to use as a guide because I couldn’t copy from the other Tinkerbell cakes on this site. I figured that a flat pose (standing vs sitting cross-legged or bending forward) would be easier to model in 3D. The hardest part was definitely her head as sugar paste does not hold its shape well- next time I will try modeling paste!
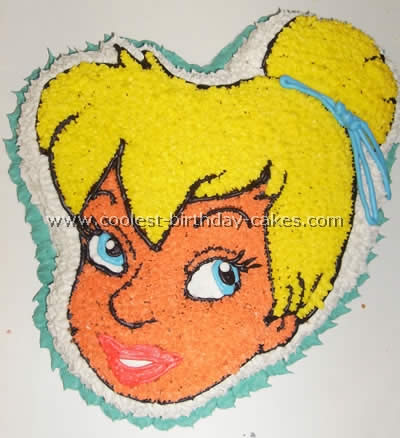
This was my first character cake. I used the Wilton Tinkerbell pan and the Wilton colors to tint the icing. Instead of icing the entire cake first like the instructions said I outlined the details in black and starred in the appropriate colors. I even starred the sides of the cake instead of icing smooth because I really like that look.
This is my first ever attempt at Tinkerbell cakes and the teachers at school loved it and even ordered cakes!
Related cakes:
1000+ Coolest Homemade Animated Character Cakes  1000+ Birthday Cake Decorating Ideas and How-To Tips
  1000+ Coolest Homemade Movie and Book Character Cakes
  1000+ Awesome Animal Cakes and Lots of Inspiring Cake Photos
 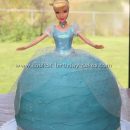 100+ Coolest Cinderella Birthday Cakes
  700+ Game and Toy Cakes to Inspire Your Birthday Cake Decorating
  700+ Coolest Web Series and Television Character Cakes
  750+ Food-Shaped Birthday Cake Ideas and Cake Decorating Techniques
Your comment has been sent successfully.