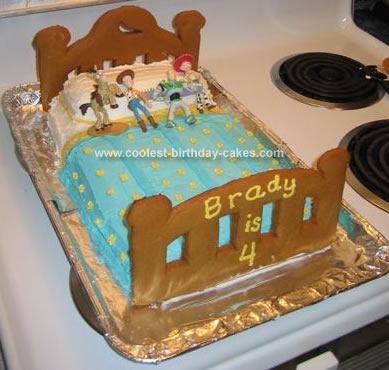
This Toy Story Birthday Cake was modeled after a couple of cakes on this site. The bed is a 9×13 cake. I made 8 1/2×2″ rectangular-shaped rice krispie treat for the pillow.
The headboard and foot board are each one piece of gingerbread. I rolled out the gingerbread onto a Silpat silicone baking sheet, then used a table knife to cut around paper templates that I had drawn. I rolled the gingerbread fairly thick but also put it in the freezer after I baked it to make sure it would remain sturdy enough.
I frosted the cake, then used a fair amount of extra frosting as the “glue” to adhere the frozen gingerbread (didn’t take it out of the freezer until the last minute) to the bed.
The characters came from the Disney Store.
Related cakes:
 Cool Homemade Andy’s Bed from Toy Story Cake
 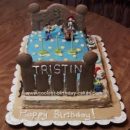 Coolest Toy Story Birthday Cake Design
 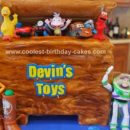 Coolest Toy Story Toy Box Birthday Cake
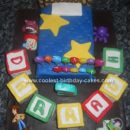
  12+ Coolest Peppa Pig Cake Ideas
 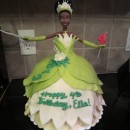 Coolest Ice Cream Tiana Doll 4th Birthday Cake
 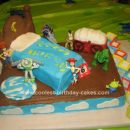 Coolest Toy Story Birthday Cake Idea
 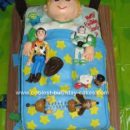 Coolest Toy Story Cake
 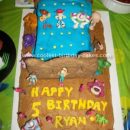 Coolest Toy Story Birthday Cake Idea
I used this cake as a model for my 4 year old’s birthday cake. It was wonderful! Thanks for posting your picture and directions – it was a blessing for me!
I love your cake design. I have just made one similar for my sons 4th Birthday. Your gingerbread bedhead and foot was the best design. Thank you so much. Cheers
Did you add anything else to the frosting to make it stick better or was putting the gingerbread in the freezer enough? Also, I plan on putting stars on the cake. What should I make them out of, instead of fondant?
I love your cake! I am making this for my nephew. He is turning 4.
Thanks!
I really love love this cake. The way you did the headboard is just awesome. It is the best yet. Do you have the pattern that you used for that by any chance? If so would you consider e-mailing it to me? Plz..pretty plz lol!! I want to do a cake like this for my nephew and I want it to look as good as yours lol. Thanx!
How far in advance did you make the headboard and footboard?
what kind of gingerbread did you use? was it a box mix that you rolled out?
My grandson is turning 6 this wk. and picked out this cake from all the website cakes. I have a few questions I hope you will answer. I have never made gingerbread, so is the batter thick enough to roll before you cook it or did you roll flat afterbaking? Is the icing buttecream or fondant. Thanks, Beverly
Thank you so much!! Your cake was the inspiration for my sons 3rd birthday cake. When he came to me and asked for a Buzz Lightyear cake I wasn’t quite sure how I was going to achieve it but seeing this design was truly inspiring!! He loves his Buzz on Andy’s bed. Thank you so much!!
Okay, first, sorry to all who asked timely questioned that I never responded to–I’m just seeing them all now. Whoops!
Some clarification on the gingerbread…I used a standard gingerbread recipe from a Christmas cookie cookbook. I rolled it out fairly thick–at least a 1/4″. I baked the gingerbread 24 hours in advance.
As for the templates for the headboard/footboard, I just used a ruler and drew them out by hand on a sheet of paper. The only thing you need to worry about is making sure they are 9″ wide and at least 4″ tall, so they fit the ends of your 9×13 cake.
I did not do anything special to the frosting to make it stickier…just used the standard Wilton recipe. The stars I made using my Wilton frosting tips. (I don’t care for the taste of fondant.)
Hope that clarifies some things!
Just made this cake, what a fantastic idea! Thanks for posting it. For others – if you live in an area with a Michael’s Craft store, they are currently selling a Toy Story book set that includes a short storybook, play mat, and ALL of the Toy Story figures in 1-2 inch sizes. The book was only $12 – the figures were perfect for the cake.