
My daughter is completely mad about the new Frozen film from Disney (and so am I a little!), and she asked me to make her a birthday cake in this theme.
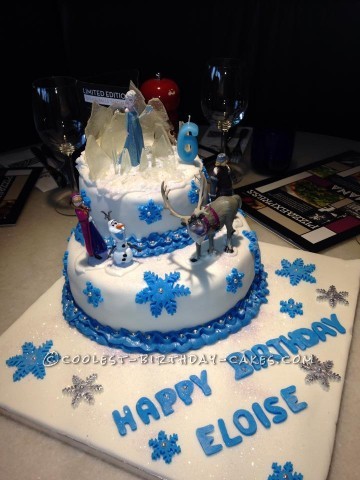
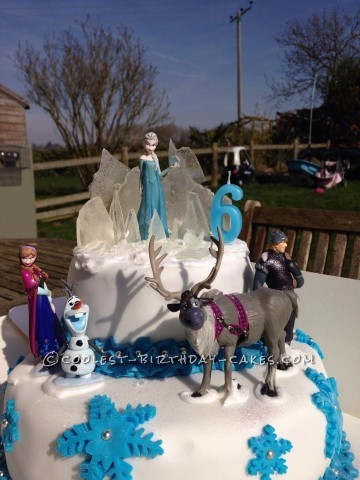
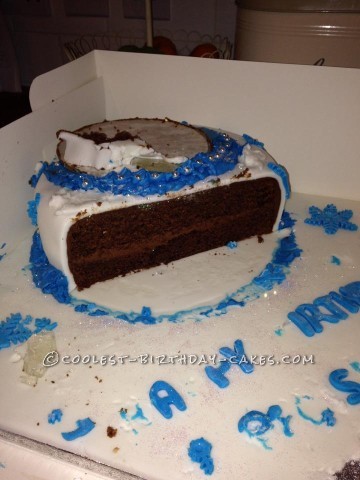
I had the idea of making the cake with some of the figures she had got on a recent trip to Disneyland Paris. I am not experienced or patient enough to attempt to make them from sugar paste!! I knew I had to make a two tier cake, as I wanted Elsa to be above the others in her ‘ice palace ‘, so I baked two chocolate cakes, filled them with chocolate butter cream and covered them in white fondant for snow.
I bought a board a lot bigger than the cake, as I wanted to cover it in white fondant to look like snow and write a message on it, as there would not be room for this on the cake. I stuck the bottom tier to the fondant covered board with royal icing and doweled it to support the weight of the other tier. This was a challenge for me, as I have never done a two tier cake or used dowels before. It turned out to be quite straight forward.
When the cakes were in place on the board, I colored some royal icing blue and iced around the bottom of each cake, which was a nice contrast to the white. This is probably the most disappointing part, as I am not good at piping. I had planned to do stars around the bottom in the blue and place a silver ball in each one. I quickly realized this was not going to happen and changed it to a sort of ribbon effect and placed silver balls in it at regular intervals (do this before the icing sets, or they will not stick!)
I them used some snowflake plunger cutters and some edible glue to stick the blue fondant snowflakes to the board and the sides of the cake. I did a few in white fondant and painted them silver using edible food paint. I placed a silver ball in the middle of each. I used alphabet cutters to cut out the message. This was easily the most frustrating part! I have never used alphabet cutters before and found them really difficult to get the fondant letters out of. I ended up cutting some of the letters freehand as I just could not remove the fondant from the cutters (I am considering taking them back to the shop, as they are so rubbish!).
Once the basic cake was assembled and decorated, I used royal icing to attach the figures and topped the top tier with some royal icing, which was meant to stand up in peaks like snow. This didn’t work but still served as a good base for Elsa and the ice.
The ice was made by melting clear mints in the microwave in a silicone baking tray. Once melted, use the back of a spoon to spread out the molten mints to cover the base of the tray. BE VERY CAREFUL WITH THIS!! I stupidly got some stuck to my hand and it hurt a lot and I have a lovely blister to show for it! When the mints are cooled and set, snap them into pieces to make the ‘ice shards’ and stick them into the top tier around Elsa. I used the smaller bits at Elsa’s feet, to look like crushed ice. I then sprinkled edible glitter all over the cake for extra ‘frosty’ effect.
My daughter LOVED the cake and so did all of her friends. We had a Pizza making party at Pizza Express and customers not involved in the party were coming up and taking photographs of it. I had had this idea in my head for so long and was so pleased that it all came together the way I imagined it. I have very limited knowledge of cake making and this was always going to be a gamble but if I can pull it off anyone can!!
Related cakes:
 12+ Coolest Frozen Birthday Cake Ideas for the Ultimate Frozen Theme Party
  Coolest Disney Frozen Birthday Cakes
 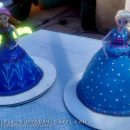 Easy Frozen Anna and Elsa Doll Cakes
 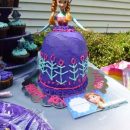 Sweetest Elsa and Anna Cakes
 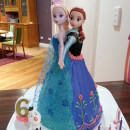 Coolest Frozen Anna and Elsa Cake
  Coolest Snow White Cake
  Snow White’s Enchanted Forest Cake
  15+ Cool DIY Monkey Cake Designs for the Birthday Cake Enthusiast
Can I buy one of this cake?please!
Can I buy one of this cake?please!
The cake is beautiful! You did a great job. What size cake layers did you use?
The cake is beautiful! You did a great job. What size cake layers did you use?