The construction birthday cake recipe is one called chocolate zucchini sweet potato cake. You can go here for the recipe. My review is listed under hollygollygee and it will tell you the adjustments I made on the recipe. The buttercream recipe is from a Williams Sonoma cookbook. It is a vanilla meringue buttercream. I love the taste of this buttercream but it might be easier to use a standard buttercream recipe so that you don’t have to worry about refrigeration as much. I followed the directions out of Wilton’s Celebrate with Fondant book.
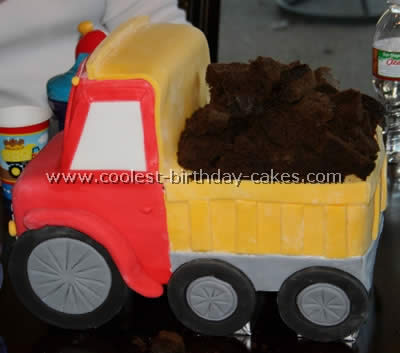
I made four 6X6 cakes and stacked two for the hood and two for the back “dump” part. The layers are filled and frosted of course. The last cake is cut in half and stacked on top of itself creating a 3X6 layer cake that I then shaved off the front so there would be an angle for the windshield. These are then filled and frosted. The whole cake sits on top of a 6X12 cake board wrapped in fancy foil (actually a double cake board). Under the cake board are three 2X2X6 foam pieces covered in foil and glued to the bottom of the board. These are later hidden by the wheels. I made the wheels in advance so they would have time to dry. I just used a small bowl to cut out the large wheels then a baby bottle lid to cut out the centers. I cut circles the same size out of grey fondant to put in the center of the black wheels and then just kind of roll over the top of it to push it together. The spoke impressions were made with toothpicks. The back wheels were done in a similar fashion. Leave these out to dry on a flat surface. I ended up running a damp finger over the back of my wheels and leaving them face down to dry. I felt like I needed to glue them together so I used the water trick.
The front two cakes and the cab of the construction birthday cake were covered with red fondant and the back was covered with yellow. Then I made templates using a paper towel and a pencil for the windshield and cut out the shapes from white fondant. Each window is framed by a 1/4 inch strip of red fondant cut at angles at the corners. Then on the back I cut a nice thick piece of yellow to cover the back side of the cab and also the top of the cab. Then another thick strip to go at the end of the previous strip that sits on top of the cab. Then I cut 10- 1/2 inch strips of yellow to go around the bed of the truck as well and a thick yellow strip to go around the top of the bed to give it depth. Then I added a thick grey strip at the bottom to finish off the bed. The back to the hood I made another template to figure out how to cut the grill. I used an embosser tool to cut the lines into the grill. (By the way all of the fondant pieces are glued in place by using a q-tip (with a little water. I just apply a little water to where I am gluing something and then stick it on). Then I cut two grey pieces to go over the top of the grill for depth.
At this point of making the construction birthday cake I glued on my wheels using thinned fondant which is really just fondant mixed with a little water to make a very sticky paste. After I got my wheels on I rolled out an even log, cut it in half and then flattened the ends to make the running boards (out of red). Lastly I added little bits of yellow for lights on the cab and headlights and then little bits of red for door handles. Voila! The dirt in back is actually cake scraps. I only had 8X8 pans but needed 6X6 cakes so I used the trimmings to make “dirt”. This worked great for his smash cake. It was for my son’s first birthday.
Related cakes:
 Coolest Construction Vehicle Cakes and Dump Cake Ideas
  Coolest Construction Cake Ideas
  Cool DIY Construction Cakes and Lots of Unique Birthday Cakes
 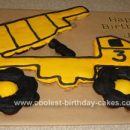 Coolest Dump Truck Cake Ideas
 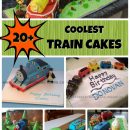 20+ Coolest Train Cake Ideas to Inspire Your Birthday Cake Decorating
 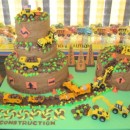 Cool Homemade 3 Tiered Construction Birthday Cake
 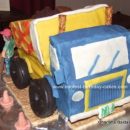 Coolest Dump Truck Cake
  Easy Construction Site Cake