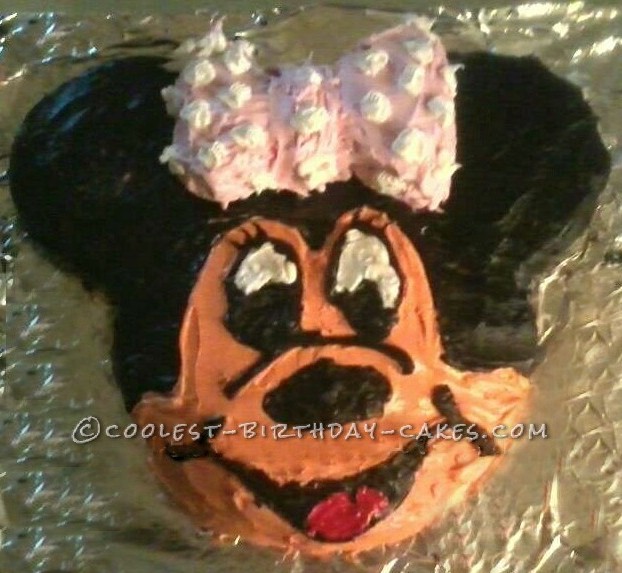
To make this Minnie Mouse cake, I started with a simple box of white cake mix. I used two round pans and split the cake into two even amounts for the pans. Then, I set them at the right temperature in the oven.
While the cake was baking I mixed the icing (bought at the store). I had to use food coloring at the time as I didn’t know about all the special stuff available to use. I mixed the white icing with orange and red icing to make the color of the face and then mixed more white with red to make pink for the bow.
Once the cake was finished, I took a plastic bowl and cut out the ears not making them a complete circle, but an almost full moon shape. I made two of those out of one cake. Once I cut the ears I used the rest of the first cake to carve out the bow with a knife.
Next, I started the gluing process. I used icing to glue the ears to the second cake and then started pretty much painting the cake with icing, putting the color for the face where it needed to be and the black where it needed to be, all while looking at a picture of Minnie Mouse. Then, I put icing on the bow, made white polkadots with the white icing, and then glued the bow in between the ears with icing.
All of this was for my oldest daughter’s 2nd birthday party. I had never carved and made a shape of a cake and colored it before. I wanted it to be special, so one day she could see the photos of her birthdays and how great they were. Growing up I didn’t always get a birthday party and I wanted it to mean something to my daughter, so I made a cake instead of buying one.


Your comment has been sent successfully.