My best friend’s favorite princess has always been Belle from Beauty and the Beast, so to please her (more to satisfy my own need for extravagant baking, actually) I went to work on her Belle Birthday Cake (we’re both 18). I made a pilgrimage to the holy Mecca of all craft stores, Michael’s (cue the singing Angels) and bought a Wilton cake pan, doll pick, and fondant; I also went to my own personal Hell, also known as Wal-Mart, and bought the new princess Belle doll, several boxes of white cake mix, and several cans of white icing.
I began with the skirt first. I assembled the doll pan and sprayed it with copious amounts of PAM (there is nothing worse than a cake that rips in half because you forgot to grease than pan! Nothing! So do NOT forget!). It took about a box and a half of mix to fill the pan enough to make a nice full dress for Belle (short and skimpy is not the Disney way!). Be forewarned the batter will take much longer than usual to bake and will come out denser and moister; it’s still delicious. Then I prepared two 9″ round cake pans (don’t forget the PAM!), using about a box and a quarter (left over from the skirt) for each.
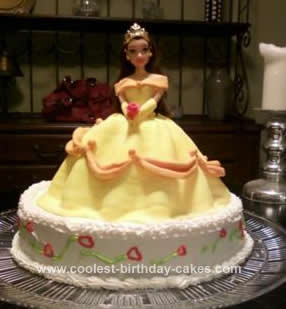
Now for the fun part, decorating! I assembled the skirt and the bodice separately, first I dirty iced the skirt with a little more than half a can of white icing, then I rolled twelve or thirteen “logs” of fondant that were a little less than an inch in diameter at the bottom and tapered to a point at the top (these will create the folds in her dress and give the cake more movement and dimension). I placed these around her skirt about an inch or so apart (this part I just kind of played by ear’ well sight actually, until it looked right). Then I rolled out the fondant (leaving enough for the detail work later) and dyed it a bright yellow for her dress and bodice (if you’re getting streaks in you fondant just keep working or rubbing it, they’ll come out). I loosely laid a flat piece of yellow fondant on her skirt (do not restrict yourself to sharp lines, let the dress flow on the cake) and worked it until it covered every part of the cake (don’t freak out about any mistakes, they can always be hidden in the back). Then I cut a piece of yellow fondant to fit her body (the Wilton doll pick, with the princess doll’s head on it); wetting the back of the fondant helps it stick to the doll.
I then placed the doll pick into the skirt and worked the fondant so that there were no cracks. I then tied her hands with a bread bag tie and placed them on her lap and covered her forearms with the yellow fondant for her gloves. Next I dyed whatever fondant was left red (for the rose) and a golden orange color by mixing together oranges and yellows (for the swags and her shoulders). I cut a long piece of the orange fondant for her shoulders, tapering it in the center and placing a small sphere of the orange fondant there. Then I made several swags (following the directions on the fondant box, fold a small rectangle of fondant loosely by gathering the sides) and placed them asymmetrically around the cake, separated by small balls. I made the rose according to the fondant packaging as well (loosely roll a small strip of red fondant then gather it at the bottom).
Now the body should be assembled (it helps to assemble her on a card board round so that you can easily transfer her). I placed the 9″ cakes on each other (icing in the middle) and frosted them with the white icing and put Belle in the center of the cake. (Now let your piping skills go wild!) I used a kind of double back technique with the frilly tip, for a more elegant look, and then used just a small line tip to draw on the roses, in keeping with the Beauty and the Beast theme, but each cake will be unique and personalized, so just pick up that piper and let loose!
Related cakes:
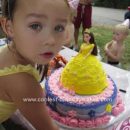 Cool Homemade Belle Birthday Cake for My Daughter’s 4th Birthday Party
 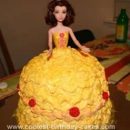 Coolest Princess Belle Cake
 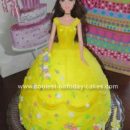 Coolest Belle Birthday Cake
  Dazzling Princess Cake Fit for a Princess
 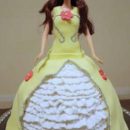 Coolest Princess Belle Birthday Cake
 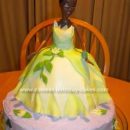 Coolest Princess Tiana Birthday Cake
  12+ Coolest Peppa Pig Cake Ideas
 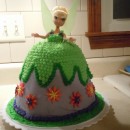 Coolest Tinkerbell Dress Cake
You did a great job.