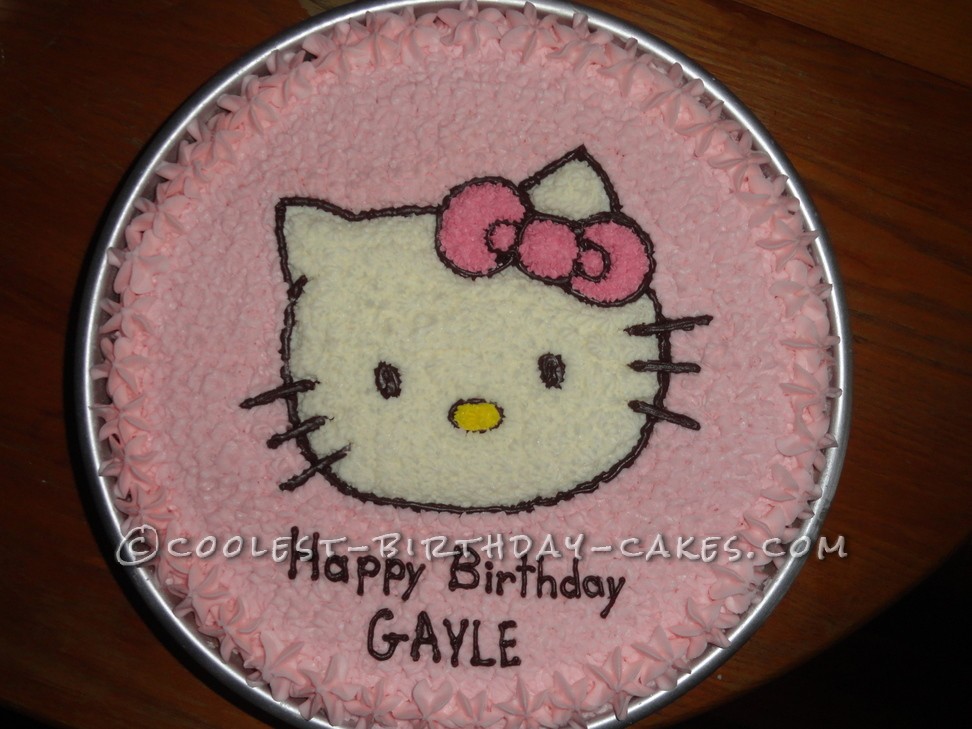
No need to have the specialty cake mold for a Hello Kitty cake. Do your own.
1) Bake your favorite cake from scratch or mix and fill 1/2 – 2/3 cake pan. I used a 14″ round cake pan. Bake accordingly.
2) Let cool and transfer to cooling rack.
Make at least 2 batches of buttercream icing. Have a pre-made batch of chocolate icing. Chocolcate will be used to outline your Hello Kitty, make whiskers, outside of eyes-nose-bow.
Color majority of icing light pink. Small portion darker pink and yellow. Leave the rest white.
3) Cut out picture of Hello Kitty from coloring book. If not large enough, enlarge on copier to desired size. Cut out along the outside lines, the cut in around bow but not the whole way just enough to use for a guide.
4) After your cake has cooled you can put it on a large baord or bake into your cake pan. I put mine back in cake pan for easier transport to party.
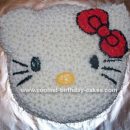
5) Take your picture and lay on cake. Take some cocoa powder and gently rub lightly around your picture, so that you get outline. Once outlined picture and area’s remove paper. Take chocolate icing in bag, tip size 3 or 4 and outline entire area. You will build up the black lines later, but need your lines in all locations ie. around Hello Kitty head, whiskers, eyes, nose, bow tie.
6) Using any desired star tip fill in Hello Kitty first with your white icing. Used size 16 (star tip) for white. Then complete the pink bow, size 16 or 17 (though any can be used). Then fill in nose. For eyes you will fill in with the chocolate.
7) After Hello Kitty is complete go back and fill in the rest of the cake with the light pink. I used my size 17 or 18 star tip. At end took 1M and did larger stars around the outside.
8) At the very end can go around Hello Kitty again so that none of the colors overlap (ie. white and pink). Then put on any writing.


Your comment has been sent successfully.