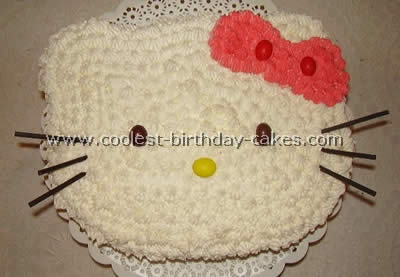
Her popularity is endless, so we are not surprised by the abundance of Hello Kitty cakes! She is so iconic that many cakes only feature her face. But don’t be fooled! It is the simplest cakes that require the most precision. One wrongly placed whisker can make a Hello Kitty cake look slightly evil. Find out tips and tricks these bakers have used to get the correct shape of her eyes and nose. Hint: jelly beans are involved.
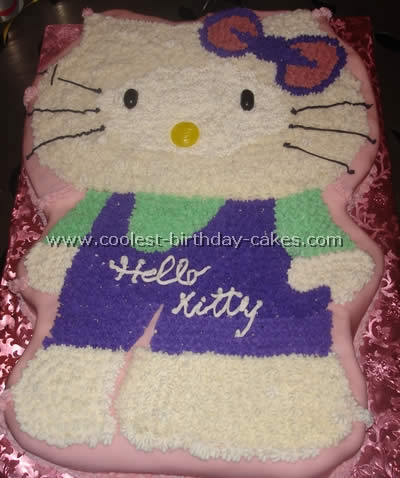
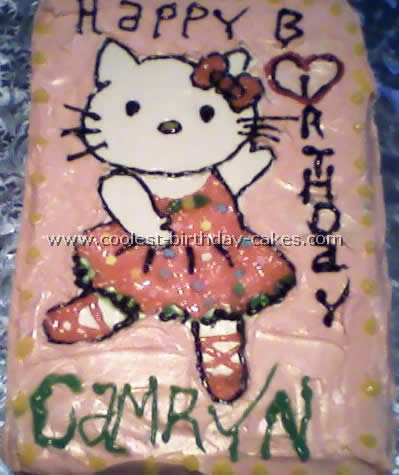
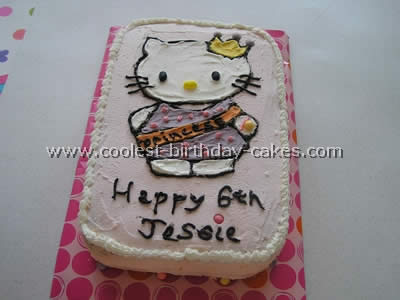
Many decorators have personalized their Hello Kitty cakes using different color bows and dresses to match the party décor. You will also see cakes which create a scene in which Hello Kitty is featured. Wherever she is, Hello Kitty looks content to be there (maybe because she has no mouth).
Additionally, you may not know, but Hello Kitty was revealed to be a girl, not a cat! We’re still in denial. Either way, it hasn’t stopped her youngest fans from requesting a Hello Kitty cake on their birthdays.
Latest Hello Kitty Cakes
- 12 Cool and Easy Hello Kitty Birthday Cake Ideas
 Here’s a collection of easy and cool Hello Kitty Birthday cake ideas contributed by visitors to our coolest birthday cakes site. Enjoy … Read more
 - Coolest Hello Kitty Cake Ideas and Decorating Tips
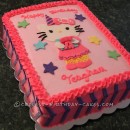
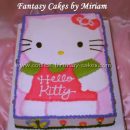 I baked a half sheet cake for this Hello Kitty cake and filled it. I made a drawing from the … Read more
 - Coolest Hello Kitty Birthday Cakes
 I actually got this cake idea from your website for Hello Kitty birthday cakes. I put two boxes of confetti … Read more
 - 7 Cool Hello Kitty Cake Ideas
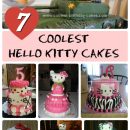 Looking for the purr-fect Hello Kitty cake ideas for your upcoming party? Here’s 7 cakes we love. 1. Pretty Hello … Read more
 - 4th Birthday Hello Kitty Cake and Cupcakes
 I had this Hello Kitty cake in mind one year ago for my granddaughter. She didn’t even know about Hello … Read more
 - Coolest Biker Hello Kitty Cake
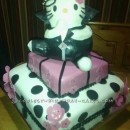 I received an order for a Hello Kitty Cake but they wanted it to be a biker Hello Kitty so … Read more
 - Coolest Mr. Tumbles Hello Kitty Cake
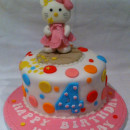 My friend’s granddaughter wanted a Hello Kitty cake made for her 4th birthday. She also loves Mr. Tumble so this … Read more
 - Simplest Hello Kitty Cake Idea
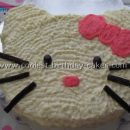
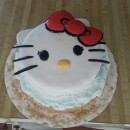 This Hello Kitty cake was as simple to make as it looks. To build it, I placed a 9″ round … Read more
 - Coolest Hello Kitty 5th Birthday Cake
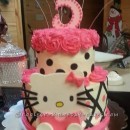 Hello World! I made this Hello Kitty 5th birthday cake for the sweet little daughter of one of my co-workers. … Read more
 - Cool Hello Kitty Cake for a Birthday Girl
 I had a friend ask me to make a birthday cake for her grandaughter’s birthday party to match her birthday … Read more
 - Beautiful Hello Kitty Cake
 One of the ladies I work is a complete Hello Kitty fanatic. I decided for her birthday I would make … Read more
 - Coolest Strawberry Hello Kitty Cake
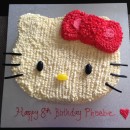 My lovely daughter Phoebe really wanted a Hello Kitty Cake this year for her 8th birthday…. and it had to … Read more
Featured Hello Kitty Cakes
Cake by Ruth B., Inver Grove Heights, MN
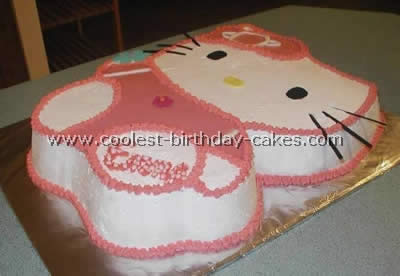
This is the first cake I have ever tried to decorate beyond just frosting and sticking in some candles! I followed the advice from this website for Hello Kitty cakes and figured I would give it a try for my twin daughters’ third birthday. I thought it came out great!
I baked a white cake in a 9×13 pan; letting it cool before removing to a platter. I frosted the whole cake with pink canned frosting. I then made buttercream frosting to do the Hello Kitty and other decorating. I got a picture of Hello Kitty from a website, enlarged it, printed it out and then cut out the Hello Kitty head. I used a toothpick to lightly trace the head onto the frosted cake. I then piped a thin line of frosting over the toothpick tracing. This provided a nice outline which I then used the star tip to fill in the design. I used two licorice buttons as eyes and a yellow Jordan almond for the mouth.
As you can see the only real difficultly I had was in spelling “Birthday”, by mistake I left out the “d” making it “Birthay”!
For my sister’s 18th I made her a Hello Kitty cake. It was really simple. Just find an image from the internet, print it out to the appropriate size (I printed mine in two halves on landscape paper to make it large enough). I then made two square tin cakes (around 22cm). You then take the print out and make a tracing paper/baking paper copy of it.
I froze my Hello Kitty cakes to make the assembly and icing a little easier. Using your template pin it to your cake and cut around the template. You can then use the template to mark out the lines for the icing. I used a skewer to do this. I then iced the whole cake white. Using a licorice roll (flat licorice that is rolled up) I then cut this into strips to do the black outlines. Fill in the other bits with the red and pink icing and use smarties for the eyes and nose.
My idea came from this website. I was so inspired by all the Hello Kitty cakes I decided to do one myself. I used round pans and made it into an oval for her face and decorated it! It was really simple. Thanks for all the great ideas. I love this site.
Cake by Jennie B., Bountiufl, UT
These Hello Kitty cakes made with four different shaped round cake pans. I used a frosting recipe from the Betty Crocker cook book and when I decorated to add the kitty I just thinned the frosting a little bit so the face would be smooth.
I used a picture from my little girl’s Hello Kitty coloring book for the template for my two cakes. It was a pretty easy job it took me about four hour’s total. It was time consuming but fun.
Cake by Brandy F., Boiling Springs, SC
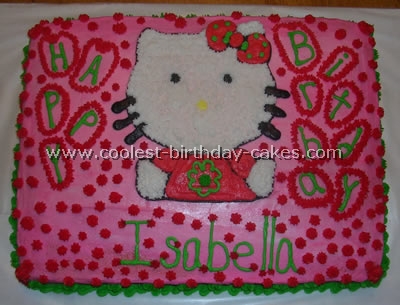
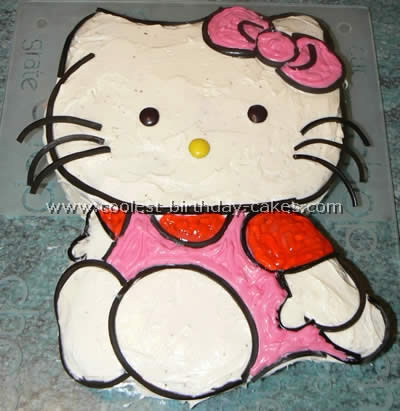
My niece wanted a Hello Kitty cake for her birthday. I got online and found a coloring page of Hello Kitty cakes. I printed it up and cut it out. I laid the picture on the cake and outlined it on the cake (after I have frosted it pink) with a toothpick. I then removed the picture from the cake and outlined Hello Kitty in black frosting. I starred in Hello Kitty.
I used my homemade buttercream frosting for the entire cake. I like my cakes to look busy so I then added just a lot of star “flowers” all over the cake to give it spunk!
Cake by Isabel B., Malta, Europe
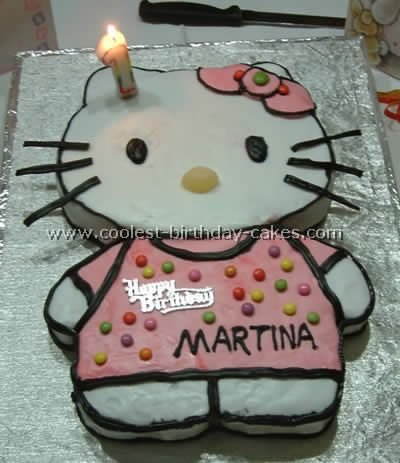
I wanted to make a special cake for my daughter’s first birthday. I started looking up sites of kid’s birthday cakes and I came across a template of Hello Kitty cakes. But I wanted to make a complete Kitty so I drew a picture of the body on baking paper. I made two cakes, one for the face and one for the body. My husband helped cutting the cakes.
I used ready made white icing for the face, hands and feet and colored a portion of it in pink for the dress. I used licorice for the outline of the body and black icing for the face and eyes. The whiskers are also from licorice held in place with toothpicks. I used a yellow sugar sweet for the nose. I also decorated the dress with small Smarties.
Everybody liked the cake especially my two nieces who have already requested me to make them Hello Kitty cakes for their next birthdays.
Cake by Chantal R., Panama City, Panama
I made this cake for a friend that loves Hello Kitty! I have never decorated Hello Kitty cakes before and it was pretty easy. I baked a rectangular cake. I leveled the cake with a cake leveler. I made the frosting and the icing. I stacked the cake and trimmed it using a Hello Kitty template that I got online.
I put a thin crumb coat on and with a star tip I decorated the whole cake. Start from bottom to up. The bow is also with the same star tip but with pink icing. The eyes and nose are M&Ms. The whiskers are BBQ sticks stained with black food coloring (boil water and add the food color, let simmer for 15 min or until dyed) and that’s it! Everybody loved it!
I was shocked to know that Wilton doesn’t have the tray for Hello Kitty cakes. This cake was made for my friend’s daughter’s birthday. But I got an idea from Hello kitty cakes on this site (Hello kitty 11). It was very helpful for me because this was my first Hello Kitty cake.
First I drew Hello kitty on a paper. (Replication of the birthday invitation I got). I traced the template with a tooth pick and cut the cake for its shape (kept one inch out line of the cake). Then I used fondant around the one inch space left from the tracing. After that I used the tip #17 (star shape) for the entire hello kitty. Finally I used jumbo black jelly beans for the eyes and tip # 2 for the whisker.
Cake by Darlene E., Toledo, OH
This cake is half strawberry half white. It’s a strawberry swirl cake with white frosting topped with strawberry frosting. I used a knife to make the shape of an “S” to make this a strawberry swirl cake. When the cake is cut it reveals strawberry swirls.
To create the “Hello Kitty” character I frosted the cake with white frosting first then with a toothpick I drew the sketch of the desired picture which I copied from other Hello Kitty cakes on this site. Later I traced it with black glaze frosting. The entire character was completed with the gazed frosting using multiple colors. After the character completed pink frosting was added around the character and blended in with the base (white frosting).
Cake by Julie G., Charlotte, NC
We got the idea from this website for Hello Kitty cakes but my daughter wanted hers to be a Princess Hello Kitty. We found a picture, my husband sketched out a template for me and I made two 9×13 vanilla cakes. I made a vanilla filling for the middle then iced the entire thing in solid pale colors.
Then I used his template to outline the figure in black and went back and filled in with various colors of icing my daughter’s choices in colors. We added jelly bellies for eyes and nose and sweet tart chewy candies for more decoration then I piped around the top edge in white.
Find, enlarge, print and cut out the pattern which you can copy from other Hello Kitty cakes. Bake the cake, lay the pattern on the cake, secure with toothpicks, cut out pattern, turn out and position on foil covered cake board cut in half and add filling. Trim down top so it’s flat.
For the icing I used a Pastry Pride non dairy topping you keep frozen then whip up. It’s the same texture as buttercream but it’s got a really light taste. This is where you really need to make your shape contour correct on this one; a big piece of paw fell off and crumbled so I had to rebuild it about an inch out of just frosting. This is the point where you take a wet cloth and carefully run it as close to the cake as possible and remove any crumbs or icing smears. I know some people slide wax paper under then remove it but I’ve never been able to master that. This is the easiest way for me.
The clothes and bow are the marshmallow fondant (thank you who ever made that recipe!); it’s so fast and easy. It was ready in like 10 minutes and I still have over half left. The flowers are precut foamies, the eyes, nose, whiskers are all foam I cut out and I just tinted and piped the star borders with left over icing.
This cake fed about 30 people! And it’s a snap for even a beginner like me!
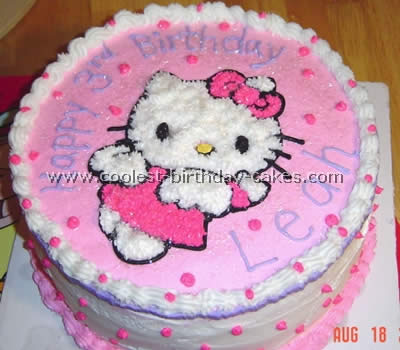
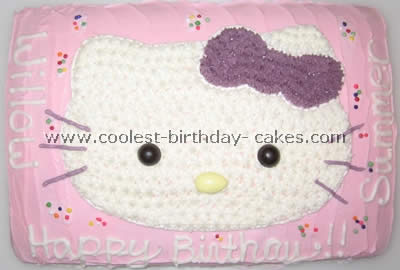
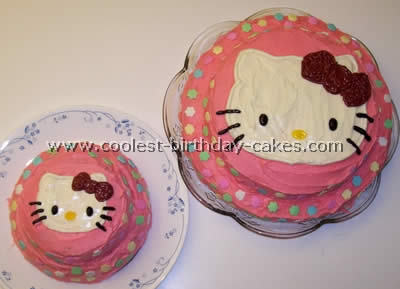
I just made this Hello Kitty cake for my daughter’s third birthday. It is a double layer 10″ round devil’s food cake with buttercream icing. I found a picture of Hello Kitty cakes that we liked and then traced it on wax paper.
After the cake was leveled and cooled I frosted it in white buttercream frosting and then added a thin layer of pink frosting to the top only. I allowed that to crust over and then placed the traced picture on top of the cake and poked out the outline with a large sewing needle (a toothpick as recommended by Wilton didn’t want to go through the wax paper). I traced the outline with black frosting and a #5 decorating tip. I filled in Hello Kitty with white stars (#16 tip) and Hello Kitty’s dress/bow with rose frosting (#16 tip). I added black for the eyes and a yellow nose. The writing was done with purple frosting and a #3 tip.
I added edible white cake sparkles to the entire top of the cake…my daughter just loves sparkles!! I added accents and borders to the cake and it was finished. My daughter just loved this cake and it was delicious too!
Related cakes:
 1000+ Coolest Homemade Animated Character Cakes
  1000+ Birthday Cake Decorating Ideas and How-To Tips
 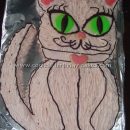 100+ Coolest DIY Cat Birthday Cake Ideas
  1000+ Coolest Homemade Movie and Book Character Cakes
 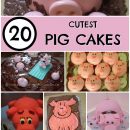 55+ Coolest DIY Pig Birthday Cake Ideas
  1000+ Awesome Animal Cakes and Lots of Inspiring Cake Photos
  Coolest Birthday Cake Decorating Ideas for Hobby Bakers and Pros
  700+ Coolest Web Series and Television Character Cakes