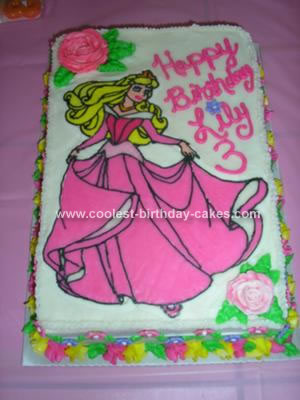
This is a sleeping beauty cake I made for my niece. It is a rectangular cake which I lightly frosted with white buttercream. I made a green vine around the sides of the cake. I then made a bunch of fondant flowers, using a fondant flower punch. I placed them on the vines around the edge of the cake.
To make sleeping beauty, I printed out the design and taped it to a piece of cardboard paper. Then I placed wax paper over the top and secured that as well. I lightly sprayed it with cooking spray and wiped it with a paper towel. Then I outlined the picture in black frosting. After that I started to fill in the design using a round piping tip (like I was coloring a coloring book).
After I had the design all filled in, I used a large round tip to pipe zag zag white buttercream all over the top of the picture (covering it up). I carefully spread it around to cover the design evenly. Then I put the cardboard with the design in the freezer. After it was frozen, I carefully turned it over onto the top of the cake and peeled of the wax paper.
Since the design was now higher than the rest of the frosting on the cake, I piped a layer of white to make it even. I made a few buttercream roses and put them on top. Then I finished the bottom border with a large star tip.
Related cakes:
 Coolest Sleeping Beauty Baby Shower Cake
  Cool Homemade Sleeping Beauty Birthday Cake
  Cool Homemade Sleeping Beauty Doll Cake
  Coolest Sleeping Beauty Birthday Cake
 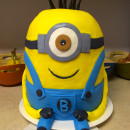 Coolest One Eyed Minion Cake
 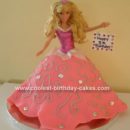 Cool Homemade Sleeping Beauty Doll Birthday Cake
  12+ Coolest Frozen Birthday Cake Ideas for the Ultimate Frozen Theme Party
  12+ Coolest Minnie Mouse Cake Ideas
I’m sorry. I’m a little confused. Did you transfer the picture(icing) onto the cake or did you leave the wax paper on the cake with the picture(icing) on it?
Hi, Amber
I really like the idea how to transfer to the cake. It really inspire me., but I am a little bit confuse the last part which is
“After I had the design all filled in, I used a large round tip to pipe zag zag white buttercream all over the top of the picture (covering it up). I carefully spread it around to cover the design evenly. Then I put the cardboard with the design in the freezer. After it was frozen, I carefully turned it over onto the top of the cake and peeled of the wax paper.” Are you using royal icing?
Can you give more details?
Amy
Hi, i have seen this done. What you do is:
~prep the cardboard, or other sturdy moveable surface (cookie sheet, etc.) as she listed.
~Outline the image with black or whatever color you want to use.
~Fill in the design as you want, making sure to get the corners, leaving no ‘holes’.
~With a larger tip, cover all what you just did with white frosting in a zig-zag, then smooth it out not pushing down hard, just enough to smooth it out
~move the cardboard with frosting design to the freezer and leave it for at least an hour.
~to remove the design, release the tape and carefully place the SOLID frosting design on the cake with the WAX PAPER FACING UP, when it is positioned as you want it, remove the wax paper.
~you can either have the cake frosted before and then put a border around the design, or have the sides frosted and then frost the top of the cake to the same level as the design.
hope that helped.