My 5 year old is a very big Sonic fan this year. So of course he wanted a Sonic the Hedgehog Cake. This wasn’t going to be an easy task seeing as the difficulty of making a 3d head of Sonic wouldn’t be easy. So I did some extra research and discovered I could do a “Buttercream Transfer” instead.
After googling a lot of cakes for idea’s my son finally picked out what type of sonic he wanted for his cake. And thus- his Sonic the Hedgehog and Tails Cake was born.
First I made him a double layer Vanilla cake. (Vanilla is his favorite). I’d like to say I used a 10×10 cake pan 2x’s. After which, I butter creamed his cake with blue butter cream icing (to match the butter cream transfer I was making.
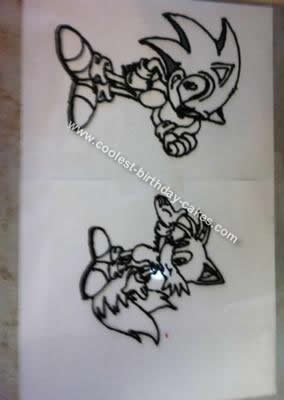
After the cake was cooling in the fridge I began my butter cream transfer experience. First I retrieved a flat metal cookie sheet. Printed a picture of Sonic and Tails from online and taped it to the sheet (remember when doing transfers that your picture will not face the same way you’ve copied it.. it’ll have the switched around effect so make sure its facing the wrong way when copying it to get the effect you want).
Second, place cookie sheet paper over the picture (wider then the picture itself) and tape that down. This is where you’ll put your butter cream on to freeze.
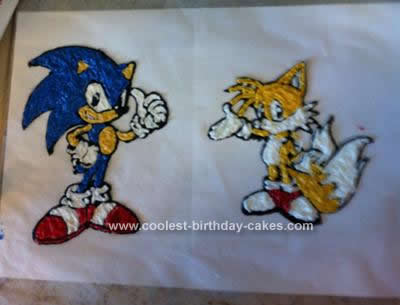
Next, find some Wilton store bought colored tubes for the outlines (and only the outlines). Carefully begin outlining your picture (its best to have the picture all ready in black and white outlined and then use another picture for reference on what colors you want on the inside).
Fourth, start to color in the picture with homemade butter cream (all the colors should already be made and make sure when using a butter cream recipe you use the one that only allows REAL butter in your recipe.. it’ll freeze better and transfer easier (taste good too).
After you have finished drawing in the lines of your transfer make sure to take a toothpick to make sure there are no gaps in your pictures.. it might break when you place it on the cake if you don’t do this step. After which you place an outline (in blue, because the cake is blue) and an extra thick layer on top of your picture (because remember, that part is really the bottom part when it freezes).
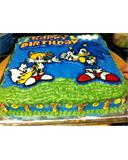
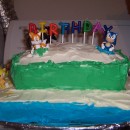
Place it in the fridge for over an hour at least and when it’s ready flip it on top of our blue sonic cake.
After all this is said and done, I hand decorated palm tree’s on the bottom with tiny coconuts. And made some clouds on top to give it an effect. I made another little sign that said “Happy Birthday” and butter cream transferred that too. In the end we had a completely butter cream only cake (perfect for a 5 year old’s birthday party).


Your comment has been sent successfully.