First I made 3 cakes 6”, 8” and 10”, and then stacked them largest to smallest and put reinforcements in to support the stacking. Dirty iced and placed in freezer for a couple hours. Removed from freezer and using a straight edge knife began carving. Cut in long sections around the bottom edge and placed those pieces around the edges of the bottom two layers to get a smoother transition. Once cake was shaped to my satisfaction, I dirty iced again and returned to refrigerator.
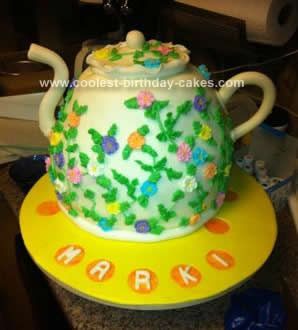
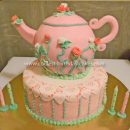
Shaped fondant for spout, and handle. Rolled out 2 circles of fondant one larger than the other. Rolled an oval shaped piece and placed in the center between the circles, using water attached. Took the outer edges of the larger circle and pinched sides up evenly spaced used a dot of water to attach. Rolled a ball for the top of the lid. Rolled out enough fondant to cover the teapot and covered the teapot. Don’t worry if your fondant doesn’t look great. Placed cake in refrigerator for a couple of hours.
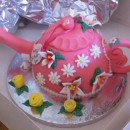
Died my buttercream icing green and using line tip, I started at the bottom of the teapot and created vines…making sure to cover any fondant ugliness!! Then I attached the flowers at vine intersections or wherever I thought they should be. I had order the small flowers online so I would not have to make them. Once all the flowers were attached using a leaf tip I began making leaves and filling in empty spots. Rolled cords of fondant different sizes to cover the connection areas for the spout, handle, lid and base.
Thought it turned out amazing. The white fondant actually looks like porcelain.


That is soo coolx