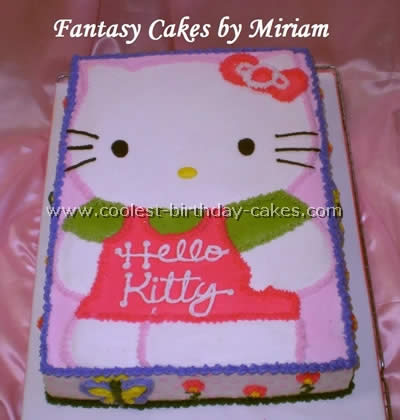
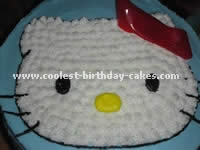
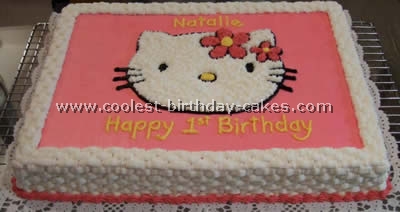
I baked a half sheet cake for this Hello Kitty cake and filled it. I made a drawing from the Hello Kitty invitation on a piece of wax paper. Filled and iced the cake and placed the drawing over it and traced with a toothpick.
Then I proceeded to fill in the outlines in the appropriate color. Because it looked too plain after I finished I decided to decorate the sides with polka dots and little flowers using the stars tip.
Simple and Sweet
Cake by Marisa C., Lincoln, MA
I looked at a few pictures of a Hello Kitty cake on this site to get the idea started for this one. For the cake, I used two cake mixes and three pans, one rectangular 9 x 13 inch for the base and two 8 inch rounds. I flipped the base upside down for a level surface and flipped the rounds as well, also cutting off the uneven bumps on the tops of all three first so they would sit flat.
I cut one of the rounds in half and separated the sections. The other round, I cut into three strips and took the middle strip and placed it between the half sections of the first round to make an oval. Then I used the leftover pieces to fashion in triangle ears. I frosted the base with pink icing, placed the pieces for Hello Kitty on top and frosted her in white. I added premade flower decorations (from a Barbie set) and used black jelly beans for her eyes and a yellow jelly bean for her nose. For her whiskers I used licorice twists cut lengthwise in half to make them thinner and then into sections, two long and one short on each side. For the bow I used wire ribbon.
This Hello Kitty cake was an easy cake to do and it came out great. I can’t wait to surprise my daughter tomorrow with it. She’s been a Hello Kitty fan forever.
Chocolate and Delicious
You will need some fridge or freezer space in using this technique (or if its winter time that will work!). To make this Hello Kitty cake I used a technique my sister had learned from someone else. Using a cutting board as a firm base I taped a computer print out picture of this Hello Kitty character. On top of that I taped a piece of plastic wrap large enough to cover the picture being traced and some extra space. I used a thin black icing to trace the picture then put it in the freezer to help make the icing firm.
Then after it’s firm take it out and generously fill in the colors (for this picture, where I wanted a smoother look, I used a thinner icing). Return it to the freezer. When all is firm remove tape from plastic wrap and cutting board.
Transferring the Image
Pick up the plastic wrap with icing character on it. Lay it upside down onto the top of the iced cake (it’s scary the first time and having a helper beside you to hold two corners will be much easier).
Once it’s on the cake, use a finger to rub lightly on the back of the plastic wrap to help stick the frozen icing to the cake. This will also press the icing rows together and warm the plastic wrap a little so it will peel off – but don’t do it too much. Slowly pull the plastic wrap from the frozen icing. You can fix any mistakes with a toothpick pretty easily if needed.
Pink and Purple Hello Kitty Cake
Cake by Janine L., Palm Harbor, FL

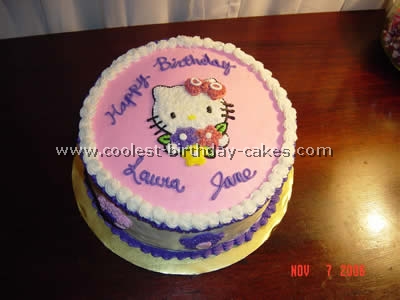
This is a three layer white Hello Kitty cake with buttercream frosting in the middle. The frosting I used is the Wilton recipe. I covered the whole cake in fondant and then cut out pink flowers and used them as the bottom border and also put them around the sides of the cake.
I traced a picture of Hello Kitty onto the top of the cake and used medium consistency to pipe out the figure. Then using a star tip I filled in the outline.
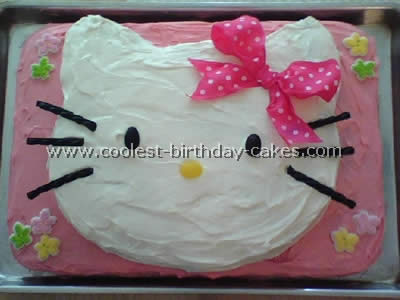
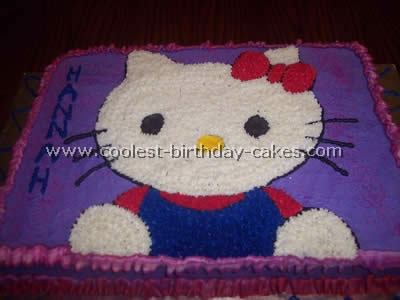
Clever Hello Kitty Hair Bow
Cake by Kelly S., Grand Rapids, MI
My niece desperately wanted a strawberry hello kitty cake with blue frosting for her third birthday and here is the result. Fruit by the Foot (or a fruit roll up) makes a terrific bow. The outline really seemed to improve the look. The Williams Sonoma tube decorator frosting hardens when it cools and leaves a nice comic looking line and was great for the eyes. The nose is frosting chilled and molded into an oval and set on top.
Beautiful Hello Kitty and Smash Cake
Cake by Cheryl S., Cortland ,OH
This hello kitty cake was for a friend’s little girls 1st Birthday. It’s a double layer half chocolate and half French vanilla. Wiltons butter cream recipe. I assembled the cake and frosted it first. I did a basket weave on the sides. For Hello kitty I drew her and cut it out then laid it on the cake and outlined her with a toothpick. I piped in with black and then filled in with stars. The little cake was the smash cake.
Cute Homemade Cake
Cake by Val T., Louisville, KY
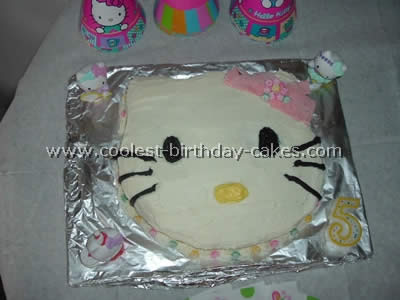
I used this site for my ideas. This hello kitty cake was for my daughter’s 5th birthday. She loved it. I use bubble gum tape to make Hello Kitty’s pink bow along with tiny mints. I used a white box cake mix and two tubs of frosting. This was fun to make and everyone loved it.
Perfectly Piped Hello Kitty Cake
Cake by Cherry L., Fort Riley, KS
My Daughter wanted a Hello Kitty cake for her 6th birthday party. I searched and searched for ideas and could not find any that I liked. What I ended up doing was finding a coloring page that had Hello Kitty on it and then filling it in with my daughter’s favorite colors.
I used homemade butter cream icing, tastes great. I used the Wilton recipe that I have included. Butter cream Icing – Ingredients: 1/2 cup solid vegetable shortening,1/2 cup butter or margarine* , 1 teaspoon clear vanilla , 4 cups sifted confectioners’ sugar (approx. 1 lb.), 2 tablespoons milk**.
Cream butter and shortening with electric mixer. Add vanilla. Gradually add sugar one cup at a time beating well on medium speed. Scrape sides and bottom of bowl often. When all sugar has been mixed in icing will appear dry. Add milk and beat at medium speed until light and fluffy. Keep icing covered with a damp cloth until ready to use. For best results keep icing bowl in refrigerator when not in use. Refrigerated in an airtight container this icing can be stored 2 weeks. Rewhip before using. YIELD: 3 cups
*Substitute all-vegetable shortening and 1/2 teaspoon Wilton No-Color Butter Flavor for pure white icing and stiffer consistency.
**Add 2 tablespoons light corn syrup per recipe to thin for icing cake.
Pink Hello Kitty Cake
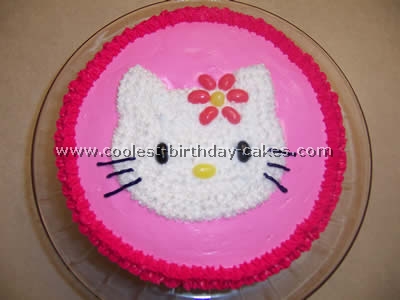
As you will see I used the idea of the Hello Kitty cake already shown on this site. (Thanks to that person who submitted their idea!) Instead of smoothing out the frosting for the kitty head I used Wilton’s star technique. I also did the same for the border.
I am too much of a perfectionist and if I would have tried to smooth out kitty’s face as well I would have been up all night long! This hello kitty cake is a 2-layer cake 8″ round. I frosted the entire cake pink and then did the face on top of the pink frosting.
Carved Homemade Cake
Cake by Kelli P., Lexington, SC
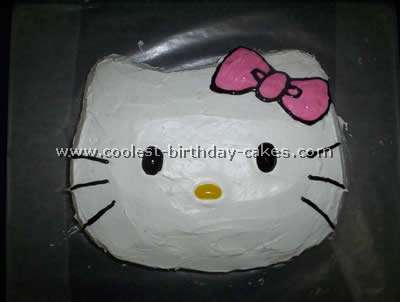
After looking at the cakes on this site I was inspired to make my own Hello Kitty cake. I searched for a cake pan – trying to make it as easy as possible – with no luck. My daughter’s 4th birthday is all Hello Kitty and I’m not exactly known as a fine baker. This particular cake only took about 2 hours to complete.
The boxed cake mix that I used was a vanilla Betty Crocker Super Moist with whipped vanilla icing. I baked the cake the night before decorating and put it in the freezer to prevent crumbling. I put the cake on waxed paper for easy decorating and transporting.
Shaping Hello Kitty’s Head
Using a picture of Hello Kitty I used the tip of the knife to outline the shape freehand. Once the outline looked good I cut all the way through the cake. I spread the icing on top first using a cup of milk to dip the knife periodically. Then ice the sides. Use a spatula to spread icing as even as possible on top for Kitty’s smooth complexion.
I could not find black jelly beans to save my life so I used green ones for the eyes and put black icing over it. I like the jelly beans because it adds dimension, yellow for her oval nose.
The bow was drawn by hand using a tooth pick in the icing. I messed it up spread it out and tried again until I liked it. I used pink writing icing (in the little tube) and spread it out with the tooth pick. Whisker placement is vital to the over all look so I etched them in icing first so they looked okay. Use black writing icing for whiskers and to outline bow.
My daughter loved the home made hello kitty cake creation! No more store bought cakes for us! Thanks for the inspiration.
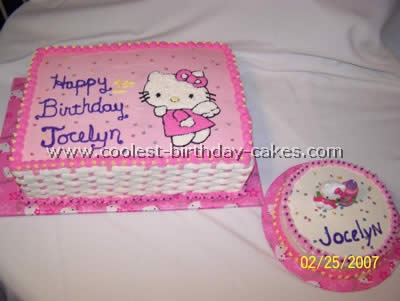
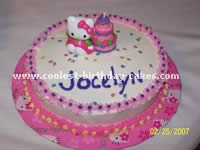
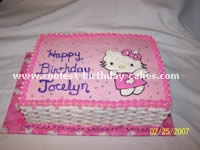
Gorgeous Borders on This DIY Cake
For this Hello Kitty cake, I used an 11×15 sheet cake iced in buttercream. First the sides were iced with a thin coat of white butter cream. Then the top was iced in pink. The cake was then squared off and smoothed out using a long spatula which was dipped in hot water.
Next I used a wide-rimmed margarita glass to lightly press in 2 overlapping circles which gave me an oval shape to draw the face. I lightly dotted my design on the pink frosting using a toothpick so that I would just be able to trace over it. The face, eyes, nose and flowers were then outlined in black using a #5 round tip. They were then filled in using a #16 star tip. Once the face was finished I used a long string of dental floss to mark my border lines on the top of the hello kitty cake. This allowed me to make the border even as well as give me a better idea of where I needed to place the lettering. I used the toothpick method again to lightly dot out where I needed to place my lettering and then wrote over it with a #3 round tip.
Piping the Border
The basket weave border was made by 1st placing stripes from the top of the cake over the corner and down to the bottom using a #4 round tip. Since the design extended up and over the top of the cake I angled the lines on the corners to give it a neat appearance. Then I used a basket weave tip #46 to fill in the design. Last a border was placed along the bottom of the hello kitty cake using a #16 star tip.
The recipe that I used for the buttercream is: 2 sticks of butter softened, 1 cup of Crisco, 2 lb bag of powdered sugar, 3 tsp vanilla, 5 tbsp milk. Whip softened butter and Crisco in a mixer. Add powdered sugar 1 cup at a time until it is all mixed in. Then add the vanilla & mix well. After that, add the milk to give a smooth consistency but not too thin. I used the following Wilton paste colors to dye the frosting: Rose – top, Black – outlines, Rose mixed with Burgundy – flowers & bottom border, Lemon Yellow mixed with Golden Yellow – nose & lettering.
Lovely Lettering For Hello Kitty
Cake by Jennifer S., Williamstown, NJ
I made this hello kitty cake for a neighbor’s 22 year old daughter that just loves anything Hello Kitty. Of course, I came to this site first to get some ideas and then came up with this.
I baked a two-layer 10 inch round cake leveled and filled with buttercream icing. I frosted the entire cake in white and then tinted a portion a pretty mauve to use on the top. The Hello Kitty cake image was from a coloring book.
I placed a piece of waxed paper over the image and outlined it with clear piping gel. I then inverted the waxed paper onto the cake and smoothed to transfer the clear outlines onto the cake. (This is one of my favorite tricks learned at the local craft store cake classes!)
Using the clear outlines I then used my black icing to finish the picture. I filled in with a star tip and built up the face a bit for a rounded 3D effect. Before finishing with top and bottom boarders I used a flower cookie cutter on the cake sides to give outlines to fill in with pink and purple. I finished with borders and some clear cake sparkles on Kitty’s face.
Related cakes:
 12 Cool and Easy Hello Kitty Birthday Cake Ideas
  7 Cool Hello Kitty Cake Ideas
  Coolest Hello Kitty Birthday Cakes
 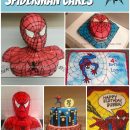 12+ Cool Homemade Spiderman Cake Ideas
 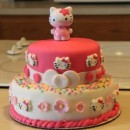 Coolest Hello Kitty Overload Cake
 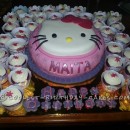 Coolest Hello Kitty Birthday Cake
 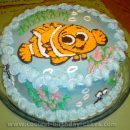 Cool Homemade Finding Nemo Picture Cakes and How-To Tips
  Coolest Spongebob Picture Cake Photos and How-To Tips