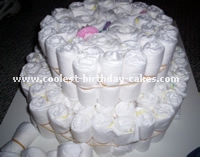
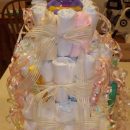
Here are the diaper cake directions I followed to make my diaper cake. I used size one and two diapers, rolled them tightly and secured them with clear hair elastics (by Goody). For the bottom two layers I used an 8 ounce bottle in the middle and put the rolled diapers around it. I did three on the bottom and two in the middle. Around each row I also used a large rubber band to keep them stable. I tried using a 4 ounce bottle for the top layer to wrap around but the bottle was too tall so I just used another diaper.
Then I tied ribbon around it and decorated it. I took out several diaper bundles so I could put stuff inside and that worked really well. I found that a really easy way to attach the toys, binkys and teethers was to use more of the clear elastic bands.
Using diaper cake directions from this site, it was my first attempt at a diaper cake but it will not be the last!
More Diaper Cake Directions and Ideas
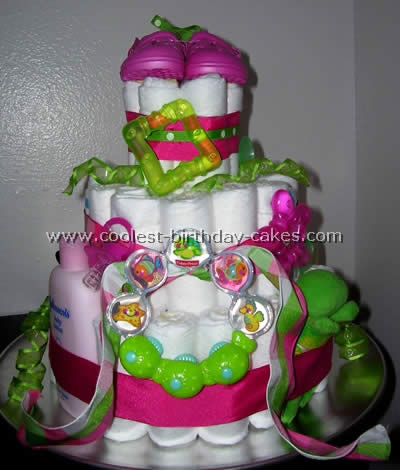
Diaper cake by Gail B., Rocky Face, GA
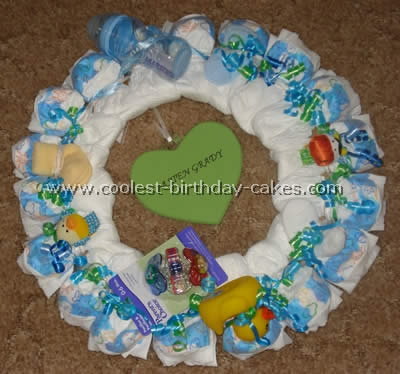
The diaper cake directions for this wreath is just to cut a big circle out of card board and wrap the diapers around it and use ribbons and different decorations. This is the first wreath I have done.
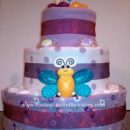
Diaper cake by KariAnn M., Rock Island, IL
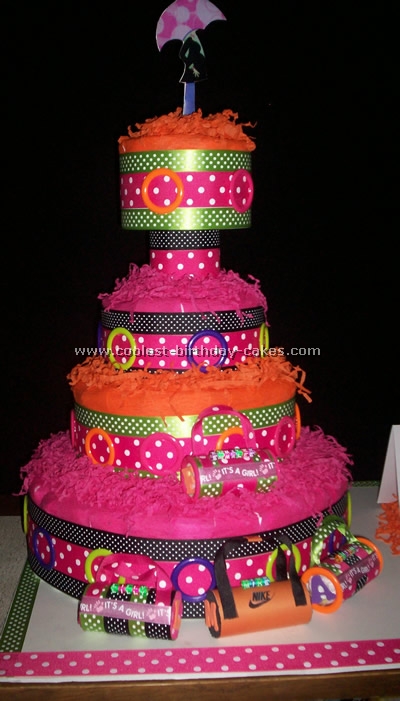
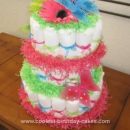
Diaper Cakes are fun and quite easy to create if you have good diaper cake directions. For supplies I needed: Approximately 100 diapers (size 8-14lb), approximately 100 small baby hair ties, approximately six large rubber bands, assorted ribbon, 3-D scrap booking stickers, a few “stuffer” gifts (i.e. bibs, rubber duckie, pacifiers, booties etc.), two tall candles, glue gun and scissors. The great thing is I found most of these supplies in the dollar bin at Micheal’.
These are my diaper cake directions. I started by rolling each diaper and securing them with a small baby hair tie. After all the diapers were rolled I secured approximately five rolled diapers together using a large rubber band. I then began inserting each rolled diaper one by one until the bundle was the size of the layer I was creating. I then removed some diapers from the middle so I could stuff a “stuffer” gift in the center. I positioned the two tall candles on either side of the “stuffer” gift and leaned them towards each other to create a pyramid.
Repeat the same for the remaining layers, threading the candles through each layer. I wrapped ribbon around each layer and secured the edges of the ribbon together with a small dab of hot glue making sure I folded the end of the ribbon under to avoid any fraying. Note: Too much glue will render the diapers unusable so use sparingly.
I used the scrap booking stickers and some “stuffer” gifts to decorate the cake. I secured any unused diapers together tightly with ribbon to create a diaper bouquet to accompany the cake. This was one of the most fun projects I’ve created in a while. It took my approx three hours to complete and was quite inexpensive. Feel free to alter these diaper cake directions to suit your needs!
Diaper cake by Nicole W., Charlotte, NC
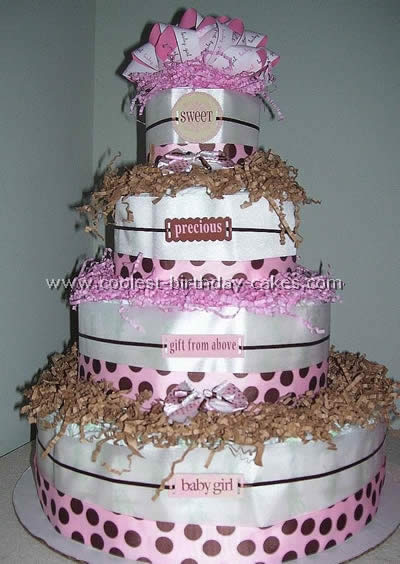
When a good friend announced she was having a much desired little girl I thought her shower was going to have to scream pink! I went ahead and decided to do her entire shower in the Pink & Brown theme since it is so popular now. For her diaper cake I used approximately 100 diapers and constructed the cake in a boutique style which is clean and sleek. I then went ahead and used very wide white ribbon to cover the sides of the cake (and any diaper print). I found many diaper cake directions but preferred my idea.
I added beautiful pink and brown polka dot ribbon some cute baby girl tags I found in the scrap booking section of a local craft store and topped each layer with coordinating paper shred. I topped it with a pink and brown large bow that read “Baby Girl”. It was the hit of the party. Some guests actually thought it was a real cake! I also did her favors invitations decorations and gift bags in the pink and brown theme!
Diaper cake by Amanda H., Charleston
I followed basic diaper cake directions though I used more diapers. My “ingredients” are as follows: 40 Pampers newborn swaddlers, 88 Pampers size one swaddlers, four receiving blankets, four burp clothes, six pairs of socks, five bibs, two spoons, comb and brush set, A&D ointment, baby wash, baby lotion, four travel size lotion, four travel size baby wash, four travel size diaper cream and lots of love!
I used a large bottle of baby wash and lotion rubber banded together for the base of the two bottom layers. For the top two layers and tier we used a box/tube of A&D ointment. The other stuff was hidden inside the cake. I think doing it this way as opposed to using the gifts to “decorate” the outside looks more smooth and neat.
Another thing we did differently was instead of decorating with ribbon against the cake we took construction paper and made a ring to fit around each layer of diapers.
We then used ribbon and colored “rings” and decorated the construction paper. This way it looks less sloppy and you can use a glue gun because it’s not touching diapers. We used crate paper and shredded crate paper to do the icing. We also made little diaper purses. We had to use hot glue on the purses so these are for keepsake only.
We used a toilet paper roll and lots of ribbon and put the families’ names on them. We even made the dad a duffel bag. This was our first cake and we spent about 25-30 hours constructing it because we tweaked it a lot. Total cost for this cake was around $150. This price can be easily lowered by using off brand diapers, not having so many “ingredients” and using not so much ribbon or cheaper ribbon. We presented the cake on a poster board with the ingredient card. Inside the card I wrote the new baby a poem.
Hope someone finds these diaper cake directions useful and idea provoking!
Diaper cake by Jennifer D., Marion, MA
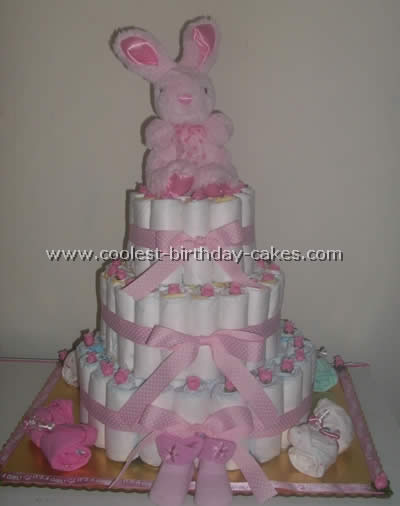
This was my very first attempt at a diaper cake. I actually got the diaper cake directions from this website. I had never even heard of a diaper cake until I stumbled across it on here!
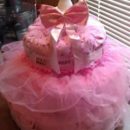
I used about 100 diapers. The top and middle layer are size newborn and the bottom layer are size one’s. I used my daughter’s rubber hair elastics to secure each diaper from unrolling. I then arranged them the way I wanted them and tied a giant rubber band around the whole thing (my husband’s hands were a big help!) I covered the elastics with pretty ribbon.
I went to the grocery store and purchased the cardboard cake holder for .25! There’s a baby bottle in the center to hold the cake together. I took 0-3 month onzies and rolled them up, secured them with elastic and tied them with ribbon. I attached them to the cardboard with pushpins. All the diapers on the outside that are showing have mini pink rose buds in them. I lined the outside of the cardboard with pink “It’s a Girl” ribbon and secured the corners with the same pink rose buds.
Finally I topped the whole thing off with a plush pink bunny! The entire cake is about two feet tall and a little over a foot wide (I didn’t measure!).
Your comment has been sent successfully.