
I baked three separate 13X9″ cakes so I would have plenty to work with for this Electric Guitar and Flames Cake. I leveled the first cake with a wire leveler to make it flat. I cut the first cake in the shape of an electric guitar on the cake board (I drew it on paper first and kept it nearby to look at while I was doing the cutting to make sure I was getting the shape the way I wanted.
I used frosting for filling, then laid the second (leveled) cake on top and copied the shape of the first cut-out cake with a knife (cutting extra cake away as I followed the original shape around the perimeter of the cake) to make it the same. I used the 3rd cake to make the neck of the guitar in two strips with frosting in the middle.
After mixing double batch of buttercream frosting, I colored some black, red, orange, yellow, and grey and began to frost. I frosted the main part of the guitar black. From there I piped the outline of flames in black, then filled the flames outline in with orange. Once the orange flames were done, I piped red and yellow in the middle of the flames and used a toothpick to make the flames appear more realistic (sort of mixed the colors a little).
I used the base color of frosting on the neck of the guitar and to make the pickguard. I used a small piping tip of black to make the strings and frets. I used rolo candies for the knobs on the guitar. Finally, used black frosting with a star tip to make a simple border of stars on the cake and to do the writing on the cake board. I found a free font online called “nightmare hero” and printed out the words for the cake in this font, then did my best to copy the font in the words I wanted on the cake board.
This was a fun project and my son LOVED the cake.
Related cakes:
 Coolest You Rock Guitar Cake for a 6-Year-Old
 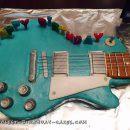 Awesome Gibson Electric Guitar Cake
 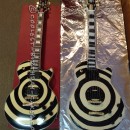 Surprise 21st Birthday Guitar Cake
 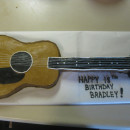 The Ultimate Guitar Cake for your Favorite Musician
 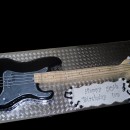 Coolest Life-Size Bass Guitar Cake
 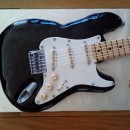 Coolest Fender Electric Guitar Cake
  Coolest Homemade Guitar Birthday Cake
  Cool Fender Precision Bass Guitar Cake
Your comment has been sent successfully.