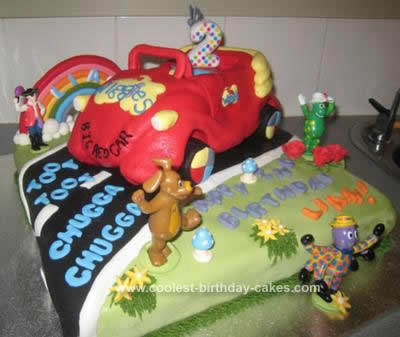
This Wiggles Big Red Car Birthday Cake was made for my son’s second birthday and was my very first attempt at a 3D cake and my very first experience with fondant.
My 2 yr old is a huge Wiggles fan and we had decided to go for a Wiggles theme for his party. I was originally just going to do a plain round cake with a Wiggles edible image on it, then after doing a bit of a Google search for Wiggles cakes, I came across this site and saw some really great big red car cakes and decided that I would give it a crack.
I began with the idea of making the car only, then I figured what is a car without a road, then after some more research I got the idea for the rainbow and the lettering and it went on from there.
The Big Red Car:
I used a vanilla cake recipe and the Wilton cruiser car cake tin to make the Big Red Car, once it was made, I carved it into more of a VW shape, cut the wheels out and shaped the wheel covers, cut the top off and carved out the seats, then covered it in “pinkish” red butter cream icing. I used red fondant cut into sections to cover the car and further create the BRC shape.
I used yellow fondant to make the soft top at the back, and the yellow background of ‘The Wiggles’ signs and made the lights (used hardener in the fondant for the soft top and lights). I then added the seats in each of the Wiggles colours, wrote ‘The Wiggles’ on the signs with writing icing, and also wrote on ‘Big Red car’. The windscreen is just red fondant with hardener, left overnight to set and stuck into the car with toothpicks.
The Wheels:
I used the cake that I had cut out from under the wheel covers and also used some of the cake cut from the top of the car to make 4 Wheels, covered in icing then wrapped in black fondant and stuck the 4 Wiggles colours in fondant on top. In order for the Cake to look as though it is actually sitting on its wheels rather than the bottom of the car sitting on the road, I have covered a thin piece of polystyrene in black fondant and placed the cake on top of it, this meant that I could decorate the cake on the polystyrene then place it on the base cake once it was finished.
Once the Car was placed onto the road I then added the wheels by sticking them back onto the cake under the wheel covers, with icing.
The Base Cake:
For the cake itself I used the vanilla cake recipe again, in a 14inch tin, I leveled it off and once it was cool I turned it upside down onto the cake board (so that the bottom of the cake was now the top), this meant that I had a flat surface to work with.
I covered the cake in green coloured butter cream icing, then rolled out enough green fondant to cover the back half of the cake, then again to cover the front half, making sure the seam would be covered by the road.
I then rolled out the road – also in two halves, in ready coloured black fondant. I had made a stencil of the road shape which I used to make sure I was rolling enough fondant to cover the cake. I cut out the road markings from white fondant and stuck it down with a little water.
Next I added the rainbow, I had made this a few days earlier to allow it to set, I had never made one before but had seen a picture of one someone else had made. However not knowing how they made it I just had to experiment. I used a very small dipping bowl placed upside down on a bench, stretched out the purple piece of fondant to the right length then wrapped it around half of the bowl, each colour after that was wrapped above the piece below and glued with a small amount of water. Once it was done I threaded a few pieces of wire into it so that I could secure it into the cake later on. The lettering is stuck on with a little water.
I added the clouds (white fondant balls) once the rainbow was stuck to the cake (I used a base of white fondant under the rainbow to assist in securing it and also used some skewers behind it to stop it from falling backwards). At this stage I placed the car onto the road and put in the wheels.
The lettering was then cut (using fondant lettering cut-outs) and stuck on with a little water, figurines were stuck on with green fondant securing them in place, and the roses in front of Dorothy I bought them pre-made and stuck them down with butter cream icing. Then the mushrooms (which I made in advance and set with hardener), Grass was made with butter cream and a grass piping tip, Flowers made with a flower cut-out and set with hardener.
Lastly the butterfly was added; I made this from a Play dough butterfly cutter! lol! Decorated it and set it with hardener, on a piece of wire.
Finally it was finished! As you can tell this was a pretty big job and took about 20hrs all up, but it was so worth it! My Son just loved it!
Related cakes:
 Wags the Dog (from the Wiggles) Birthday Cake
 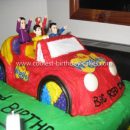 Coolest Wiggles Big Red Car Cake
 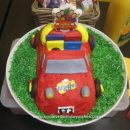 Cool Homemade Wiggles Big Red Car Birthday Cake
 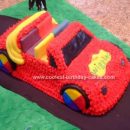 Coolest Wiggles Big Red Car Cake
 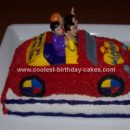 Coolest Wiggles Car Cake with Wilton 3D Cruiser Pan
  Homemade Wiggles Big Red Car Birthday Cake
  Coolest Wiggles Birthday Cake
  Homemade Wiggles Big Red Car Cake
Your comment has been sent successfully.