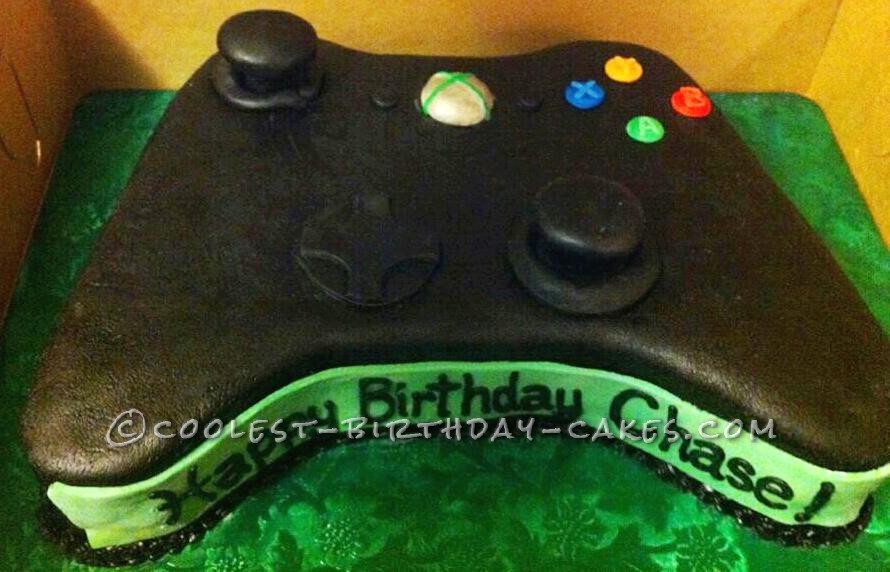
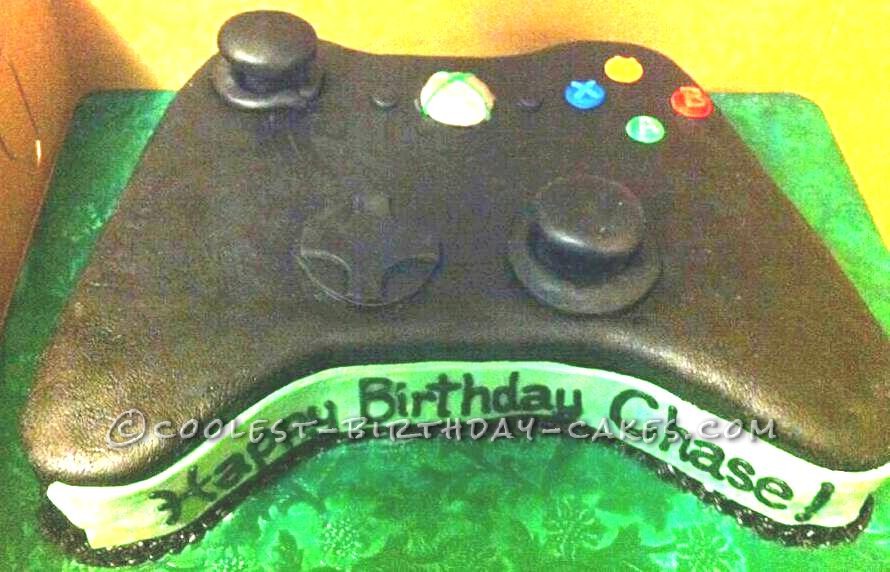
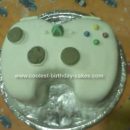
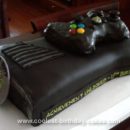
I made this Xbox Controller birthday cake for my son’s friend, who (like my son) is addicted to playing Xbox! I covered a 14″x19″ cake board with green cake foil. I then started the cake by baking two 11″x15″ strawberry cakes and then layered them with strawberry butter cream. Using one of my son’s wireless controllers, I made a poster board template to cut out the cake. After cutting the cake to the shape, I coated it in strawberry butter cream.
I made some homemade marshmallow fondant and tinted it black, leaving about 1/4 of the white to the side for the smaller pieces. I rolled it out and covered the cake with it. To make the thumb sticks, I rolled some black fondant and placed it on the cake in 2 circles. I then took some lollipop sticks, painted them with black icing color, and put a flattened ball of black fondant on top. (They really moved, too!) For the directional pad, I used my medium sized circle fondant cutter and cut out 2 flat circles. I placed one flat on the cake. To make the notches on the other circle, I had to use the larger end of tip 1M. None of my other circle cutters made the right size notch. I placed that on top of the whole circle.
I then made the left and right trigger buttons (on the opposite side of the cake) and the small start and back buttons next to the guide button in the center. Using some white fondant, I made the guide button and coated it with silver luster dust. I tinted some leftover fondant with leaf green and rolled some out to make the X on top of the guide button. Then, I tinted some fondant with no taste red, royal blue, leaf green and golden yellow. I used these to make the A, B, X and Y buttons, along with their letters. The border was strawberry butter cream tinted black and piped with tip #18.
OK, when I covered the whole cake with the black fondant earlier, I had a boo boo. The fondant split in the front of the cake. I was super stressed and kept trying to figure out how to fix it because I was running out of time and did NOT have enough time to make another batch and get the color mixed. (That much fondant takes a LONG time to tint black, and my hands were in pain from mixing the first batch!) I still had a good bit of the white fondant left so I decided to put a green strip across the front and pipe “Happy Birthday” in black butter cream! I had really intended to pipe it in green on the black fondant, but this was the only real option I had! They LOVED it!


Your comment has been sent successfully.